I have added a little cosy fashion hip to this old planter with a plaited wool design...
For those who are wondering what a plait is, it's also called a braid.
You will need:
a pot
Chunky weight acrylic wool in your choice of colour
(I used Craft wise wool from The Warehouse)
A glue gun and glue sticks
Scissors
The first step was to measure six three-and-a-half metres (about 11.5 feet) lengths of wool.
The wool lengths will vary on pot size,
but this amount was ample for the pot I used which was 13 x 15cm (about 5 by 11 inches) round.
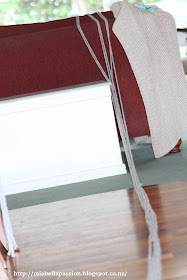
The plait was made with 6 lengths of wool to give added thickness.
Knot one end and proceed to make a flat plait.
As you can see from the first photo, I initially thought to use a terracotta-style pot, but as I was plaiting thought - I would have to seal it to stop moisture from leaching into the wool. So I changed it to a white plastic pot of a similar size, where this won't be an issue.
This pot has no drainage hole and the plant sits inside it in another pot.
Once you have a decent length of plait, begin at the top of the pot with the tassel end from the start (tassel facing down) and glue it in place and around the rim of the pot.
Once you get to the tassel, drop the plait down and under it leaving a space to add another tassel later.
Continue to glue and plait more if required.
Once at the bottom cut the plait and quickly using a glue gun glue the end into position.
Now make another tassel which is a looped knot using the 6 strands of wool.
Glue the second tassel into place at the top of the pot.
Place your plant of choice inside.
I popped a miniature white flowering cyclamen in mine.
I popped a miniature white flowering cyclamen in mine.


No comments:
Post a Comment
Leave a comment for Mia Bella passions :)