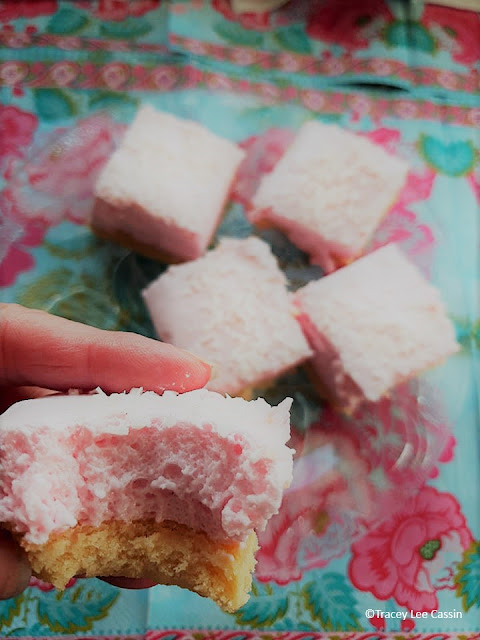
Marshmallow Slice...

Marshmallow
Mmmmm, a buttery base with a thick marshmallow topping.
I remember my mother making this slice often.  
But she did it the hard way...
with gelatin or jelly.
And we beat and beat that mixture using hand beaters.
For what seemed like hours to my young mind, 
until the topping turned pale pink and creamy.
But I discovered a super-easy way to make the marshmallow topping.
Using MARSHMALLOWS!
You do need an electric beater to create it quickly.
10 minutes is all you need.
And then you pile it on the prebaked cooled shortcake base.
Leave to set.
And then cut into squares.

Marshmallow
It is so delicious.
 Fluffy.
And not too sweet.

Marshmallow
Try it.
 Bake it with the kids.
It will become a family favourite.


Marshmallow
Or serve it on Valentine's Day as a treat - 
just top with a berry jus, berries (from a  can or fresh),
 and a dollop of cream or ice cream (or both).

You'll find the recipe HERE

or copy and Paste the recipe:

Marshmallow Slice

For the Base:
125 grams of soft butter
1 cup of white sugar
1 egg
1 teaspoon of vanilla essence
1 cup of sifted self-raising flour
Beat the butter, sugar and vanilla until pale and creamy.
Mix in the sifted flour
With clean floured fingers, press the mixture into a greased 20 x 30cm slice pan that has been lined with baking paper that has come up the sides by at least 2 inches.
(you will need this height for the marshmallow topping stage.
Bake at 180 degrees for 20 minutes and cool completely.

Marshmallow Topping:
In a pot place 1/2 a cup of water.
Add 1 packet (520 grams) f pink and white marshmallows
(I used the Pascall Big Softie Brand)
Heat over medium heat stirring until the marshmallows melt.
Set aside to cool.
Place the marshmallow mixture in the bowl of an electric cake mixer.
Beat slowly at first, and then increase the speed as it thickens.
Beat for at least 10 minutes.
When the marshmallow mixture is thick. pale and creamy pile on top of the cooled, cooked base.
Sprinkle with coconut.
Refrigerate until set.
Cut into squares.
Keep in an airtight container in the refrigerator.


Help with ingredient conversion here.
.

Grab a cuppa, and visit

 my Fine Art America gift store

:)


#marshmallow #homebaking #slices #sweettreats
#sweetslices #homebaking #baked


Hanging Succulent Plant....❥

Are you like me?
Do you have a habit of killing the plants in your hanging baskets?  
Try as I might I simply cannot remember to water them.
And that is why I am choosing succulents for my covered deck hanging baskets.

I found this sweet plant at 'Bunnings Garden Centre'.

It's called 'Rhipsalis Cereuscula'.
And isn't it dinky?
Great form.
Great green colour.
Great no kill properties!
The plant was $15.
I already had the hanging basket planter from a previous unsuccessful flower planting.
I freshened up the potting mix and popped this green beauty into the basket. 

As it gets older it will grow new hanging jointed leaf spikes that are shaped like rice.
They will hang down over the sides.
In the Spring this interesting hanging succulent plant produces white to pink satiny flowers.

The secret to growing this plant is to keep it dry in the winter. 
Protect it from frost.
It prefers warm conditions, but I have had mine on my covered deck all winter in the afternoon sun, and it has not minded the coldest mornings of 2 degrees at all.
The recommended position is in the full sun to part shade.
In fact, it is sprouting new growth!


And the little white flowers in Spring are just the cutest!

DIY kokedama
 'Rhipsalis Cereuscula' is also a perfect plant to use with the kokedama no pot technique.
Find out how to make a DIY Kokedama HERE.


#succulents #hangingsucculents #hangingbasketplants #droughtresistantplants


https://track.roeye.co.nz/click?pid=880&offer_id=375


Kokedama Christmas Tree...


For something completely untraditional,
a kokedama tree is a  perfect choice for Christmas.
Kokedama in English literally means moss-covered ball.
And this is the technique used to create Kokedama.
The idea originated in Japan.
It's a combination of nearai (meaning no pot) and the kusamono planting style.
(The tree used here is Robina pseudoacacia 'Lace Lady')

To create your own Kokedama 
You will need:
 A sludge mix of potting mix and water.

Soaked sphagnum moss.

A Plant That has been removed from it's pot.
Then:
Loosen and trim the root ball.
Covered it in the wet mix, and then in a thick layer of sphagnum moss.
Wind natural rope fibre around the ball until the moss is mostly covered.
tie a knot.

Wind rope around and around...

Until the moss is mostly covered and it is firm.
Soak root ball in a container of water until the air bubbles stop.
(this is also how you water Kokedama plants once established.
Drain off excess water.
Place on a waterproof tray.
DIY Kokedama
Pot plants are great fun to kokedama.
Here is one we made using 'Rhipsalis Cereuscula'.
DIY kokedama
A kokedama plant will last 2 to 3 years.
It's a great diy to create.
Fun, and a unique gift too.

Kokedama is a great way to create a modern Christmas tree statement as we have done.
The tree we made this year will move outdoors onto the deck once the Christmas season is over, so we can still enjoy it.


#kokedama #diyplanters


GRAB A COFFEE AND POP OVER TO MY GIFT STORES AT

FINE ART AMERICA

REDBUBBLE

SAATCHI ART


My New Art & Photography Website...

So excited to reveal my new website video has officially launched 
on Facebook via my website designer Katie Ayres...
https://www.facebook.com/katie.ayres2/videos/10215719392438120/

New Zealand Contemporary Artists
For a more in-depth view, and to find out about me and my work,
 please stop by for a visit here at:


#newzealandcontemporaryartist #newzealandphotographer


Related Posts Plugin for WordPress, Blogger...