Easy Dark Chocolate Snails

Chocolate Snails

Are you craving a sweet and indulgent treat? 

Then try these pastry chocolate snails! 

Made with readymade pastry, this recipe is quick and easy to put together, perfect for satisfying those dessert cravings in no time.

Chocolate Snails

I made mine with my Grandchildren, and they really enjoyed making them.

Though the youngest cut hers slightly smaller than her brother's, they all baked well.

So definitely supervise the cutting and the use of a knife for safety's sake when making with the younger children.

Chocolate SnailsChocolate Snails


Chocolate Snails

To Make 'Dark Chocolate Snails' You Will Need

Ingredients:

  3 square sheets of readymade puff pastry (thawed)

113 grams (1 stick) of softened salted butter

75 grams (a little over 1/4 cup) each brown sugar and fine white caster sugar

3 Tablespoons dark cocoa powder

1/2 cup chocolate chips (best to use a smaller size as mine were a little bit too chunky).


 Instructions:

1. Preheat your oven to 392°F (200°C) and line a baking sheet with parchment paper.

2. Place the 3 sheets of puff pastry sheet on a lightly floured surface.

3. Mix the soft butter, sugars, cocoa and chocolate chips together. 

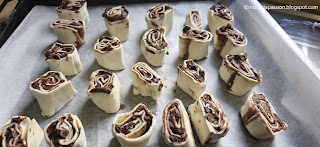
4. Spread the chocolate mixture over the pastry with a metal spoon. Roll up the pastry tightly into a log, then slice it into even pieces to create the snails.

5. Place the snail's cut face up on the prepared baking sheet.

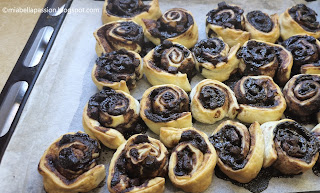
6. Bake in the preheated oven for 15-20 minutes, or until the pastry is golden brown and crispy.

7. Allow the pastry chocolate snails to cool slightly before serving.

Yield 22 snails.


Adaptions:

You can use normal cocoa powder instead of dark along with white chocolate chips if you'd like a lesser dark colour once baked or you simply prefer the lighter sweeter chocolate flavours.

Belgian Chocolate
 I used dark Belgian Chocolate.
Chocolate Snails

These pastry chocolate snails are perfect for a sweet treat any time of day. 

Indulge in their dark deliciousness or make them for a Mother's Day (or for another special occasion) treat.

As this recipe yields 22, they are also fabulous and quick to make for a school bake stall or large gathering.

Chocolate Snails

Once baked and cooled, the grandchildren's taste test verdict was 'These are so delicious, Nonna!'

They were a great school holiday baking activity.

Find the printable recipe HERE.


#chocolatesnails #pastryrecipes #pastrytreats #darkchocolate


How To Make A DIY Fruit Bowl Lightshade

DIY Lightshades

 Are you looking to add a unique touch to your home decor?

DIY Lightshades

 Why not make a DIY light shade from a metal fruit bowl? 

It's a simple and affordable way to personalise your space and create a stunning focal point in any room.

This project took just 15 minutes to create.

As I wanted a black shade which is the original colour of the metal bowl, I didn't need to paint it.

But you can paint yours any colour you like using quality spray paint.

(The metal fruit bowl was purchased from KMart in New Zealand, for 10 Dollars).

 Here's what you'll need:

· A metal fruit bowl

 (Choose a sturdy fruit bowl that will allow light to shine through).

· A screw-on light fitting 

(you can use a pendant fitting if desired)

.A drill

. 2mm drill bit

.29mm hole saw bit

· A light bulb

· Paint or spray paint (optional)

 Instructions:

1. Clean the metal fruit bowl thoroughly to remove any dirt or residue.

2. If you want to change the colour of the bowl, now is the time to paint it with your desired colour. Let it dry completely before moving on to the next step.

DIY Lightshades

3. Measure and mark the centre point where the hole for the light fitting will be.

4. Drill a pilot hole with a 2mm drill bit. Doing this helps centre and stop the slipping of the hole saw attachment when you drill it in the next step.

DIY LightshadesDIY Lightshades
DIY Lightshades

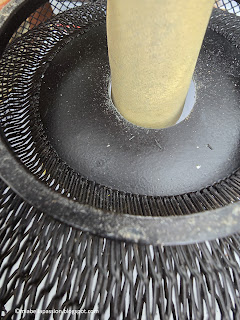
5. Using a 29mm hole saw attachment, carefully make a hole in the bottom of the fruit bowl.

DIY Lightshades

6. Lightly sand the rough metal on the hole circle.

DIY Lightshades

7. Hang the light shade in your desired location and add a light bulb to complete the look.

 Voila! 

DIY Lightshades

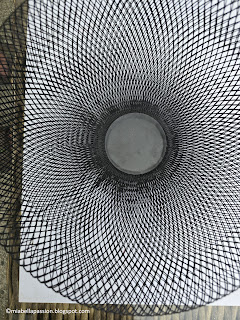
 You now have a beautiful and unique DIY fruit bowl light shade to brighten up your space.

DIY Lightshades

And who would have guessed this cool light shade was once a very cool fruit bowl in a past life?

DIY Lightshades
     Upcycling fun at its best!

New Zealand Bloggers

For the latest posts CLICK  :)

#diylightshade #upcycling #upcycledlightshade #uniquelightshades #upcycled #diydecorideas #diydecor

#diyhome #creativediy


Livingstone Daisies

Livingstone Daisies are beautiful, low-maintenance annuals that bring a splash of colour to any garden. 
Livingston Daisies Annual Garden Plants

These daisies come in a variety of colours, including tones of pink, white, yellow, mauve, orange and red, so you can choose the ones that best match your garden design. Or plant in a vibrant colour mix.

Livingston Daisies Annual Garden Plants

Annual plants, like Livingstone Daisies, complete their life cycle within the spring and summer seasons; grow, bloom, produce seeds, and die. This means that you will need to replant them every year if you want to enjoy their beauty. However, the good news is that annuals have a longer blooming period than perennials and require less maintenance, making them ideal for busy gardeners. Livingstone Daisies are easy to care for. The shallow-rooted small groundcover succulent-like plants prefer well-drained soil and full sun exposure but can also thrive in partial shade. 

Livingston Daisies Annual Garden Plants

Water them regularly, especially during hot and dry spells, to keep the soil moist. 

You can choose to deadhead them regularly to encourage new blooms and maintain a neat appearance.  But I never bother to do this as if you let them seed new plants will sprout in the following Spring where they have previously been planted. 

Livingston Daisies Annual Garden Plants

Fertilise them once a month to promote healthy growth and vibrant colours.

The daisies are ideal for fronts of borders, mass plantings, or containers. Combine them with other annuals, such as petunias, marigolds, or zinnias, to create a stunning floral display. 

Or add them to a rockery garden for gorgeous colour impact.

Livingstone Daisies also attract butterflies and pollinators to your garden, adding another layer of beauty and ecological value.

Livingston Daisies Annual Garden Plants

I'm a big fan of the beautiful Livingstone Daisies! 

Easy-to-grow dry tolerant annuals that offer a burst of colour and beauty that will create a stunning stand-out display your neighbours will be talking about!

For the latest posts CLICK  :)

#gardenplants #annuals #borderplants #containerplants #daisies


Related Posts Plugin for WordPress, Blogger...