In Love with Roses...

Today's flower photograph is of a rose called 'Just Joey'.
Apricot and  peachy 
with a lovely scent = pure loveliness!
The blooms fade to a soft buff colour as they age.
One of my favourites,
it is a hybrid tea rose
with huge five inch blooms that have an unusual ruffled edge.
The bush is small to medium in size.
The bonus about this rose is that it is free-flowering!
In Mia Bella Gardens it blooms all summer long right through to early winter.


Pink Geranium love...

I know I said I would not be back until next year...
BUT...
I have taken so many gorgeous photos at Mia Bella Gardens 
that I simply had to share with you all.
So here is the first one,
Pink Geranium Love...
This Geranium has an upright growth habit and is from Pac Zonal.
The blooms are semi double,
variegated white and shocking pink.
Stunning in contrast with those bright green leaves.
What's not to love about that?
And then there is the name...
Geranium Flower Fairy White Splash.
That's very lovable too!


Christmas wishes...


 On the eve of Christmas,
I wish you all 
a fabulous fun holiday 
filled with happiness,
wishes, love, hugs 
and beautiful memories...

It's holiday time...
and 'Mia Bella Passions'
will be enjoying a short vacation
to return in the early New Year 
with NEW, EXCITING, FUN  
and BEAUTIFUL things 
to share with you all.
Until then,
'Merry Christmas'
and
'Happy New Year'
my fabulous friends...

Pohutukawa - the New Zealand Christmas Tree...

Todays post is all about the pohutukawa.
I thought I would share these photos I took yesterday, 
then you can see what my Christmas season looks like...
My snow is red... 
from the beautiful pohutukawa needles that covers the ground under the trees.
It is summer here...
and the photos look are a bit hazy as the heat and humidity was extreme 
causing a visual haze.
The Pohutukawa is a native tree that is known as the New Zealand Christmas tree.
That's because it is flowering during the Christmas holiday season
from November to January,
Legend says if it flowers early it will be a long hot summer.
  The flowers are bright, bright red...
Very Christmasy don't you think?
 The stunning flowers cover the tree...
 The trees can grow in the most precarious positions as they have an epiphyte tendency.
You can see this here as there are many on this rocky hillside,
which are just beginning to bloom.
 Where I live on the coast of the Eastern Bay of Plenty, 
in the North Island of New Zealand,
there are thousands (or more) of these beautiful trees,
which are from the Myrtle family.
Putting on an awesome summer display,
much to the delight of the nectar eating birds.
 It is thought these trees can live up to 1000 years, 
and can grow up to 25 metres in height!
 Pohutukawa  - 
The New Zealand Christmas Tree.

Merry Christmas friends.


Glitter branches for last minute Christmas decorating...

One can never have enough bling...
And the shelf in the lounge was desperately plain.
But at the last minute, and in the midst of Christmas madness
 what can one put together in the jingle of an bell...
Glitter branches of course!
Simply spray adhesive glue onto a branch 
sprinkle with glitter in the colour, or colours of your choice.
Put aside to dry.
 Once they are dry to touch place in your decor.
 I put mine in a small French Country pot
and tucked some Christmas themed fabric around the the base of the branch.
Viola!
An easy to do nature meets glitter bling masterpiece...
And I LOVE it!
So does Ella...
Who has found a comfy napping spot amongst the burlap tree skirt!


Cinnamon stick & berry jar candle...

You can never have too many candles...
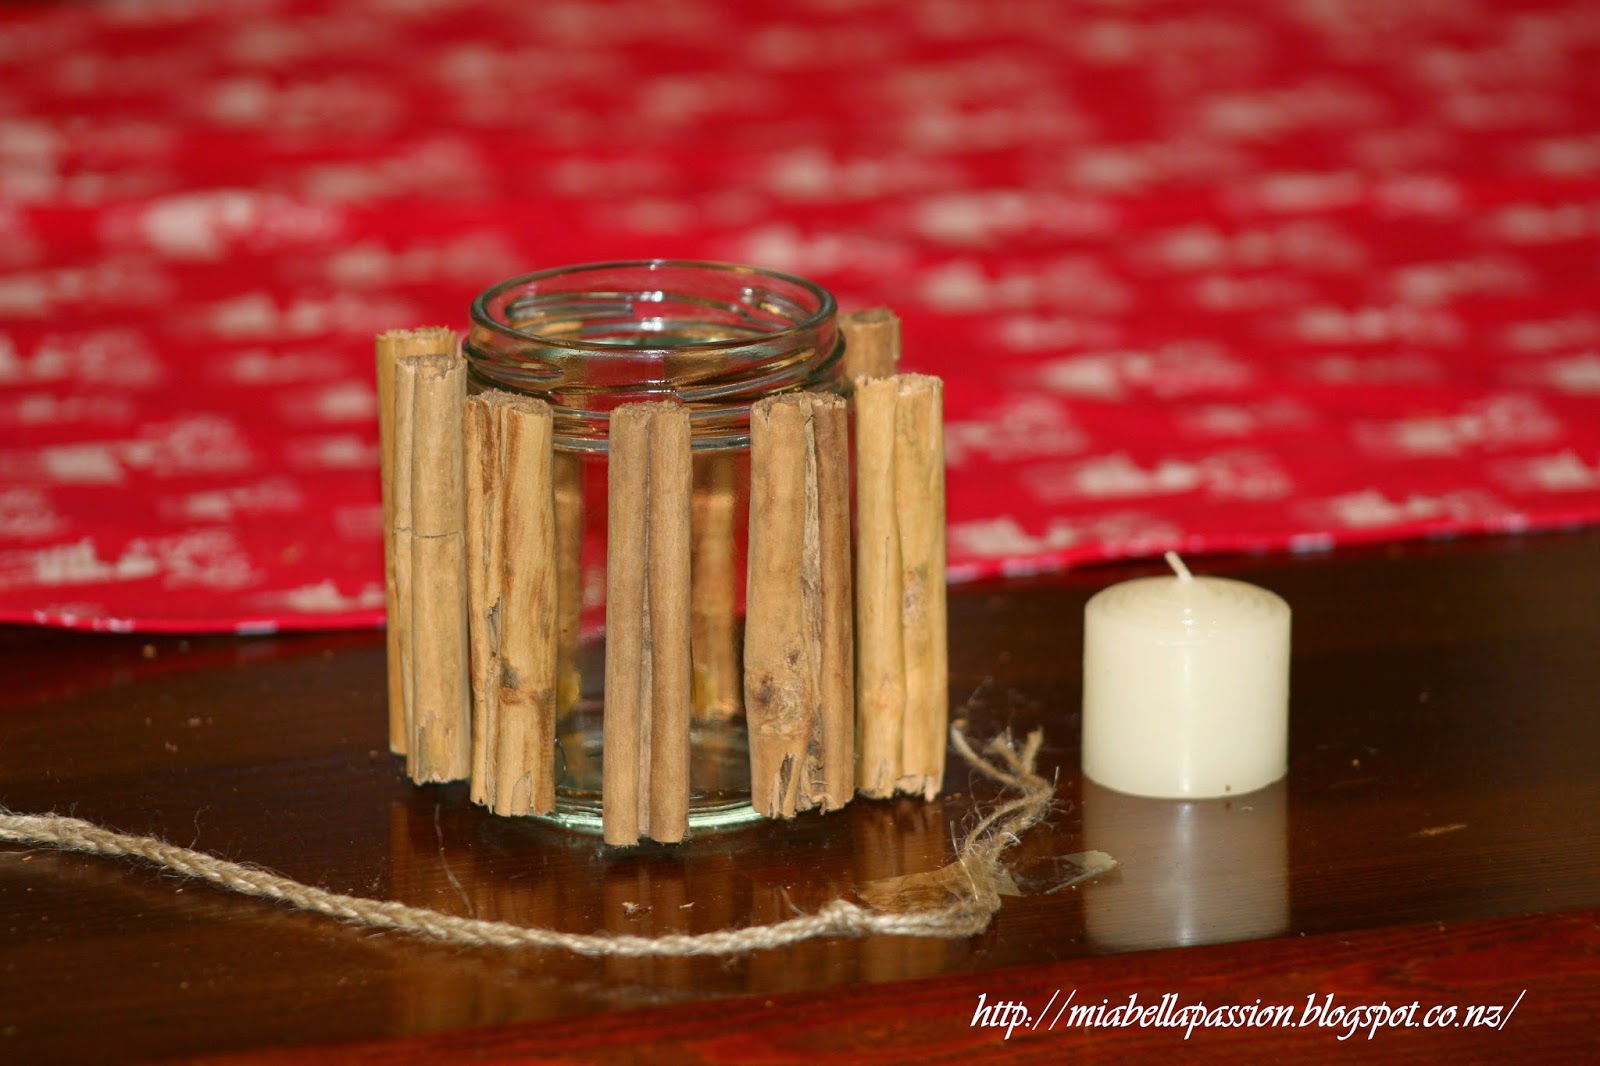
so lets create a cinnamon stick jar candle.
 I can hear you say - this ones been done a million times...
But I think mines just a bit special 
with a cute plaited jute bow tie,
and accent berries.
 Plus the cinnamon sticks have been spaced 
so you can see the candle in the jar
All you need to create this is a small jar,
a small candle,
Cinnamon sticks
jute string
and some artificial berries.
 I used a dab of hot glue to hold the cinnamon sticks in place,
and plaited three strands of the jute string.
Twirl the jute string around the jar twice,

 and tied a bow.
Then I added the berries,
 which were already pre-wired.
Now it is ready to light!
Let me show you the book table while we wait 
for that delicious aroma to start as the jar warms up from the candles flame...
This year I'm using a lovely French style coffee table, 
 to display some very special Christmas books.
It sits beside the red Christmas tree...
Can you smell the cinnamon now?
The cinnamon stick and berry jar candle is gorgeously Christmas...
And pretty cute to look at too.


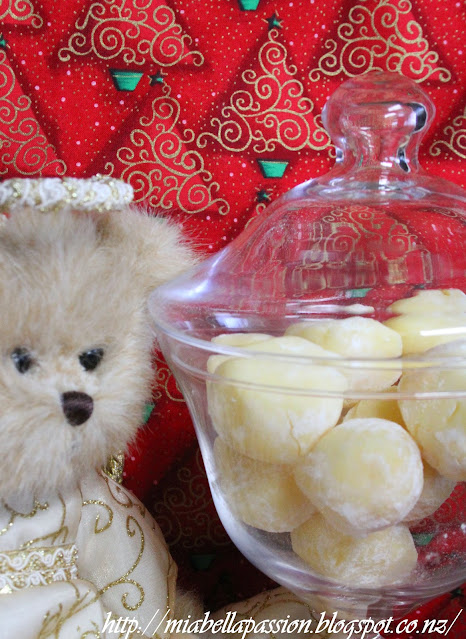
Buttery and sweet, white chocolate and lemon truffles...

Got a sweet tooth?
Then here is a sweet treat that will surely satisfy it!
Buttery...
Sweet...
White Chocolate...
AND
lemon!

All you do is pop into a double boiler and melt:
Truffles
(For me that is a pot with a metal bowl sitting on the top.)
460g White chocolate melts
120g salted butter
and
6 Tablespoons thickened cream.
Once melted: stir in 2 teaspoons lemon juice
 and 1 teaspoon finely grated lemon rind.
Cool.
 Refrigerate for 2 hours stirring often as the butter will initially separate.
Truffles
Once the mixture is firm enough to roll into balls, put 1/2 cup of icing sugar in another bowl.
Truffles
 Drop teaspoons of mixture in it and roll into small balls.  
Truffles
Truffles
Keep in an airtight container in the refrigerator.  
Makes approximately 30 balls.  
Truffles
(depending on the size of the ball you roll.) 
Truffles
Serve directly from the refrigerator.
And just in case you are wondering who this beautiful angel is...
 Meet Angelica.
She is a gorgeous Christmas Angel 
from the collectable Bear range - Bearington Bears. 
Truffles
The printable recipe is HERE.

#christmas #christmastreats #chocolatetruffles #truffles


Hole punch paint dipped tin can lantern...

The white and silver Christmas tree display was glittering and sparkling,
but something was not quite right.
I needed just one more thing to balance the visual dynamics of it all...
so I whipped up this cute tin can lantern.
Remember making these as a child?
But instead of just doing the hole punching on the tin can, 
I decided to add a little paint.
This is where dip dye trend meets the tin can lantern trend.
The first thing you need to do is put water in the can,
or sand/water mix if the metal of the can is of a softer variety.
(Make sure you fill it to the top as once frozen, 
the can will then hold shape when you are punching the holes.)
Freeze it overnight.
Remove from freezer.
Punch two holes below the top rim of the can on each side
(this is where the wire hanger will attach).
Position your template...
and attach with tape to can.

Punch holes around the template outline on the tin can using a nail and hammer.
The bigger the nail- the bigger the hole size.
Then remove template and punch holes inside the outline.
When you are happy with the holiness,
let the ice melt and tip it out.
Dry the tin can.
In a container place acrylic paint in the colour you would like.
Dip the bottom/sides of the can in the paint.
Blot on paper and set aside to dry.
To make a hanger from wire, 
attach wire to can via one of the top rim holes.
This wire is available at Bunnings in New Zealand.
Twist and twirl the wire overhang 
by winding the wire around a pencil or dowel rod.
At the top of the hanger, make another twirl.
Poke wire through second hole on rim.
twist and twirl the overhang.
(Sounds musical doesn't it?)
Pop a candle inside.
Sit on a mantel, sideboard, table or make lots, 
and hang from the trees in your yard. 
I love the way the candlelight flickers through the holes in the tin can...
Now the white and silver Christmas tree vignette...
Is perfect!


Related Posts Plugin for WordPress, Blogger...