Cake & Cupcake Decorating Idea....


Here is a really pretty way to decorate a cake.

How to pipe icing roses
Looks very impressive.

How to pipe icing roses
And can be done quickly.
For a simple icing bag, I use a plastic bag.
Instructions on how to do this are at the bottom of this post.
Works a treat!

Mia Bella Passions Blog
The cake is just a simple chocolate cake.
Just use your favourite recipe or cake mix packet.
Sprinkle the cool, cooked cake with powdered icing sugar. 

How to pipe icing roses
And pipe the top with roses.
(Using the plastic bag technique).
Wipe the icing sugar off where the circular icing roses are going to be put, 
otherwise, they will slide off the cake.

How to pipe icing roses

Add some flower sprigs to the plate for a final touch of pretty...

Mia Bella Passions Blog
 Share with your guests and ENJOY!

How to pipe icing roses
These icing roses are a great decoration on cupcakes too.

Make your icing...

You will need a Wilton 2D nozzle...

Cut the corner off a sandwich bag,  and poke the nozzle through.  
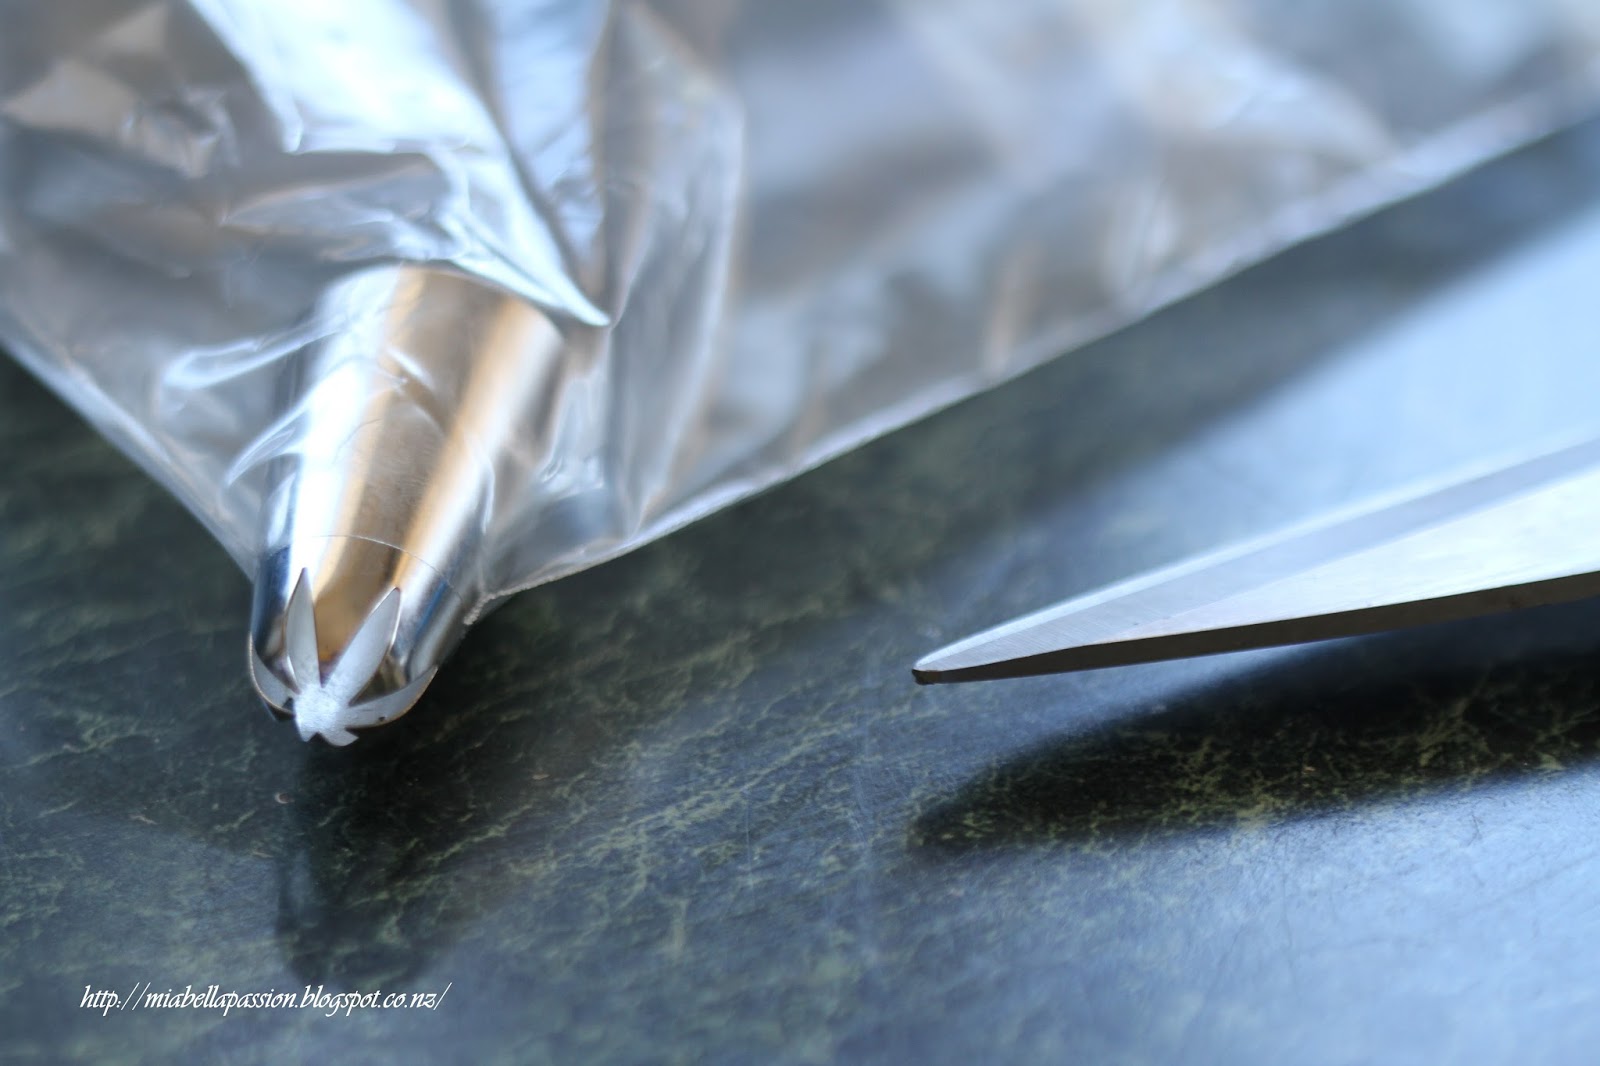
It needs to be a tight fit.

Sit the bag in a glass and spoon in the icing...
How to pipe icing roses
Close the bag squeezing the air out.

How to pipe icing roses
Start from the centre of each cupcake ,
 and twirl the icing around in a spiral motion as you squeeze the plastic bag.  
Hold it quite close to the nozzle (icing tip) so you have control.
My roses are never 100% perfect, and unless you are a cake icing pro, yours probably won't be either.  
Practice does make perfect...but I can guarantee your guests will be so impressed regardless!

How to pipe icing roses
I had to make cupcakes just so I could show you how wonderful they look (and taste!).
Banana cupcakes with raspberry butter cream icing roses...
So very pretty, don't you think?

Get updates about the latest blog posts,
by joining for free HERE.


#howtopipeicingroses #cakedecoratingideas

A Little Inspiration - Create Yourself!


 "Life isn't about finding yourself, it's about creating yourself"....

Free to print for personal use.
Print, frame and gift, (oh my gosh - yip thinking Christmas here!), 
for your mood board or use as a screensaver.


After The Rain...

It had rained all day, 
then just before dusk,
the clouds parted and the sun peeped out.
With raindrops glittering on the garden, it was irresistible!
Out came the camera, and here are the captured images:
Raindrops on rose leaves...
 Tiny reflective orbs of gorgeousness!
 Heavenly scented stock flowers drooping with the weight of the water...
 Raindrops with a little purple colour manipulation.
 droplets of water in black and white...
 I'm loving the colours of this snap of the tip of a drenched Iris bud...
But this rose bud is my favourite,
I've added some pink and lemon yellow hues to make the droplets pop!
As always, you are welcome to print my images for personal use.
Or use as a screensaver.
ENJOY   :)


Sia Series Painting #6...

New Zealand artists

This is painting number six in the Sia series.
(Two more paintings to do to complete this series)
Sia's album 1000 Forms Of Fear is the inspiration for this painting, 
of whose title has been taken from the lyric line -
 'Tears Fall To The Beat'.
This is in oils on canvas.


Beachy Tin Can Christmas Wreath....

It's time to think Christmas!
(well for some it is - LOL)
So I thought I would create a new tin can wreath.
Last years tin can Christmas wreath was the most imperfect creation EVER....but you all still LOVED it.
It was UNBELIEVABLE the said DISASTER Christmas Wreath went VIRAL!! 
But it did!
Blog Project Fails
Find out all about that here: 
http://miabellapassion.blogspot.co.nz/2014/11/diy-tin-can-christmas-wreath.html   

I have been thinking for many, many months about a new design...
one that might actually be a round shape not an oval!
Meet the 2015 tin can wreath design...
DIY Beach Inspired Tin Can Wreath
To create the 'Beachy Tin Can Christmas Wreath':

You will need 9 tin cans.
Upcycling Tin Cans
Mia Bella Passions Blog
Shanti-Rose decided she would help with can selection from the basket!
Leave cans as is or paint them with spray paint.
I wanted mine rustic looking, so have left them as is.
The cans are starting to develop a nice little rusty patina and I like that.
Using an old screwdriver, punch a hole in the end of each tin.
Thread rope through each hole and create a circle of tins.
I used rope not wire for the beachy look.
Now this is where I got into a whole lot of trouble last year, as try as I might, those cans created an oval, and no way were they staying in a circle.
Glue gun glue just wasn't strong enough for the weight of the cans.
Nails are secret weapon number 1...
Pop a thin nail through the cans where they connected as shown.
Then put a drop of Superglue (secret weapon number 2) on each nail head so it drips through the hole.
To make it even stronger, I dolloped a little more 'Glues anything' glue where each can connected. (Weldbond is the best glue EVER and is secret weapon number 3!)
Then I left it for 24 hours to dry.
Beach Crafts
I used small pieces of driftwood and pumice from my 'beachy bits' collection.
Upcycled Tin Cans
These were glued on using the glue's anything glue, 
DIY Beach Inspired Tin Can Wreath
and once more left 24 hours to dry.
DIY Beach Inspired Tin Can Wreath
 I decided it needed a focal point so added a dried starfish using a gluegun.
Beach Inspired Tin Can Wreath
Finally the rope ends were looped and bound with thin wire to make the hanger.
And the end result is this very cool rustic Beachy Tin Can Christmas Wreath.
I think it will look even better once the cans get more of a rustic, rusty patina!
DIY Beach inspired  Tin Can wreath
The Beachy Tin Can Christmas Wreath is PERFECT for my near the beach home!
DIY Beach inspired wreath
Maybe, I should take the word 'Christmas' out of the title.
 Because this wreath is fabulous for any time of the year, don't you think?

NZ Lifestyle Blogs
Get updates about the latest blog posts,

by joining for free HERE.


#diy #wreath #recycled #upcycled #can #driftwood

Live The Dream...

It is a glorious time of year for photography,
the springtime light is beautiful here in New Zealand!
Purple 3D Heart
This gorgeous geranium shot was simply shouting for a quote...

Live The dream quote
Free to print for personal use...


#quote #quotes #flowerquote


Seascapes...

In love with the ocean...
That's why I live by the sea!
New Zealand Artists
Right now I am enjoying painting seascapes... 
New Zealand Artists
There's just something that is completely soul soothing about painting water.