Halloween SPIDER Fizzy Drink

 With the orange hues being a classic Halloween (or Fall colour), I thought I would share this very quick and easy drink EVERYONE is bound to love.

Halloween Drinks

(Read to the end to find out the Southern Hemisphere history of this drink which we call a 'SPIDER' and the chemistry lesson.)

Halloween Drinks

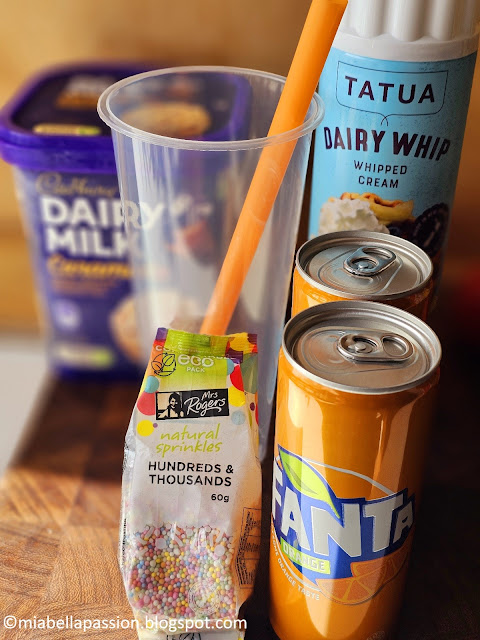
Classic orange Fanta is the fizzy drink element.

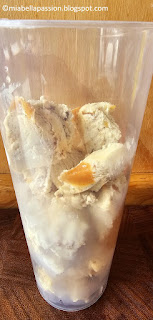
Ice-cream the filler component in the vessel.

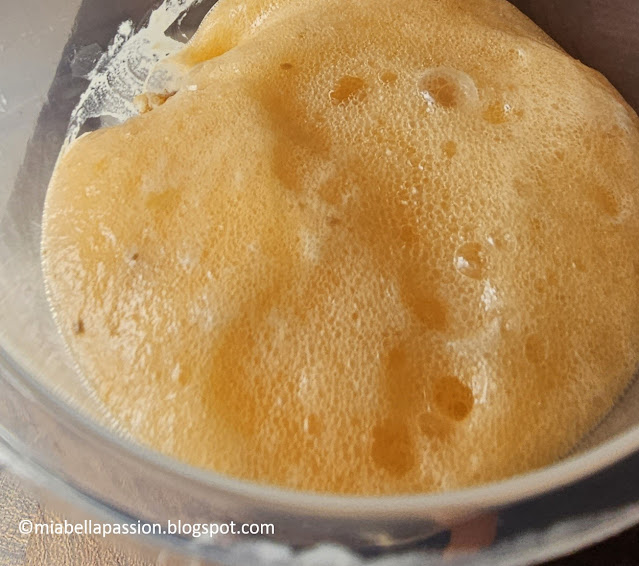
Then watch the fun frothy reaction when you pour the Fanta onto the ice-cream.

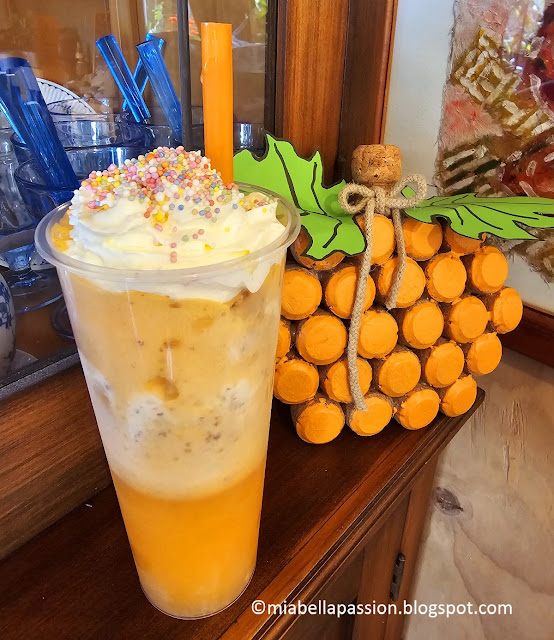
Top with whippy canned cream, add sprinkles and a straw.

Use the straw to poke the ice-cream into the Fanta if it settles and devour.

It's like pudding in a glass!

So yummy!

And one of these at a time is never enough.

They are loads of fun for the kids to build their own 'SPIDER'.

🕷

SPIDER History:

An ice-cream float elsewhere, but in New Zealand and Australia it is called a 'SPIDER'.

Due to the spider like frothy web in the drink.

It's a fizzy but creamy beverage made from fizz/soda and ice-cream served in a tall glass, with or without the added topping of whipped cream and sprinkles.

I have fond memories going to the tearooms in town for a special occasion, where the children always ordered a SPIDER!

It was such a treat in those days.

And it still is.

Only now we can recreate the drink at home.

Halloween Drinks

SPIDER Chemistry Lesson:

Halloween Drinks

The chemical reaction between the icecream and the fizzy/soda drink is caused by the gas molecules from the fizz/soda gathering on the tiny ice crystals that are on the surface of the icecream.

Together they become bubbles of gas. (The frothy reaction).

If the icecream in the glass is melting (not dry) the reaction is not as prevelant.

So you need straight from the freezer into the glass quick pour to get a good froth!


To Make:

Halloween DrinksHalloween DrinksHalloween Drinks

3/4 fill a tall glass with ice cream as shown

Pour over one can of ice cold Orange Fanta

Top with canned whipped cream

Add Sprinkles.

Serve with a straw.  

Note: 

I used caramel swirl ice-cream, but you usually use plain vanilla, or French vanilla flavours.

You can also use other fizz/soda flavours like cola, lime, raspberry, passion, lemonade, ginger beer, etc.

Printable recipe HERE.

Halloween Ideas

To learn how to make the Cork Pumpkin visit HERE.

Find more HALLOWEEN IDEAS HERE.

Home and garden blogs
For the latest posts JOIN :)


#halloweendrinks #halloweenideas #halloween


Simple To Create Cork Pumpkin

Pumpkin Craft

This project is a very simple one.

The Halloween cork pumpkin (which can also be displayed in the Fall and Thanksgiving decor displays).
Cork Craft

To create this, you will need:

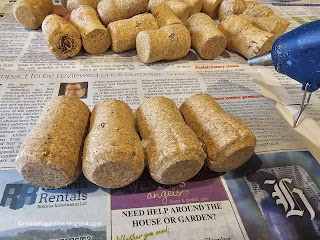
25 Corks

A hot glue gun 

Orange acrylic paint

Green card for the leaves

Fabric ribbon or twine for the bow detail.


To make:

Cork CraftCork Craft

Glue four corks together for the base.

Cork CraftCork Craft

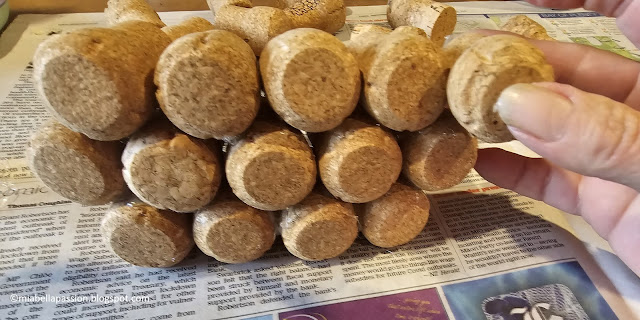
Glue another 5 corks in a row on top of the four that create the base.

Cook Craft

Then glue 6 corks in a row on top of 5 corks.

Cork Craft

And on top of those, a row of five more corks.

Then another row of four corks.

Pumpkin Craft

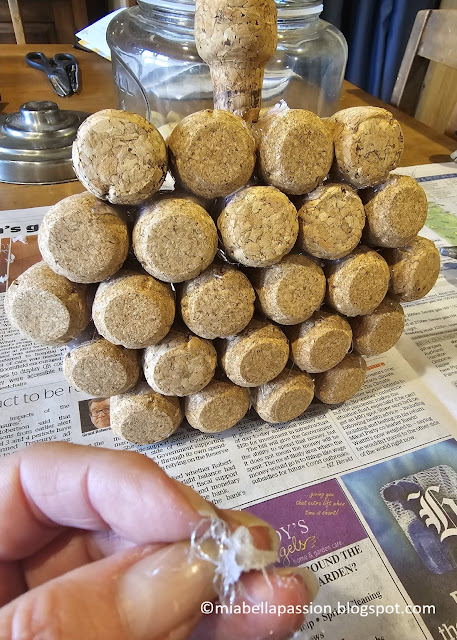
Finally, glue one cork atop the centre of the last row of four corks for the stalk.

Pumpkin Craft

Remove any excess glue strings.

Pumpkin Craft

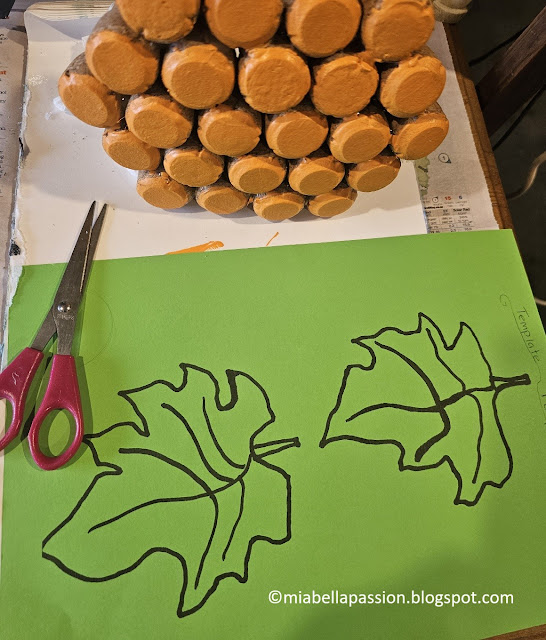
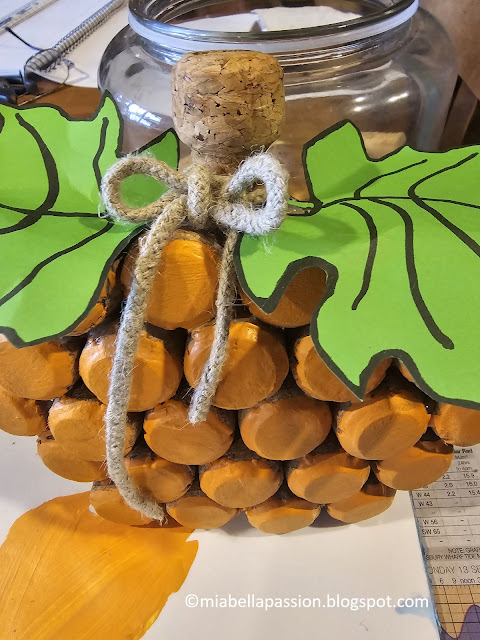
Paint the fronts of all the corks as shown.

Pumpkin Craft

Pumpkin Craft

Print the leaves template on a green coloured card and cut them out.

Pumpkin Craft

Glue at the base of the cork stalk.

Bend the card slightly to give the leaves some shape.

Pumpkin Craft

Add a bow to the pumpkin stalk.

I used a rope braid.

Pumpkin Craft

Place in your decor.

The Cork Pumpkin is a fun addition to your Halloween, Fall or Halloween decorations.

MORE HALLOWEEN IDEAS & PRINTABLES HERE

Home and garden blogs
For the latest posts JOIN :)


#halloweencrafts #pumpkincrafts #falldecor


Airdry Clay Flower Incense Holder

 DIY Clay Flower Incense Holder

Let's make a beautiful flower incense holder.

Clay Craft

We are using airdry clay, which you can get from most craft stores.

The photographic tutorial that follows will guide you on how to create it.

DIY Clay Flower Incense Holder

You Will Need:

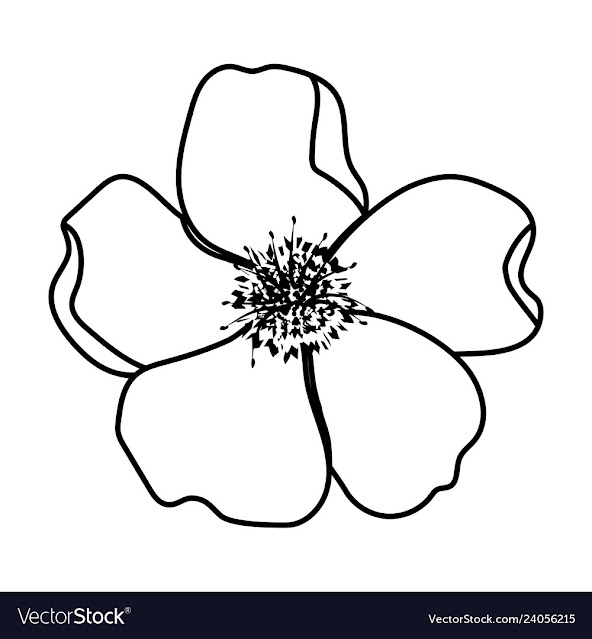
Printed flower guide

Scissors

500 grams white airdry clay

Rolling pin

Sculpey tools, or a small knife, teaspoon, and thin skewer.


Step One:

Flower Template

Clay Craft

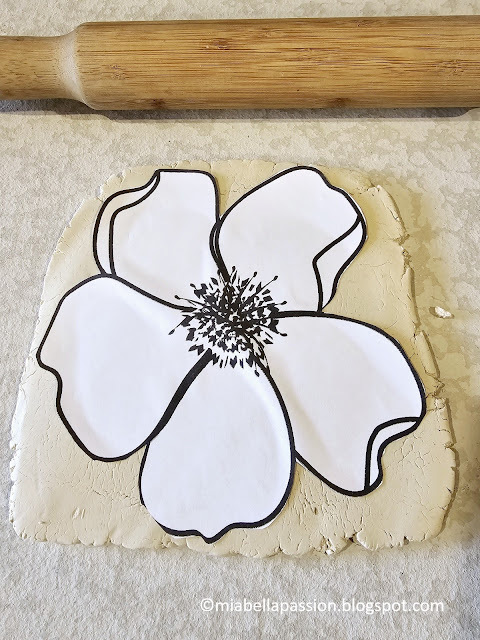
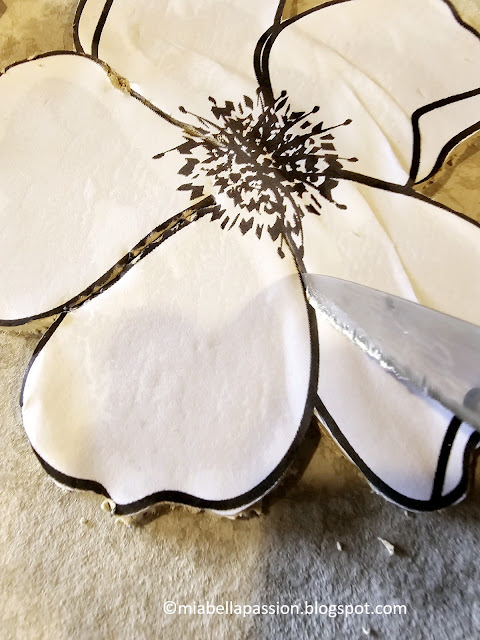
Print the free VectorStock flower image in 8 x 10-inch size.

                       Flower Craft

Then cut around the outline with scissors.

Step Two:

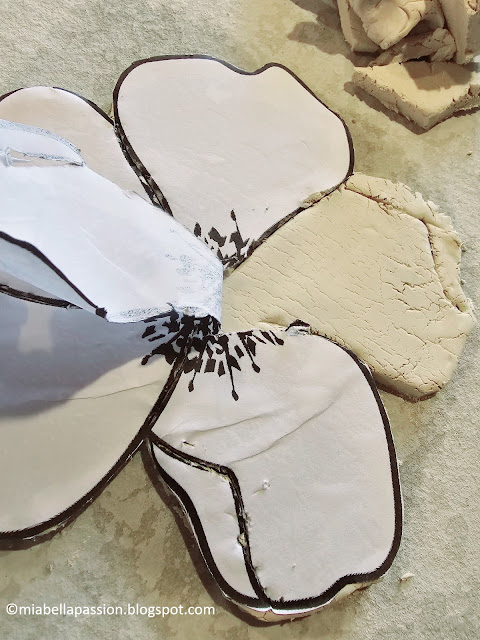
Roll out clay to about 1cm thick to fit the image.DIY Clay Flower Incense Holder

Step Three:

DIY Clay Flower Incense Holder

Cut around the edge of the flower to remove the excess clay.

DIY Clay Flower Incense Holder

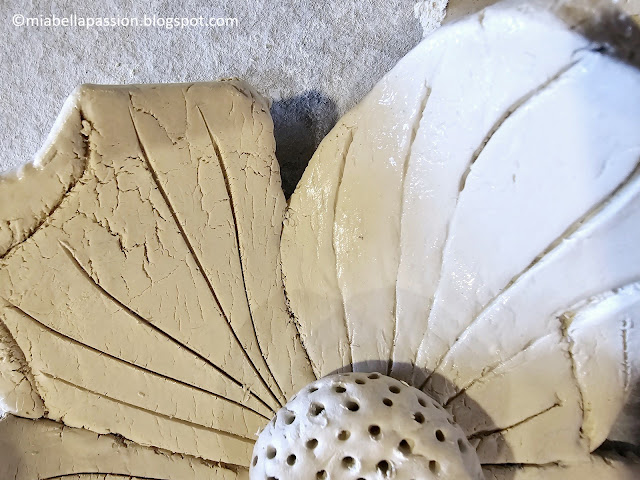
And score the detail lines as shown.

Save the offcuts!


Step Four:

DIY Clay Flower Incense Holder

Remove the paper guide.

DIY Clay Flower Incense Holder

Then use a pointed tool to score lines on the petal.


Step Five:

DIY Clay Flower Incense Holder

Use an offcut piece of clay to roll a circle that is 4cm by 4cm in diameter and 1 and 1/2cm in thickness.

Moisten with water if the clay is hardening.

Step Six:

Use cold water on your finger to make a clay slurry on the centre of the flower.

Press the circle onto this.

DIY Clay Flower Incense Holder

Use a pointed tool to make hole detailing.

DIY Clay Flower Incense Holder

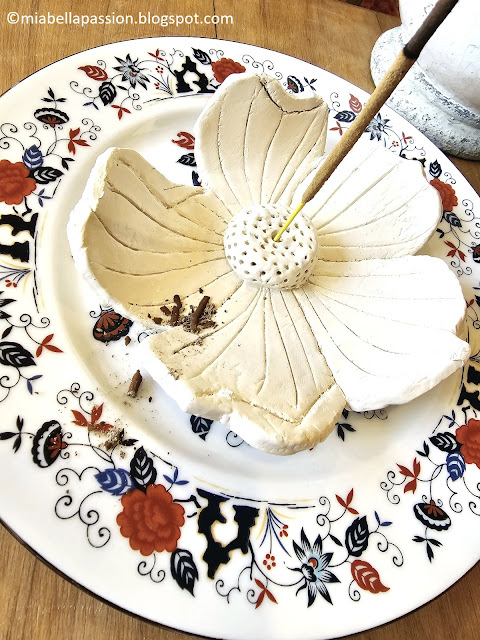
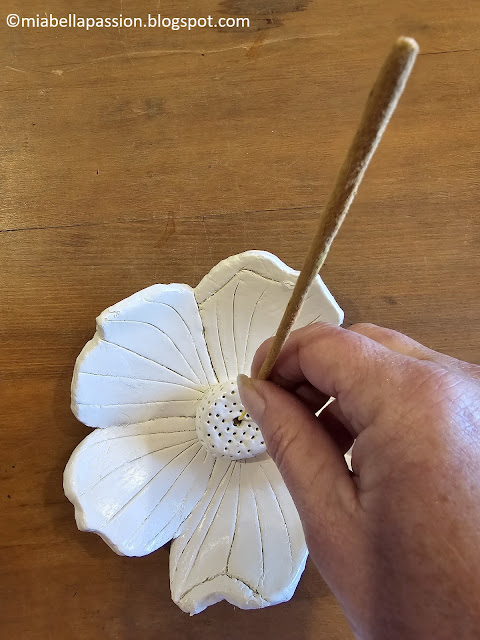
And then a centre hole to hold the incense stick.

Step Seven:

DIY Clay Flower Incense Holder

Make a slurry of clay and water and gently go over the entire flower and edges to smooth the surface.

DIY Clay Flower Incense Holder

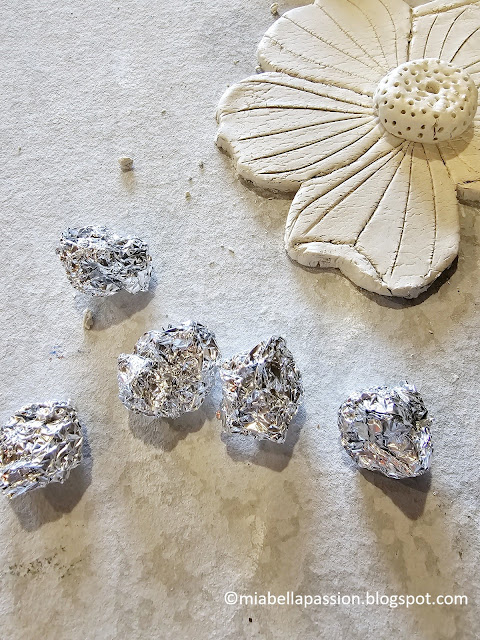
Roll four pieces of aluminium tinfoil into balls.

Step Eight:

DIY Clay Flower Incense Holder

Use the balls and any excess clay to place under the petals which you are gently moving upwards as shown.

If cracking occurs use clay slurry to smooth out.

Leave in a warm place overnight.

Step Ten:

DIY Clay Flower Incense Holder

Place the flower on a lined tray and put it in an oven at 80 degrees Celcius, and bake for 20 minutes to complete drying.

Turn the oven off and leave it inside until the oven is cold.

Step Eleven:

You can leave the flower a natural white clay, sealed with a clear sealer, or you can paint it in the colour of your choice.

Make sure you also seal the bottom too!

I painted my DIY incense Flower in a cream-white colour.

DIY Clay Flower Incense Holder

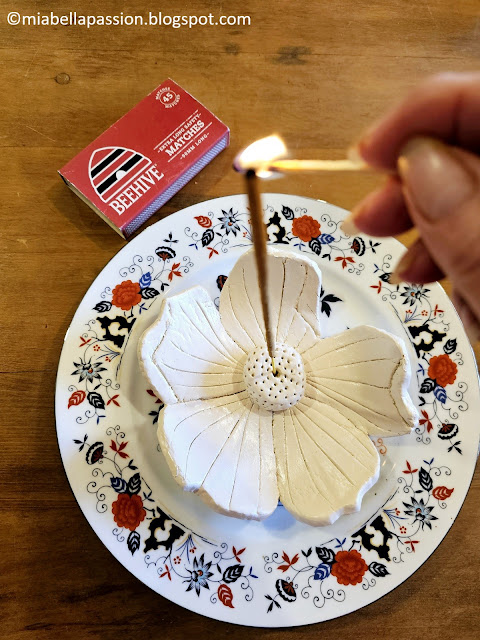
When completely dry, put the incense in (place on a pretty plate if you like) and light.

DIY Clay Flower Incense Holder

A lovely homemade gift to give.

Just place the incense flower on a foil or pretty paper covered piece of cardboard as a base. 

You'll find Mia Bella Passion's free printable papers HERE.

Put it on a sheet of clear cellophane, stand a pack of incense behind it and pull all sides upwards to tie at the top with a piece of rattan or ribbon.

Trim the cellophane top, and add a gift card to the ribbon.

Gift sorted!

Home and garden blogs
For the latest posts JOIN :)


#DIYincenseholder  #homemadegifts #airdryclay 

#claycraft #claygifts


Related Posts Plugin for WordPress, Blogger...