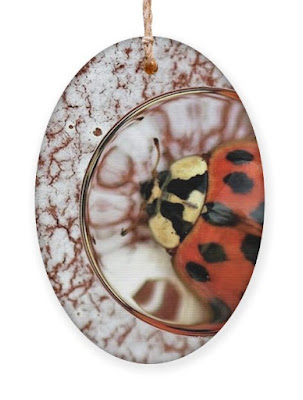
Beautiful Ladybird Christmas Ornaments

 One day I just happened upon a beautiful ladybird and captured wonderful photographs as it meandered across a textured pot.

Ladybird Christmas Decorations

These images were manipulated using old-school digital technology many years ago well before the appearance of AI. 

With the assistance of 'Fine Art America', I've created a collection of contemporary 'Ladybird Christmas Ornaments'.

The oval ornaments are half an inch thick and about 4 inches tall made from wood. 

They come with a hanger and with a magnet on the back.

Links to each design are below the pictures.

Ladybird Christmas Decorations

Ladybird Christmas Decorations Ladybird Christmas Decorations


   Ladybird Christmas DecorationsLadybird Christmas Decorations

      Ladybird Flower Blur #3                  Ladybird Pair

  
  Ladybird Christmas DecorationsLadybird Christmas Decorations


These designs are also available on coffee mugs, journals, tote bags,  and other gift products HERE.


#christmasdecorationsonline #onlinegifts
#ladybird #ladybirds

Let's Craft A DIY 'Christmas In A Mug'

DIY Christmas Craft Ideas

Add a cute festive touch to your decor with 'Christmas In A Mug'. 

This project is very easy to create.

I chose white and green as my colours, but you can choose whatever colour way you like.

Let those festive Christmas vibes flow.

DIY Christmas Craft Ideas

What I have created is a guide for you.

This project takes half an hour to DIY.

DIY Christmas Craft Ideas

You Will Need:

A plain white coffee mug

Polystyrene (or dry florist foam)

An assortment of Christmas picks - pine, pinecones and berries.

A small ornament for the focal point

2 green and white striped pipe cleaners

Wire cutters

Hot glue gun

To Make:

DIY Christmas Craft Ideas

Cut your polystyrene to fit the inside of the mug.
DIY Christmas Craft Ideas
It should sit just below the lip of the mug.
DIY Christmas Craft Ideas
Start at the back of the mug and poke the first
 Christmas pick in place.

DIY Christmas Craft Ideas

Continue placing the pine picks as shown.

DIY Christmas Craft Ideas
                               Add some pinecones.

I used wired bunches that I could pull apart and cut the wires with wire cutters to the length required.

DIY Christmas Craft Ideas

This is what it should look like at this stage.
DIY Christmas Craft Ideas
Next, add a focal ornament.
And a striped pipe cleaner around the cup.
DIY Christmas Craft Ideas
Shape the second pipe cleaner into a heart shape.
DIY Christmas Craft Ideas
Cut the extra length off and bend the end to make a hook.
DIY Christmas Craft Ideas
Hook it over the pipe cleaner around the mug, and bend the heart to sit nicely.
DIY Christmas Craft Ideas
I added a small pearl to the top of the Christmas tree ornament to hide the wire hanging loop, and a small crystal ball to the top of the tallest pine pick.
I used hot glue to do this.
Place in your Christmas decor.

DIY Christmas Craft Ideas
Here in New Zealand, it is Summer and very hot during the festive season.
But it's on my bucket list to experience a Northern Hemisphere snowy Christmas. 
:)
DIY Christmas Ideas

You'll find more Christmas crafts, DIY, free printables and recipes HERE.

New Zealand Bloggers
For the latest posts JOIN  :) 


#christmascrafts #diychristmas #christmasdecorideas

 #homemade


Cherry White Chocolate Blondie

White Chocolate Blondie Recipe

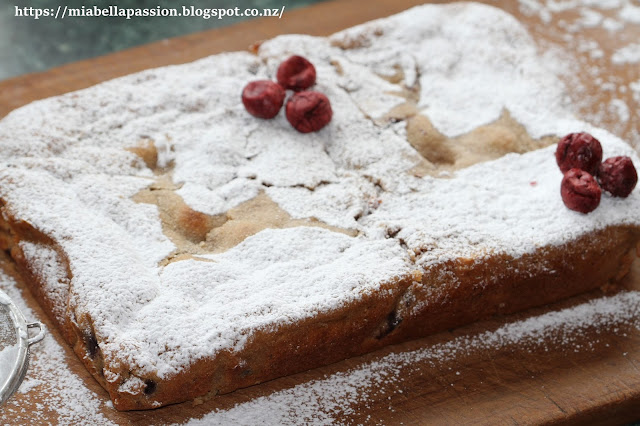
Cherry White Chocolate Blondie is 'Christmas in a MOUTHFUL'!

The flavours induce childhood memories of my mother's Christmas cake.

 Using brown sugar in the mix adds to the deliciousness.

 White Chocolate Blondie Recipe

It's super easy to whip up.

Cherry White Chocolate Blondie

Ingredients:

1 1/2 cups of pitted canned cherries (with juice drained)

2 Tablespoons of brandy

3/4 cup soft butter

1 teaspoon vanilla extract

1 1/2 cups brown sugar

2 eggs 

1/2 cup almond meal

1 1/2 cups plain flour

1 1/2 teaspoons baking powder

3/4 cup white chocolate (chopped)

Powdered icing sugar to dust

Method:

Preheat the oven to 180 Celcius (356 farenheit)

Line a rectangle brownie pan (32 x 18cm/ 12.5 x 7 inch) with baking parchment paper.

In a non-metallic bowl place the drained cherries with the brandy.

Set it aside.

Using electric beaters, mix in a bowl, the butter, brown sugar and vanilla until pale and creamy.

Add the eggs and beat well.

Add the flour and almond meal.

Beat again.

Reserve six cherries to decorate the top of the blondie once baked.

Fold the rest of the cherries and chocolate through the mixture.

Spread into the prepared pan.

Bake 35 minutes or until a skewer comes out with a few crumbs but not wet.

Cool in the pan.

Lift out of pan and when cold, plate, dust the Blondie with powdered icing sugar, and group the cherries in threes on top.


Note: you can omit the brandy if preferred.

White Chocolate Blondie Recipe

 After it's baked and cooled - 
use a Christmas template (sourced from the internet, printed onto paper).

Using scissors, cut the template out.
White Chocolate Blondie Recipe

Place the template in position on the top.

White Chocolate Blondie Recipe

 Sprinkle sieved powdered icing sugar over the top of the Blondie.

White Chocolate Blondie Recipe

 Carefully remove the template.

White Chocolate Blondie Recipe

It is such an easy way to decorate a cake, slice, brownie or blondie... 

White Chocolate Blondie Recipe

Repeat so you have two images on the blondie. 

White Chocolate Blondie Recipe

Position the cherries, cut
and serve with fresh cream or vanilla ice cream.
You will find the printable recipe HERE.
New Zealand Bloggers
For the latest posts JOIN  :) 

#cherry #baking #blondie #christmas #christmasbaking


Related Posts Plugin for WordPress, Blogger...