DIY Farmhouse Vase Topper...❥

Do you have vases that you place the flowers in to and they instantly fall to the side.
Flower or foliage placement is a disaster as the stems just don't stay put?
Then your flower arrangement looks hickley pickley,
 and is not the fabulously arranged vision of beauty you had in your mind.

Do you enjoy Farmhouse styling?
Well here is an easy DIY solution to that flower arranging frustration!
Make a Farmhouse wire net vase topper.
Here's how...

You'll need a vase...
 This large decorative bowl leaks so I placed an internal vase inside it.

 You will need some chicken wire netting, and some wire cutters.
Also some gloves to protect your hands.

 Place the netting on top of the vase.
Cut the netting into a circle with a 3 centimetre excess.

 With gloved hands turn under the wire netting to make a finished edge.

 You can twist and blend all those loose wire ends or trim off.

 If you are using an internal vase in a larger vessel, fill with water.
Place your Farmhouse vase topper in place.
And prepare your chosen flowers.

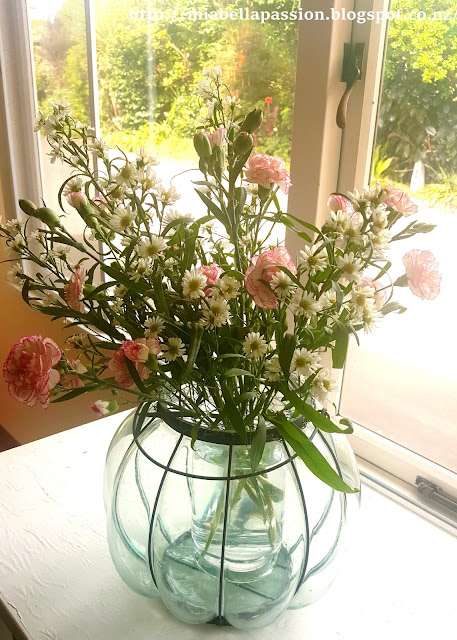
Poke your trimmed flower and foliage stems into place through the holes in the wire netting.
The netting holds each stem in perfect position! 

Wire Vase Topper
Such a simple solution to holding the flowers and foliage stems in place.
The Farmhouse Vase topper makes for easy arrangements.
I truly wish I had made one DIY style before now.


#farmhouse #DIY #Flowerarranging #vasetopper

You might like to also visit:
My stores at Fine Art America

Bird Silhouette
& Redbubble 
for art prints, and gift ideas.

:)


Microwave Russian Pecan Fudge ❥


Russian Fudge is my favourite kind of fudge.
But I have always found it to be the most tedious to make.
And the caramel will always catch on the bottom of the pot no matter how low the heat.
That is why I am sharing the easiest Russian Fudge recipe with y'all today.
It's so simple.
AND there is no burning on the bottom of the pot, 
because it's completely microwave made!
I have added toasted pecans to my recipe - but if nuts are not for you leave them out.

To make the fudge...
you will need a can of condensed milk, brown sugar, butter, pecans and white chocolate.
You can find the printable recipe HERE.

Melt the butter -
Add the sugar and condensed milk and cook for five 2 minute increments stirring each time.

This is what it look like after 6 minutes...
Golden beautiful - and NO burny bits!

After the last 2 minutes - remove from microwave and add the pecans and white chocolate.

Pecan Russian Fudge
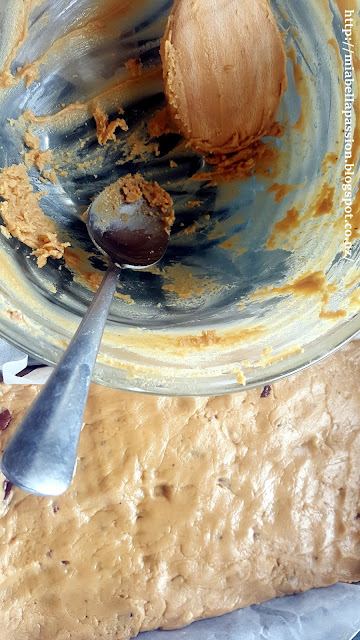
Quickly mix with a wooden spoon and spread into a baking paper lined slice pan.

Pecan Russian Fudge
It's so delicious.
I always 'snapchat' the family, and they all appear for a share.

Pecan Russian Fudge
Once you have made Russian fudge in the microwave, 
I doubt you'll return to the pot-cooked version...
it is that GOOD!

Recipe: HERE

#sweets #fudge #Russianfudge #microwavecooking #homemade

You might like to also visit:
My store at Fine Art America & Redbubble


Succulent Hanging Planter...❥


I have decided to start a succulent collection....
Many years ago (and I'm talking about 25!) succulent and cacti were a popular garden plant in rock gardens.
And all those many years ago I had one.
But as time and trends changed it went...I gave them all away.
And the cacti garden was removed when a puppy I was babysitting ended up with a face of prickles.  I remember the hours spent removing them....and I think my children remember many a time meeting up with a cactus too.
But I met a cute little sedum...
And my succulent love was rekindled.
That was a year ago....

It was a tiny little plant then...
but look at it now!
This is Sedum morganianum.
It's commonly called Donkey or burrows tail.  
It is a native plant to Mexico and Honduras.

Here in New Zealand, we call it the jellybean plant.

Because one little jellybean like piece will grow...

...into this!  And then you have a brand new plant!

Where I live it grows on my covered and sheltered deck year-round.
It is also commonly grown as an indoor houseplant.
This plant does require sun or bright light.
Keep out of the wind and handle with care as the little nodule leaves will fall off if knocked.
It has clusters of star-shaped rose-pink flowers in the summer.
And the trails will grow up to 60cm in length.
Finally - do not overwater it.
And it will look fabulous all year!


And if you would like step by step instructions on how to make the rope hanger,
you'll find it HERE.

If you are curious about the mosaic...
that is an old mirror that I upcycled into mosaic artwork.
Just another idea for your covered patio or deck!

If you'd like to read more about the different varieties of succulent plants then pop over to:
 https://plantedwell.com/succulent-plants/


You might like to also visit:
My art store at Fine Art America and designer collection at Vida
  

#Sedum morganianum #donkeytail #succulent #hangingplants


'Reserved For The Cat' cushion...❥

Ever since I saw this cushion with words only on Etsy I wanted one.
But cos I am a DIY'er I had to create my own.
I found a stone coloured linen cushion by haven gallery at Farmers reduced to $20 from $70!
I just love the simplicity of the fabric weave.

The first step was to design the wording and I also added a crown image.
I printed this in black ink onto an A4 paper sheet.

Then cut a piece of cotton fabric to the same size.
The Fabric was sellotaped to the paper.

Onto a bright sunny window this was taped.

Then I used a fabric marker pen in black to copy the crown and wording.
Once dry, I removed it from the window and paper back, 
and I ironed the reverse side of the fabric to set the ink.

Fabric Marker Pens come in all colours but I used black for this project.

With the iron I pressed in place 5cm turned edges.
Then I removed the cushion inner from the cover.

Measured the centre placement and pined the fabric written wording onto the cushion cover.
It was really just a matter of a quick double stitched outline to keep it all in place, using a sewing machine.
Place the inner back into the cushion cover,
and...

Reserved For The Cat Cushion
voila - I now have my own 'Reserved For The Cat' Cushion.

DIY Cushion Graphics
Lovely little Lola the Rescue Kitty looks so tiny behind it...
The Lola story is yet to be told...
Another day.  :)
Until then I am crushing on my cushion!


#diy #cushion #design #reservedforthecat #sewing


You might like to also visit:
My store at Redbubble


Related Posts Plugin for WordPress, Blogger...