Showing posts with label French Country & Shabby Chic. Show all posts

Hyacinth In A Teapot!

It's now the depths of winter here in the Bay Of Plenty in New Zealand.
Today has been the coldest day so far...
a mere 4 degrees at 10am this morning.
I am not a fan of the cold. 
 I am so grateful the beautiful Bay offers a Spring, Summer and Autumn with warm, hot, warm temperatures.
It really is a grin and bear it scenario in winter.  
When the weather is just awful and you are stuck indoors, what do you do?
Well, you fast forward Spring, and jazz up your home decor a bit, that's what you do!

Hyacinth
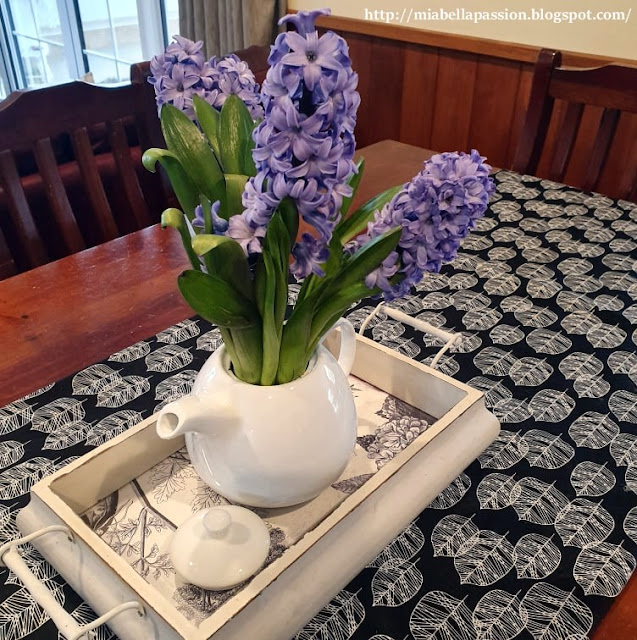
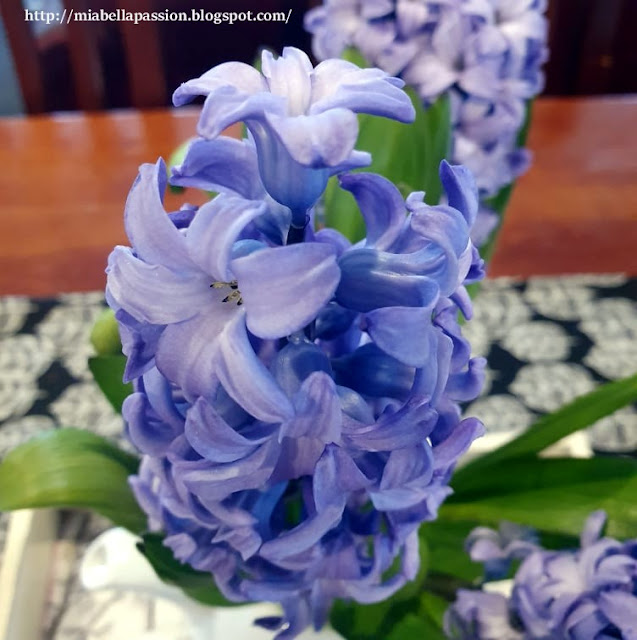
So today I potted up a gorgeous blue-purple hyacinth into a funky teapot.

The white teapot was $8 from KMart.

 
The Hyacinth sourced from Bunnings.

Hyacinth
A hyacinth in a teapot you ask?
Well, I say - why not!

Indoor Bulbs
It's a bit quirky, and once placed onto a French style tray, makes a super winter table centrepiece.
I also made a new table runner.  
You can find out how to make a 'DIY TABLE RUNNER' HERE.


Hyacinth
It looks pretty. It smells divine.
And it's a reminder that Spring is coming!

Hyacinth
Once the Hyacinth blooms have finished flowering which will be in 2 or 3 weeks time,
 I will plant them out into the garden border where they will rebloom next winter.
Hyacinths have a delightful scent and a stunning form.
If you grow them potted indoors they require a warm position with good light conditions.
Only keep the soil lightly moist as too much water makes them grow too tall!
It is best to place a wood orchid stake in the centre of the pot and make a thin wire loop to thread through the flower stems 3/4 of the way up, to pull stems together so as to avoid the weight of the flowers drooping over.
They do tend to grow towards the strongest light source, so turn the pot regularly to keep the plant in shape.
You just cannot beat the beauty and perfume of the Hyacinth.


#hyacinth #springflowers #bulbsindoors


Vintage Newspaper Covered Books....❥

It was time to change up the fabric-covered books on my shelf display.
I had a red theme going on, and it's been like that since 2016!
That's such a LONG TIME!
How did I miss changing this before now?
So for the 2019 book makeover, I decided on a neutral black and white.

I'll be removing the fabric to recover them in the vintage paper.


This is why I used sellotape in the original fabric covering. 
So I could easily take it off and reuse the books.


You can read the original post about the red themed fabric covered books HERE.
Years ago I found a very old newspaper and it's been in my cupboard 'might make something with you' stash since.
The newspaper is from 1946, so it is extremely fragile.

That's why I opted for photocopying the pages so I could still use the interesting font and vintage images for the book covering project.
Also, I wanted black and white not the worn yellow aged paper as it was.

Do you remember covering your schoolbooks?

Well that's the same technique I used.  
Held in place by sellotape.

My black and white themed collectables now look fabulous!

Book Stack
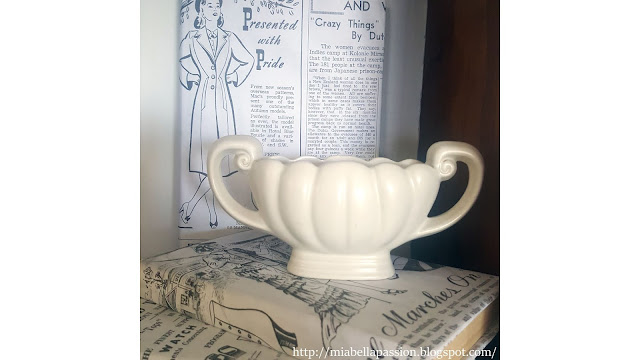
Book stack now in vintage themed black and white font and images,
with my favourite little Wade England scroll handle vase atop.


Wade England

Upcycled books

Love, Love Love!


#vintage #papercraft #upcycled #bookstack


DIY & Sewing Home Improvements....❥

So the past few weeks have been a little chaotic...
New double glazing and carpet have been put in Mia Bella Passions mansion.
This house is my mansion.
Did you know I have lived here for 30 years?
The double glazing in the living area of the house was a costly but necessary upgrade to make the home warmer for when the next winter comes.
Worth every penny already to be rid of all those old drafty doors and windows.
Gone also is the old forest green carpet and the peach carpet.
It was a half and half carpeted house.

The new carpet is dark black brown.
I love it.
It is so soft and squishy.
So when new things happen...it's nice to upgrade the decor too.

This first thing I did was to paint the bookshelf.

I left the sides wood and also the shelf bases.
It looks so farmhouse.
I'm in love with this too.

Then I sewed a new runner for the coffee table.
This easy sew runner is a breeze to make.
You can find the instructions HERE.

I had a piece of fabric left so I made a new pillow cover.

The forest of trees fabric design just freshens the whole tv room up.

The white guest bedroom headboard was looking a little dirty, so I recovered the headboard with a textured neutral coloured linen.


It was a great improvement,
 as the headboard now matches the linen type fabric on the lamp.

Then I made a new headboard from scratch for the purple bedroom.
(Just get your hardware store to cut a piece of mdf or any other board to size).
I padded the board by stapling an old but still usable puffy mattress topper on to it.
Then I repurposed grey curtain fabric from an old curtain set to cover over the padding.
All using a staple gun.

It was a much-needed addition to this bedroom.
I also have another curtain in the grey spare so that will be used for a future DIY project of recovering the Roman blind in this room.

Love, love, love all my DIY interior decor upgrades.
The total cost to do all this was just $25 for the table runner fabric.
(I purchased this from Spotlight NZ Online)

Because everything else in the decor upgrade was created using saved or stashed materials, and paint I already had.


#diy #upcycling #repurposing #homedecor #sewing 


Old Metal Tray Upcycle...


Frida Kahlo
I love trays...
I use them practically - for serving 
And to display bits and pieces in the decor.

Often as a low base layer in a vignette.

decoupage
This old aluminium tray is one that I have had for about 20 years.
It certainly has that well worn patina.

I wanted to change it and decided to decoupage this old tray.
Decoupage paper is available from scrapbook and craft stores.
It's a very fine paper like tissue paper.
It comes in many beautiful designs.
 I chose a black and white perfume bottle design.

Isn't such a pretty paper?

And I think it looks fab with the aged silver of the tray.

First clean the tray, 
and then measure and cut the paper to fit.
I left about 5cm of the silver edge exposed.
Mod podge glue the base of the tray.

Press the paper carefully in place.
Smooth out any major unevenness and big wrinkles.  
Layer more glue on top and then place on the second layer of paper.
It leaves a shadow from the bottle pattern as the placement is uneven.
You could just do a  single layer of paper, but I wanted the shadow and a more wrinkled paper effect.

Finally paint a thick layer of modpodge over the top of the paper.
This acts as the final sealer.

Next I wanted to add a flat braided cord to define,
 and create interest around the outer edge of the paper.

Cut cord to fit.
I used to two pieces of cord as I wanted a round edge,
 and a square cut edge opposite each other.

Using a thick line of modpodge press cord on top of it.

decoupage
Leave to dry for 24 hours.

Frida Kahlo
I'm so happy with my very pretty tray, upcycled with decoupage and cord.

Frida Kahlo
It really adds interest with another layer to my black and white "Frida Kahlo' display.

Frida Kahlo artwork by New Zealand artist - Tanya Leef. 

#diy #decoupage #perfumebottles #tray #fridakahlo


Easy To Make Dainty Pom Poms...❥


These dainty little pom poms are super cute and simple to create.
I've embellished a cushion with one on each corner, but you can decorate anything with these pompoms.

You will need a fork, wool in the colour of your choice, a wool needle, scissors, and whatever item you will be embellishing with the pompoms.

Pom Poms
Simply wind the wool around the fork.
Remember the more wool you use the fatter the pom pom will be.

 Once you have wound the wool around the fork like this,
cut another piece of wool and thread through the middle prong gap.

Pull the wool as tight as you can and knot.
If you don't tie it tight the pom pom will just fall apart.

  Cut up each side of the fork with small sharp scissors.

Pom Poms
Fluff out and trim.
You will want one long string left to sew you pom pom onto the cushion.

Hand stitch your pom poms onto the cushion.
Lola thinks I put these on this cushion just for her to play with I'm sure!


#homedecor #diy #Cushion #pompoms #embellishments

You might like to also visit:
My store at Fine Art America


Related Posts Plugin for WordPress, Blogger...