Showing posts with label For the kids.... Show all posts

Arty Painted By Sharpie Rocks...

Painted Rocks
'Arty Painted By Sharpie Rocks' is an easy decor 'pick me up' idea, 
that is also a great school holiday project for the kids.
Super easy to create.
The design can be as simple or as complicated as you like.
You can use simple shapes or line art images.
For ideas - Google 'simple black and white line art images'.
For this project, I used three designs.
A simple twig, tiny daisy flowers and a more tricky - rose. 

You will need some clean dry flat rocks.

Paint the rocks using a prime and paint spraypaint like Rustoleum white gloss.

Leave rocks to dry for at least one hour before the next step.


Once the painted rocks are dry, you can draw your design in pencil first onto your rock, and then go over the outlines in black sharpie pen.


Or you can freehand draw your design.
If rocks will be indoors leave as is...but to put outside you will need to put at least two coats of sealer or varnish over the paint and design.

Black and white craft
I have used mine inside on a side table as funky arty decor accessories.

Rather fun, don't you think?

For more about me 
and my stores
 visit Traceyleecassin.com
@


#paintedrocks #artrocks #rockcrafts #kidscraft


Easter Egg Cake, Flowers & More

Easter Eggs
Easter is not far away and like any other celebration holiday, 
we start preparations weeks in advance.
The first fun activity done was to create painted eggs.

This year 'Miss four' assisted.
Her colour choice of paint was pink and purple.
The eggs are polystyrene foam eggs which were purchased from 'Dollar Value' craft section.

Emilee Rose's eggs were placed into an egg carton and used on the Easter table display.


Easter
 We added a glass vase of pretty flowers with a ripped rag fabric knotted bow.
Some nests and birds eggs.
And jars of mini Easter eggs.

The flowers are gerberas and chrysanthemums.

Birds nest
I love to collect found nests and eggs...
I think they are incredibly beautiful!
But these eggs in this nest are actually crafted by a potter.

The painted eggs are also hanging from a branch with more found nests mingled in between.

Easter Eggs
Jars of mini eggs greet visitors to 'Mia Bella Passions homestead',
as this table is right by the front entrance.

Easter Cake
Every year we bake an Easter cake.
What's your Easter tradition?

This years cake was a banana cake.
You'll find the Classic Banana Cake recipe HERE.

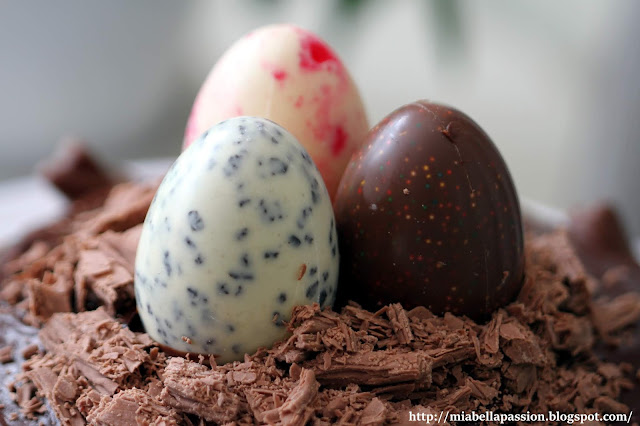
A simple cake completely overloaded with chocolate toppings! 
Eggs, bunnies and flake.
Nom NOM NOM!


#eater #eastercake #eastereggs #eastercraft #eastervignette


DIY Pet Reindeer...

Remember when pet rocks were the rage?

Reindeer Crafts
These pet reindeer are a little larger in size than previous pet rocks,
 but the kids will love to make them.
It's a super fun and easy Christmas paint craft project.

All you do is:
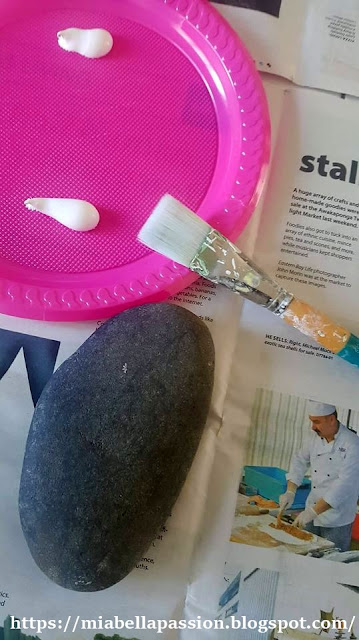
Select an oval or round flat type rock.

Paint one side or both with white paint.
(I used an artist type acrylic paint)
Leave to dry.
Or dry quicker using a hairdryer.
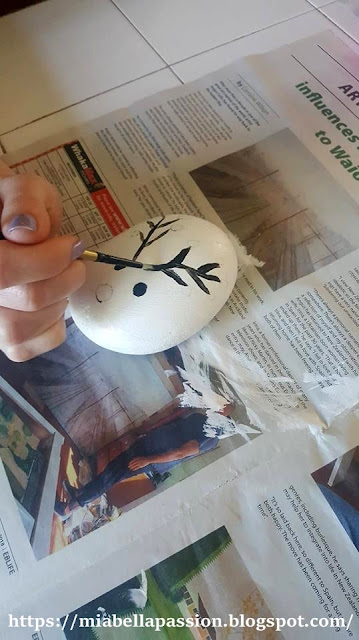
Using a thin brush, paint on eyes in black.
A red nose.
Antlers,
And baubles in coloured paint hung on the antlers.

Painted Rocks
I did this project with two five-year-olds.
So once the white paint was dry, I used a soft lead pencil to draw the eyes, nose, antlers and baubles on to the rock.
They then simply painted it.

Reindeer Crafts
Pet reindeer...
to place on the coffee table Christmas display, 
use as a paperweight, to give to someone special as a handmade gift,
or be part of your Christmas decor.


#christmas #christmascraft #reindeercraft #reindeer


Peanut Butter Chocolate Chip Snack Balls....❥

There are times when I try to be healthier,
 and try to reign in my obsessive compulsive chocolate addiction.
The trend of health lovers of late is to snack on smooze type health balls...
super healthy little darlings which are made with a date base.
But here's the thing peeps....
I loathe dates.
They are most definitely my most unfavourite flavour.
So I decided to create a snack ball that was more my style...
They are not the healthiest.... 
because apparently dates are healthier!
But my choice is either four chocolate biscuits with my coffee break,
 or two Peanut Butter Chocolate Chip Snack balls.

I figure the snack balls are the healthy winner.
And I REALLY REALLY find them delish.

They last up to two weeks in a sealed container in the fridge.
You'll get about 30 balls.

All you do is mix up in cake mixer or food processor to combine:

1 x 375g Jar peanut butter - crunchy - no added salt.
1/4 cup fine coconut
1/2 cup of dark chocolate chips
And 2 cups fine oats.
Use clean hands shape into balls and place them on tray.
If you wet your hands a little it is easier to shape them.
Place tray in refrigerator for balls to firm for a few hours.

Then transfer to a sealed container.

They tick all the right boxes for my kind of healthy!
Peanut Butter Chocolate Chip Snack Balls are little bites of blissful joy!


#snackballs #peanutbutter #healthy #treats #snacks


Pure Mandarin & Honey Jelly Lollies... ❥


Jelly Lollies
If you're looking for a healthier Halloween, party or everyday treat,
then these easy-to-make jelly lollies are the answer!

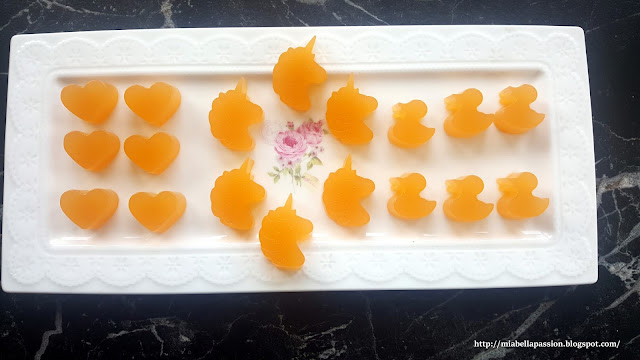
These are made with pure freshly picked and then squeezed mandarin juice.
I've also made the jelly lollies with orange juice.

 You need 2 cups of fresh juice.
Strain the juice in a sieve to remove pips and bits.
Place one cup into a small pot with 4 tablespoons of honey.
Make sure the honey is a mild flavour like clover,
as if you use strong honey it will overpower the citrus flavour.

 In a small bowl, sprinkle over the top the other 1 cup of juice and 6 Tablespoons of unflavoured gelatin powder.

 Let the juice slowly soak up the gelatin at its own pace.  DO NOT STIR IT.
This process is called 'bloom'.

Bring the remainder of the juice and honey in the pot to a medium heat .
Add the bloomed gelatin mixture.
Stir with a whisk until dissolved.
Set aside to cool.

 You will need small silicon moulds.

Place the cooled juice mixture in small jug lots to pour into the moulds.
(These are great fun for the kids to make!)

 Place on trays in the fridge overnight to set.


 The pure mandarin and honey jelly lollies keep well in a covered plastic container in the fridge.  And they don't stick together.

I'll be making these in Halloween moulds for sure,
as they are a huge hit with jelly lolly lovers...
As a bonus they are pretty to look at, yum to eat, as well as healthy!

The printable recipe is HERE.

Note: An ingredient conversion chart can be found HERE


GRAB A COFFEE AND POP OVER TO MY GIFT STORES AT

FINE ART AMERICA

REDBUBBLE

SAATCHI ART


#halloween #partyfood #lollies #homemade #jellylollies


The CUTEST Rabbit Cake Ever...

Well ain't this the CUTEST rabbit cake you ever did see?
There is a bit of fiddly prep,
but actually it is not too hard to create.
This cake was for a 3 year old girls birthday.
But would it not be the most fun cake to serve to family and friends this EASTER?

The first step in the week before making the cake,
you need to make the rabbit ears.

I just free hand drew the ear shape, 
but on the internet there are many free rabbit ear templates.
The ears were large at about 25 cm tall.

Then I cut out a smaller set of pink for the inner layer.
These were 15cm tall.

Then I decorated them.
The final step was to attach them to the iceblock stick with glue.

And this is the final result.

For the cake - I whipped up two packets of ready mix Strawberry cake.

These were baked in two large 23cm by 8cm deep cake pans.
Once cake is cold, remove it from pan and slice off tops so it's flat.
These cake slices can be frozen to use in trifle  type desserts.
Then ice the bottom cake layer (cut side up) with vanilla frosting, 
Top with other cake layer - with the cut side facing down to the frosting.

Place a thin layer of frosting over the entire cake.
Roll out white ready roll icing and cover the cake.

Then place the ears on top.

Make a pink strawberry frosting and create little swirls around the ears.
Decorate with edible paper flowers.
On the front pipe two eyes and a little pink nose.

To decorate the back of the cake place more pink icing swirls and more paper flowers.

It was a huge HOPPY hit at this Birthday Party...

And I think it would be as equally fabulous as a Easter cake.

The Rabbit cake was almost as big as the Birthday Girl!!

Pre Packet cake mix is a real timesaver...
and you know what?
It was pretty delicious too!


#rabbitcake #childrensbirthdaycakes #cakedecorating


Related Posts Plugin for WordPress, Blogger...