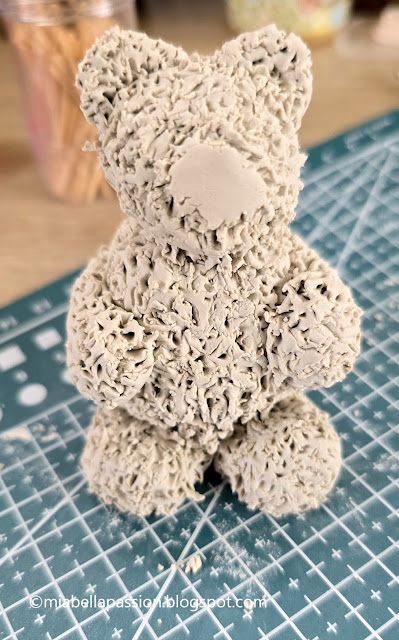
This super cute airdry clay teddy bear is not too difficult to create for a special ornament to gift, or you can use these 'how to' instructions to make it out of modeling fondant for a cake topper.
But today we are making it using the air dry clay.
On a tabletop or a craft cutting board roll a ball of clay that is about 5cm (2 inches) in size to an oval shape.
For the legs and arms, make four 3cm (1 1/2 inch) small sausages.
Squash the ends (this is where they attach to the body).
Attach by blending underneath with a flat edge tool and at the back of the bear's body, then create a fur effect using a pointed tool.
Do the same to make two arms.
Attach the legs to the body blending the flat part into the base of the body clay.
Attach the arms in the same way.
Use a pointed tool to rough up the clay to resemble fur.
You can manipulate the bear to sit flat and into the sitting shape you want.
To make the head roll a 2.5cm (1 inch) ball, a smaller one for the nose area, and two smaller ones for the ears.
Squash the balls, and cut out two ear shapes.
(see photograph above)
Position nose plate, and ears on the head, and attach blending clay to meld.
Attach the head to the body using a toothpick pushing into the centre of the body to support it.
Blend the clay around the neck area.
And use the pointed tool to create fur to blend the join.
(Take particular attention when melding the neck to the body, as when mine dried the clay shrunk (for lack of melding) and left a gap between the body and head, but reattachment using PVA glue fixed it fine).
The photo above is what your bear should look like.
Make little dots for the eyes and nose. I had black clay for this, but you can use natural and paint them later when it's dry.
Attach using a pointed tool.
Leave to dry.
(It takes about five days).
Once the teddy is completely dry, you can paint it any colour you want.
Touch up the nose and eyes with black paint if necessary.
When the paint is dry, seal the entire bear with a clear sealer.
I used a clearcoat spray sealer on the naturally coloured clay.
I hope all the photographs in this tutorial help you create your own sweet teddy bear. :)
For the latest posts JOIN :)
#airdyclaycraft #fondantcaketopper #teddybearcraft


.jpg)


No comments:
Post a Comment