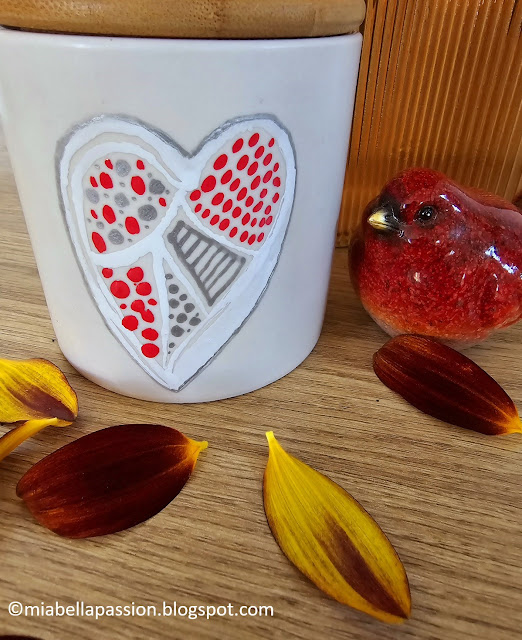
DIY A Valentine Sweet Jar

If you want to create a personalized one-of-a-kind Valentine's Day gift for your special people, a sweet jar made of glass or ceramic is a great idea. 

Valentines Day Crafts

You can fill it with their favourite candies or chocolate treats, and decorate it with paint pens to make it extra special.  

This is a creative craft for kids to gift to teachers or grandparents.

How to Use Paint Pens to Create a DIY Valentine Sweet Jar

Valentines Day Crafts

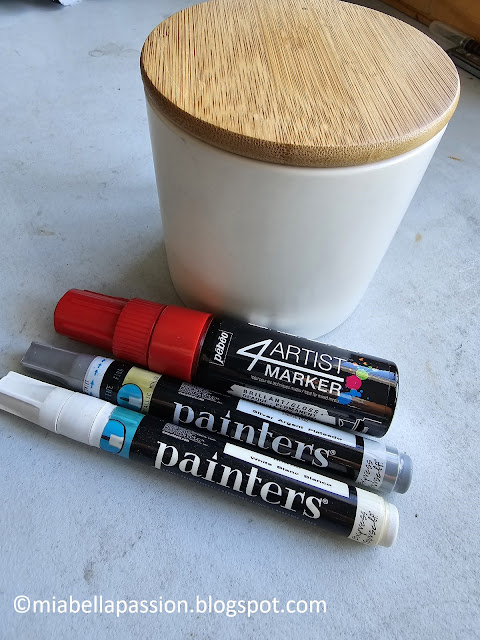
Materials

A glass or ceramic jar with a lid
Paint pens in various colours (you can find these at most craft stores)
Newspaper or a drop cloth to protect your work surface
A clean-up rag to erase mistakes
Sweet treats to fill the finished jar

 Plan Your Design

Before you start painting, it's a good idea to plan out your design. You can sketch it on a piece of paper first, or just wing it if you're feeling confident. 

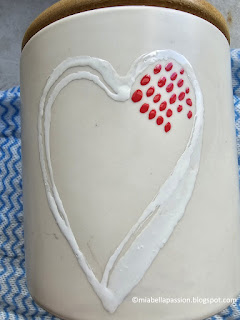
You can also print a stencil heart shape from the internet and use double-sided tape to place on the jar and then paint around it for the outline.

The design can be as elaborate or as simple as you choose.

Valentines Day Crafts

Start Painting

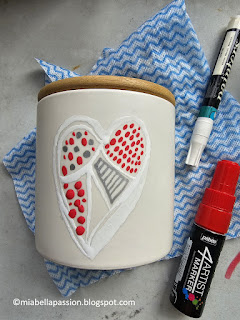
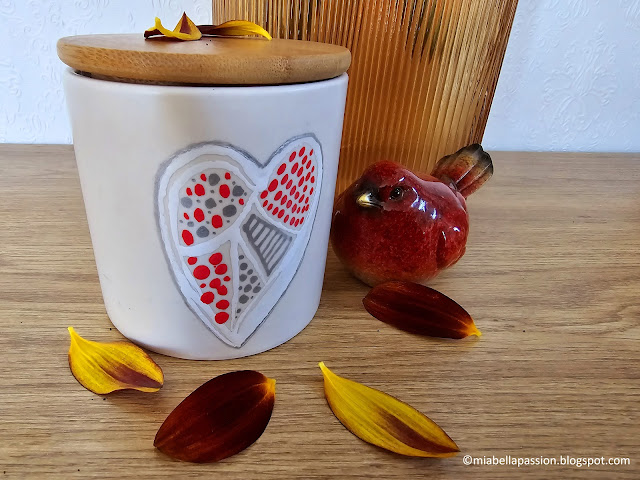
 Shake the paint pens well before use, and test them on paper first to ensure the ink is flowing smoothly. Then, begin painting your design onto the jar. 

 
Valentines Day CraftsValentines Day Crafts

Start with the larger shapes first, and then add smaller details. 

Don't worry if your lines aren't perfectly straight – that's part of the charm of hand-painted items!

Let it Dry

After you've finished painting your design onto the jar, let it dry overnight. 

This will ensure the paint is fully set and won't smudge or rub off. 

Note: The painted jar is a handwash item and not dishwasher-friendly.

Valentines Day CraftsValentines Day Crafts

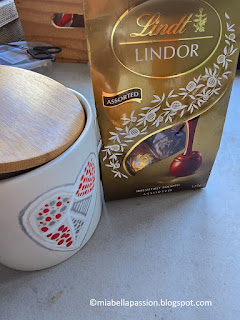
Once it is dry, you can fill the jar with your loved one's favourite sweets and surprise them with their personalised Valentine's Day gift!

Valentines Day Crafts

Creating a sweet jar with paint pens is a fun DIY project. 

It's a lovely way to show your loved one that you care and make something truly unique that they'll cherish for years. 

Valentines Day Crafts

So why not give it a try this Valentine's Day?

Valentines Day Craft Ideas
For more Valentine-inspired crafts and recipes click HERE

For the latest posts JOIN :)


#valentinecrafts #valentinediy #homemadevalentinegifts


Tangy Greek Salad

 When it comes to salads, a Greek salad is one of the most refreshing and nutritious options out there. 

Greek Salad

 You can create a healthy and tasty Greek salad perfect for lunch or dinner with delicious and colourful ingredients.

Here is my adaption of the classic recipe, with the added zesty zing of fresh oranges.

Greek Salad

It's loaded with fresh vegetables, salad greens, salty feta cheese, olives, and a tangy orange vinegarate dressing. 

Greek Salad

If you don't like a particular ingredient, change it to one you enjoy.

Greek Salad

The presentation technique is pure foodie art!

Greek Salad

I love how it looks on the table.

Then just before serving toss it all together incorporating the dressing.

Have a bowl of avocado guacamole  (I used store-bought as avocados were unavailable) to dollop as a side to the salad once plated.

Or you can have a bowl of fresh avocado slices if in season. 

This Greek salad recipe is not only delicious but also packed with nutrients. 

Greek Salad

Lettuce is an excellent source of vitamin A, while cucumber and tomatoes are low in calories and high in fibre. 

Greek Salad

Different microgreens offer vitamins A, E, C and K, as well as minerals such as calcium, magnesium, iron, selenium and zinc.

The feta cheese and Kalamata olives add protein and healthy fats to the salad, and the dressing is made with heart-healthy olive oil, with Vitamin C from the orange juice.

Avocado is very nutrient-dense with fibre, folate, potassium, vitamin E and magnesium.


To Make you will need:

Salad Ingredients: 

 2 cups of chopped lettuce or salad mix

1 cup of Micro Greens or sprouts

 1/2 a cucumber, cut into rounds

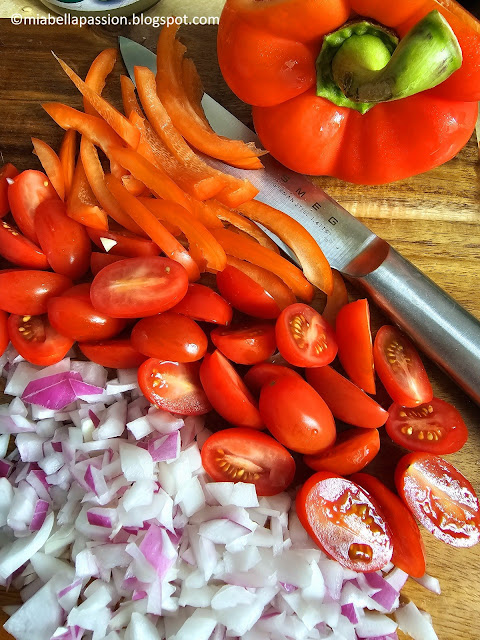
 cherry tomatoes sliced into halves

1/4 Red Capsicum sliced into strips

 1/4 cup of finely chopped red onion 

 As much diced feta cheese as you desire

 (use reduced-fat feta for an even healthier option) 

1/4 cup of Kalamata pitted olives

1 Large orange for decoration


For the dressing:

 9ml (3 oz) of extra-virgin olive oil 

 1 large orange squeezed of juice 

2 teaspoons of white wine vinegar

 1 teaspoon of garlic, minced or finely chopped

 Instructions: 

1. In a large low-sided bowl, place the lettuce as the base,

and then on each side the Micro Greens or sprouts.

Create lines of cucumber rounds, cherry tomatoes, capsicum and red onion. 

. 2. Add the sliced Kalamata olives to the bowl, top with feta cheese and arrange the orange quarters around the edge.

You can remove the peel if desired.

3. In a dressing bottle, shake together the dressing ingredients. 

4. Place the Guacamole or sliced avocado into a small side bowl.

5. Toss with the dressing at the table just before serving.


Enjoy your Tangy Greek salad on its own, or with barbequed meats, chicken or seafood.

Home & Garden Blogs
For the latest posts JOIN :)

 #greeksalad #healthysides #salads #saladrecipes


How To Incorporate Modern Floral and Abstract Wallpaper In The Home

Wallpapers are an easy and affordable way to give your home a new look. 

Photowall offers a massive range of patterns and colours.

Photowall Wallpaper

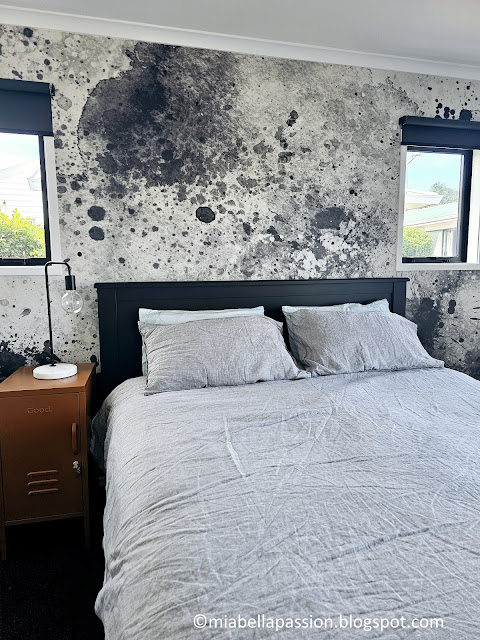
I have just incorporated two, a modern floral and abstract style into a newly built home I've recently completed.

Photowall Wallpaper

A gorgeous floral called 'Botanical Morning'.

Isn't it simply gorgeous and springlike?

The purple gingham bed cover adds to the colourfulness of the room.

Photowall Wallpaper

And isn't Enzo the poodle cross just too cute?

(Note: Enzo's owners have battled this little guy's genetic health issues for a very long time and he is constantly under professional vet care, but what a sweetie, full of life, love and personality despite his struggles).

Photowall Wallpaper

A masculine abstract was hung in the second bedroom.

Photowall Wallpaper

Which was perfect for the gamer male who abides here.

This design is called 'Black Splash'.


How To Use These Wallpaper Styles In The Decor.

In recent years, there has been a surge of interest in modern floral and abstract wallpaper designs. These designs bring a fresh and contemporary feel to any room.

The floral designs feature bold and graphic floral patterns in gorgeous colour combinations. Unlike traditional floral wallpaper, the modern versions focus on the shapes of the flowers in detail or with a blurred intent. This creates a more contemporary and artistic look that is perfect for making a statement in the home. 

These wallpapers can add depth and texture to a room, creating a unique and eye-catching focal point.

Modern floral wallpaper can be a great choice if you want to create a bold accent wall or add some interest to a smaller space. With so many different designs and colours to choose from, it's easy to find a style in the Photowall range that fits your personal taste and complements your existing decor. 

On the other hand, abstract wallpapers, feature designs that are more geometric or free-form. They often use bolder colours and shapes or a painterly aspect to create a striking and eye-catching look. These wallpapers are perfect if you're looking for something bold and fresh, but don't want to commit to a specific theme or pattern.

The great thing about modern floral and abstract wallpapers is that they can be used in various ways.

If you're brave, you can choose a bold and colourful wallpaper and cover an entire room. Alternatively, you can choose a more subtle design and use it to create a statement wall. This is a great way to add interest to an otherwise plain room.

When choosing modern floral and abstract wallpaper, there are a few things to consider. 

Firstly, you'll want to choose a design and colour scheme that will complement the other elements you will be using in the room. 

Secondly, think about the scale of the pattern - a large pattern will make a bigger impact, but a smaller pattern may be more versatile. 

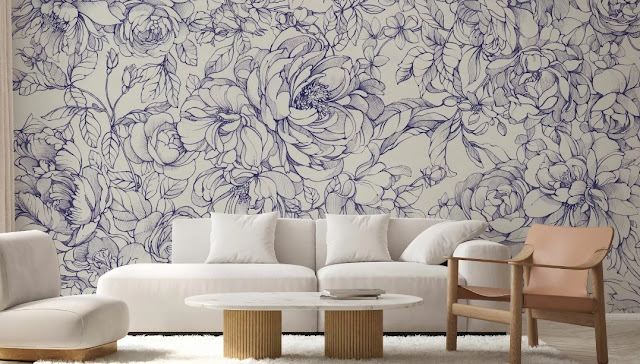
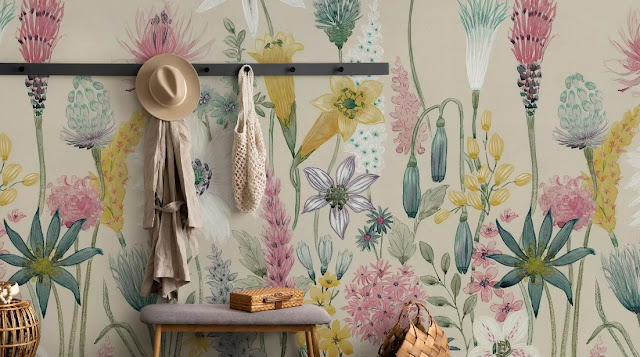
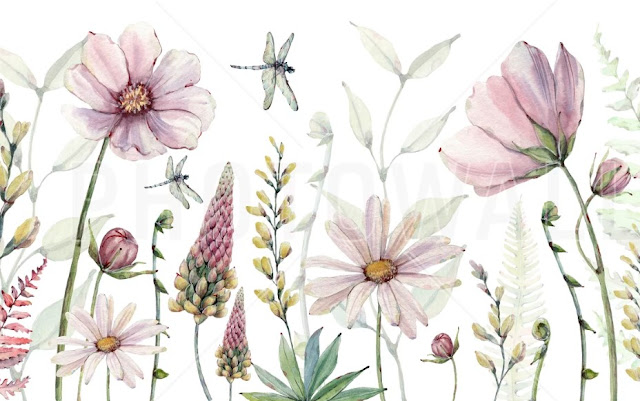
Photowall Wallpaper Idea Gallery 

Photowall Wallpaper
Lotus Floral

Photowall Wallpaper
Tropical Dream

Photowall Wallpaper
Blue Wild

Photowall Wallpaper
Floralium - Lavender

Photowall Wallpaper
Floristica

Photowall Wallpaper
Fabulous Flowers

Photowall Wallpaper

Ipanema Beach - Black


Photowall Wallpaper

Zebra Piano Print Music Black Concrete


Photowall Wallpaper

Percussion


Photowall Wallpaper

Chappy Colored Wall


Photowall Wallpaper

Neutral Gold Collage


Photowall Wallpaper
Torsion Color

To view any of these papers just click the Photowall link and then search the design name under each image shown today.

All images are copyrighted to Photowall.


#affilatepost 
#wallpaperideas #contemporarywallpaper #modernwallpaper


How To Upcycle A Takeaway Coffee Cup Into A Vase

 If you're someone who loves quick takeaway coffee breaks, you probably have a collection of disposable coffee cups that you'll eventually throw out, or you instantly bin them when you've finished the drink. 

Upcycling

But STOP - have you ever thought about upcycling these cups into something new and creative, like a flower vase? 

A  large or extra-large size takeaway cup is the best size to use.

Here's a simple way to do it:

1. Clean the cup thoroughly with soap and water to remove any leftover coffee or debris. Dry it well.

2. Use a strong glue to attach decorative elements to the outside of the mug. You can use anything from colourful paint, braid, rope, beads, or even wrapping paper; the possibilities are endless. 

      Set aside to let it dry overnight.

3. Then fill the cup 3/4 full with water. You can also add some small pebbles at the bottom of the mug to stabilize the flower vase.

4. Finally, add your preferred flowers to the water, cut them to size to fit in the cup, and enjoy your new, upcycled vase.

By upcycling your takeaway coffee cup into a vase, you not only give a new life to an everyday disposable item, but you also get to enjoy a personalized flower holder. 

Moreover, it's an eco-friendly way to reduce waste while expressing your creativity.

It's also a fantastic and fun school holiday project for the children too.

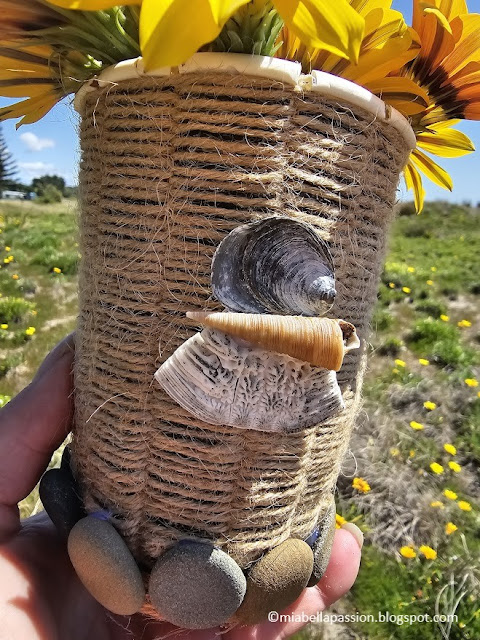
I chose a much trickier rope weave to decorate my cup vase.

Here's what you need and how I did it:

Upcycling

A roll of thin natural rope twine

One extra large takeaway cup

Sharp scissors

A hot glue gun

Stronger glue is you decorate using stones

A glass to fit inside the cup

Flowers

Upcycling 

Upcycling

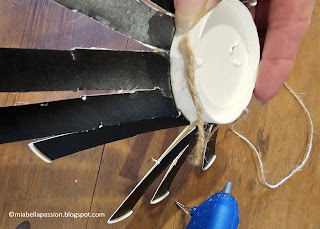
Clean and dry the cup, measure, mark and then cut 13 strips at 2 centimetre spaces from top to just above the hard base.

You can make the strips wider if you want, but make sure you use an ODD number, as an even number will not work for the weft and weave frame. Upcycling

Splay the strips and using hot glue attach the rope to the side of the base. 

Upcycling

I used the rope straight off the roll (so I'm actually not sure what the entire measurement was used) for continuity so there would be no joins.

Upcycling

Wind rope around and around until you get the the start of the strips.

Upcycling

Getting the weave started is tricky, but once you get momentum, it becomes easier.

Upcycling

Keep the tension tight.

Push the rope towards the base as you go.

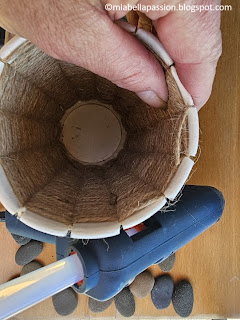
As you work the weave around the strips it pulls the cup together.

This is when you turn it the right way up and continue the weaving process.

Hint: Put the roll of rope twine in a glass to make it easier to weave with it.

Upcycling

When you reach the top lip of the cup cut the rope and glue to secure it.

      Upcycling Upcycling

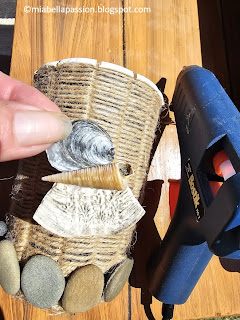
My cup had a bit of a rope gap at the base so I glued flat oval stones on it to cover it.

Upcycling

Then a central focal point using found beach shells.

Upcycling

Use a stronger glue than hot glue if you use stones on your creation.

Upcycling

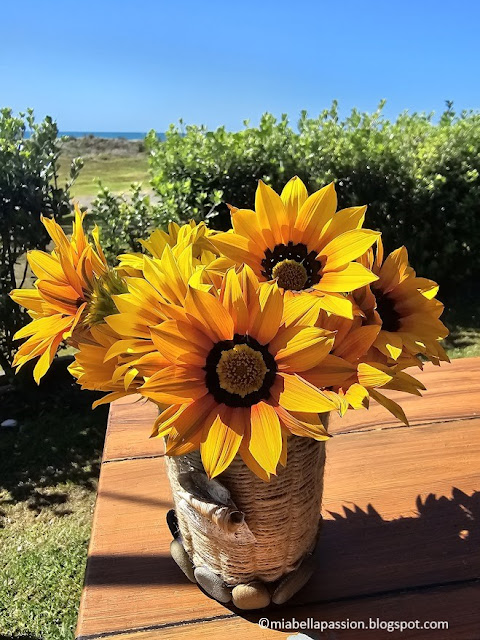
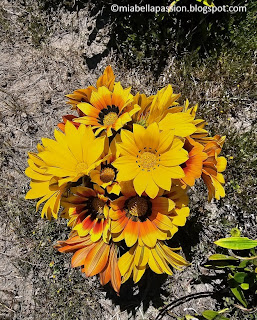
As the finished vessel is no longer watertight, I slipped a drinking glass inside it to hold the water for the painted daisy flower arrangement.

Upcycling

Upcycling

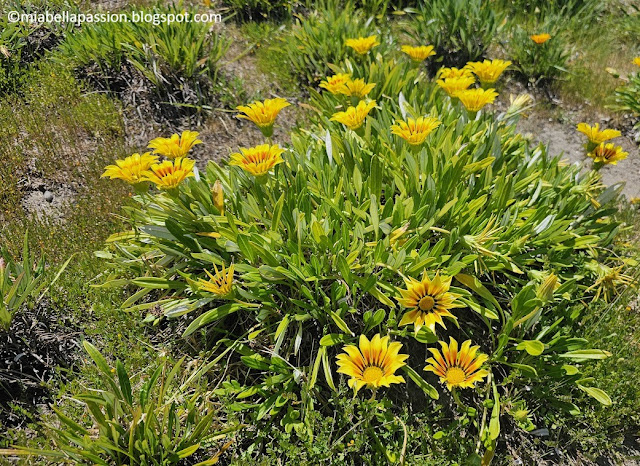
Painted Daisy plants grow wild on the sand dunes on the beaches of the East Coast of the North Island in New Zealand.


#upcycling #takeawaycoffeecupcrafts #crafts #upcycled #ropecraft #diyvase


How To Grow Beautiful Kalanchoe Pot Plants

    Kalanchoe plants are a popular houseplant choice, prized for their beauty and reasonable ease of care.

How To Grow Beautiful Kalanchoe Pot Plants

Using the hints provided, your Kalanchoe plant can bloom year-round, producing gorgeous bursts of colour to brighten up your home, or front door entrance. 

They will even grow outside in a garden bed if you live in a frost and snow-free zone.

They are often known by the names Flaming Katy, Christmas Kalanchoe, Madagascar Widows Thrill or Florist Kalanchoe.

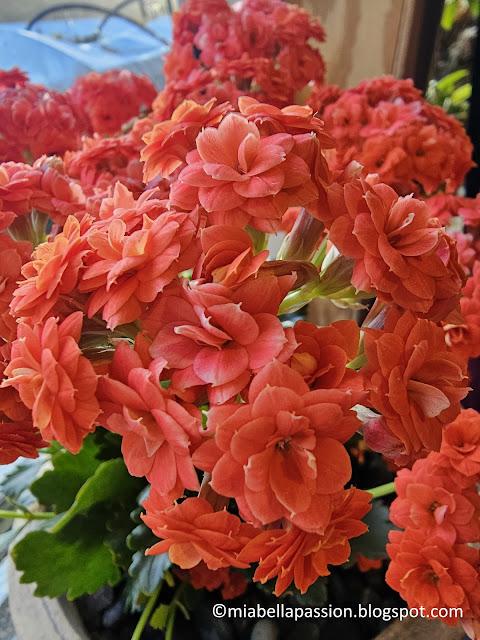
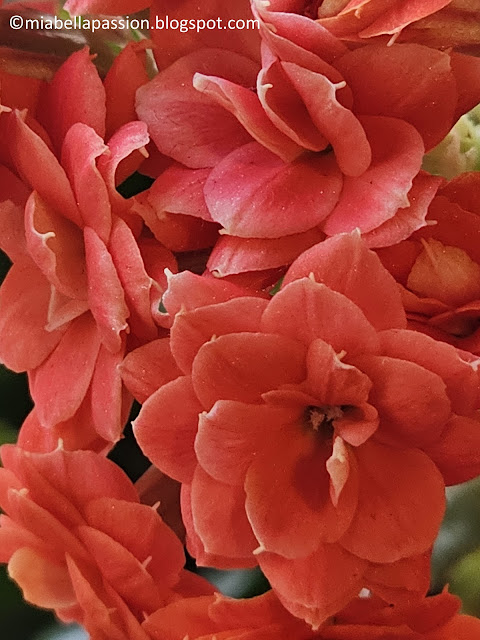
The beautiful colour range of Kalanchoe plants is absolutely stunning!

How To Grow Beautiful Kalanchoe Pot Plants

Kalanchoe is a genus of flowering plants native to Madagascar and tropical Africa. These plants are popular among gardeners due to their stunning range of colours. 

Kalanchoe flowers come in varying hues of red, pink, yellow, orange, magenta and white. The leaves of the plant also come in different shades of green and red.

How To Grow Beautiful Kalanchoe Pot Plants

Kalanchoe leaves have a fleshy succulent appearance and come in different shapes and sizes, depending on the species. 

Some species have pointed leaves while others have rounded or oval-shaped leaves. The leaves are thick and succulent, giving them a waxy or rubbery texture.

The flowers of Kalanchoe plants are equally as beautiful as the leaves. The flowers come in clusters and have a star-shaped design. The petals of the flowers are silky or velvety to the touch. 

The colourful flowers bloom for several weeks, making them great for garden displays or indoor decorations.

There are many species of Kalanchoe plants, each with its unique range of colours and appearance. Some varieties have heavily textured leaves while others have fine, delicate leaves. 

The flowers of Kalanchoe plants come in both single and double blooms, and the size and shape of the flowers can vary from species to species.

How To Grow Beautiful Kalanchoe Pot Plants

The double blooms are my favourite!

When it comes to adding colour and beauty to your garden or home, Kalanchoe plants are a top choice. 

With their wide range of colours and unique appearance, these plants will certainly add a touch of elegance to any decor space or garden bed.

Just follow these tips to ensure your Indoor Kalanchoe plant thrives.


1. Choose the Right Pot

Make sure your Kalanchoe plant has a pot that is the proper size and has proper drainage. A pot that is too small can stunt the growth of the plant, while a pot with poor drainage can cause root rot. 

Choose a pot that is slightly larger than the size of the plant's root ball to give it room to grow.

2. Provide Adequate Sunlight

Kalanchoe plants need bright, indirect sunlight to grow and thrive. Place your Kalanchoe in a spot that gets at least six hours of sunlight a day, but avoid direct sunlight, which can scorch the plant's leaves. The leaves can turn a red hue in brighter light. 

3. Water Properly

Over-watering is one of the leading causes of Kalanchoe plant failure. Water your plant deeply, but only when the top inch of soil is dry to the touch. Allow excess water to drain away and never let your Kalanchoe sit in standing water.

4. Fertilise Sparingly

Kalanchoe plants do not need to be fertilised often. 

Use a balanced fertilizer once a month during the growing season to promote healthy growth and beautiful blooms. 

Stop fertilising during the winter months when the plant is dormant.

5. Prune Regularly 

To keep your Kalanchoe plant looking its best, prune it regularly. Remove dead or wilted leaves and spent flowers to encourage new growth and more blooms.


Growing Kalanchoe in the Garden.


1. Location and Soil

Kalanchoe prefers well-draining soil and a sunny location. It's best grown in soil that's rich in organic matter, such as compost. 

If you're planting it in a garden bed, choose a spot where it can get plenty of sunlight, such as a south-facing location. It's important to note that Kalanchoe doesn't tolerate Cold temperatures at all!

2. Watering and Fertilization

Kalanchoe doesn't like to be overwatered, so it's important to let the soil dry out between watering. Overwatering can cause root rot, which can be fatal to the plant. For best results, water it deeply once a week, or when the soil is dry to the touch. You can also fertilize it with a balanced fertilizer once a month during the growing season, which is spring through fall.

3. Pruning and Deadheading

Kalanchoe blooms for a long period, but the flowers will eventually fade. 

Deadheading the spent blooms not only makes the plant look better, but also encourages more blooms to form. You can also prune the plant to keep it compact and bushy, which can be done in the spring.

4. Pests and Diseases

Kalanchoe is generally not prone to pests and diseases, but it can occasionally be attacked by spider mites and mealybugs. 

If you notice any signs of infestation, you can spray the plant with insecticidal soap or neem oil. Powdery mildew can also be a problem, especially in humid conditions. To prevent it, avoid overhead watering and make sure there's good air circulation around the plant.


By following these simple tips, you can ensure your Kalanchoe plant grows into a healthy and beautiful specimen. 

How To Grow Beautiful Kalanchoe Pot Plants

With a little time and care, this stunning plant can brighten up any room in your home decor or in your garden. 


Copyright ©miabellassion.blogspot.com


#kalanchoe #potplants #tropicalplants


Related Posts Plugin for WordPress, Blogger...