Christmas Door Wreath

 It's going to be a funny (but not the haha sort) weird kinda Christmas for me this year...

But 2020 has been just that, hasn't it?

There will be no tree this year.

I'll tell you more about the reason why in a while...

But I am doing a door wreath.

And a table feature.

But in superbly 'KISS' (keep it simple stupid) style!

This is why I love Online Christmas stores.

Because when you have no time to craft it, create it or DIY make it,

their ready-made is just right!

Plus it's delivered to your home directly.

So for the front door this year I chose a pretty metal and faux pine and greenery wreath.

Christmas Door Wreath

Noel is considered a French word but it actually dates back to the  Latin word Nasci, which means to be born.

In the middle ages, Noel described the Christmas period.

'Joyeux Noël is Merry Christmas in French'.

Christmas Door Wreath


#noel #christmas #christmaswreath


Lemon Meringue Mousse

Lemon  dessert recipes
Deliciously tart, tangy and OH SO CREAMY!

The lemon lovers will LOVE this light and airy dessert.

Lemon meringue pie inspired it's super simple to put together, and ready to eat in a few hours.

Lemon dessert

The yield is about 8 larger size ramekins.

Use smaller ramekins to treat more people.

Lemon dessert

Step 1:  Make the lemon base and cool.

Lemon dessert

Step 2: Make the meringue.

Lemon dessert

Step 3:  Fold the cream Fraiche into the cooled lemon base.

Lemon dessert

Step 4:  Use a whisk to whip the lemon mixture into the meringue.

Lemon dessert recipes

Step 5: Spoon into ramekins.

Top with some finely grated lemon rind.

Chill for 2 hours before serving.  

Lemon dessert recipes

Lemon Meringue Mousse is best made and eaten on the same day.

Adaption: Orange or mandarin can be used instead of lemon.


Lemon Meringue Mousse


  • Makes 8 large-size ramekin servings


  • Ingredients
  • 3 Tablespoons cornflour (cornstarch)
  • 3/4 cup fine white caster sugar
  • 1/4 cup lemon juice
  • 1 cup of water.
  • 3 medium size eggs
  • 1/4 cup extra sugar
  • 350 grams (1 and 1/2 cups) of Cream Fraiche (store bought)


  • Instructions
  • Mix the cornflour to a paste in a pot with some of the water. Add the rest of the water, the lemon juice and the caster sugar. Stir on heat until thick.
  • Remove from heat, cool and whisk in the 3 egg yolks saving the whites. Set aside to cool.


  • Make the meringue.
  • Whip the egg whites until stiff. Add the sugar.
  • Mix to a smooth meringue.
  • Set aside.


  • The next step is to fold the Cream Fraiche into the cooled lemon base.
  • Use a whisk to whip the lemon mixture into the meringue.
  • Spoon into ramekins. Top with some finely grated lemon rind. Chill for 2 hours before serving.


  • Tips
  • Can be adapted to orange, lime or mandarin instead of lemon.

  • The printable recipe is HERE
  • Note: An ingredient conversion chart can be found HERE
  • Mia Bella Passions Blog
  • For the latest posts JOIN :)
  • #lemondesserts #lemonmeringue #lemonmousse#lemonrecipes 

Christmas Art Rocks

Painted Christmas Rocks

Painting rocks.

One of my favourite things to do!

And these simple designs are perfect for the kids to make on a weekend.

Perfect to decorate the home for Christmas.

Painted Christmas Rocks

Perfect to gift to the grandparents, aunties, uncle or teacher.

TO CREATE:

 Painted Christmas Rocks

Select smooth rocks with a flat front surface.

                   Painted Christmas RocksPainted Christmas Rocks

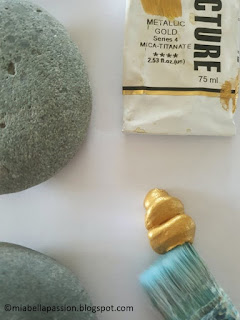
Using gold acrylic paint, paint the rock a shown.

Painted Christmas Rocks

While the paint is drying, sketch some ideas to decorate the rocks.

Painted Christmas Rocks

Use a black marker pen 

(Sharpie is best as other brands tend to run when you spray varnish the rocks)

Painted Christmas Rocks

Decorate the rocks as desired.

Painted Christmas Rocks

When dry spray a light coat of varnish sealer over them.

Painted Christmas Rocks

Place in the décor or gift.

For updates about the latest blog posts,

you can join for free HERE.

#paintedrocks #christmascrafts 


A peek at Mia Bella Passions Garden

Life has been so very busy,

and my next crafty DIY just has not been created.

So instead of a craft tutorial,

(I'll save that for the next post).

I'm just going to show you a snippet of my back of the house garden.

I adore this time of the year.

New growth over spring and now into early summer.

Lush greens.

New annuals heading up for display.

And the rhododendron in full bloom.

This back garden is my favourite place to be.

Enjoy your peek. 


EASY YEAST FREE PIZZA

Easy Pizza Recipes

 EASY YEAST-FREE PIZZA

I'M SHOUTING THIS OUT IN 

SHOUTY CAPITALS.

BECAUSE IT IS DELISH AND SO VERY EASY TO MAKE.

I think you get the hint now.

LOL

This really is the best base if you can't be bothered to fluff around with yeast.

Or you don't like that yeasty flavour.

ALL YOU DO IS:

Easy Pizza

Mix in a bowl until dough forms:

1 1/2 cups plain flour

1 teaspoon baking powder

1/2 teaspoon salt

1/2 cup fat-free milk (I used soy)

(or a little more if needed)

2 tablespoons olive oil

THEN:
on a floured benchtop knead for one minute.

Shape into a ball.

Put the dough back into the bowl. 

Cover with a clean tea towel and leave 10 minutes before using.

While the dough rests, prepare your toppings.

I used:

smoked chicken

Tomato

Mushroom

Pineapple

capsicum

Spring onion

Tasty cheese

Dollops of cream cheese

THEN:

Easy Pizza

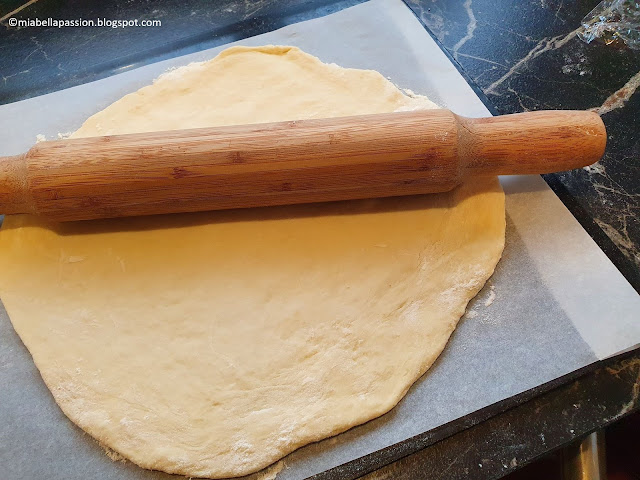
Roll dough out to a round shape.

Place on a baking tray.

Bake in a 200-degree Celsius oven.

Bake for 7 minutes.

Easy Pizza

Remove from the oven

Spread the base with cranberry jelly.

Easy Pizza

Top with the goodies.

Easy Pizza

Return to the oven and bake for a further 15 to 20 minutes.

Note: An ingredient conversion chart can be found HERE


GRAB A COFFEE AND POP OVER TO MY GIFT STORES AT

FINE ART AMERICA

SAATCHI ART


Get updates about the latest blog posts,
by joining for free HERE.

#homemade #pizzabase #yeastfree