DIY Faux Cactus In A Pot...


Pinterest is overloaded with fabulous DIY and craft ideas,
and this one's interesting!
Faux cactus in a pot!

Initially I couldn't decide whether I loved it, or hated it...
but finally decided it was pretty darn funky and fun!
And so the plant themed DIY on Mia Bella Passions continues with:
Faux cactus in a pot made from stones.


 I have always had a love of cactus in their many shapes and forms.
I remember as a child helping my Grandfather tend his vast collection.
Dangerously ugly in my child mind, but when they flowered...
MY OH MY!  
I had a cactus garden as a young homemaker.
But it was removed after a puppy fell face first into a cactus!
Not a pretty sight, hours of spike removal,
 and no fun for the puppy either.
Maybe that is why this idea was so appealing.
A bit of funky cacti fun with no dangers attached!


It's really simple to create,
and a super craft with the kids activity.
Select as many flat shaped stones that you want to put in the pot.
I used four in varied shapes.

You could use a terracotta pot and distress paint it.
But I used a square ceramic one, 
because I have super skinny window sills in my house.
Find out more about them HERE and my kitchen sill mini planters.

I used a selection of green acrylic paint.
Because this project is not going outdoors,
I didn't seal the stones first.

 I mixed up greens to create a bright colour...
you could keep the colour more realistic if preferred.

Once the green paint had dried,
 I put some crosses and line detail on the stones in white paint.

Filled the pot with potting mix to an inch from the top.


 Planter stones were added.


 Silver stones to add a little contrast to the bright green and white.


Then the cacti stones were placed into the pot.

I don't think this project will be staying at my place...
because my son wants to take it when he moves into his new flat.
He can't wait to ask his flatmates to:
 'Make sure you water the cactus when I'm away!' 
LOL


This project is definitely in the ' A bit of FUN' basket!
And I'm sure the kids would love to make too.


'Between The Lines' The Mia Bella' Story...

It is an honor to be featured this week with other 'over 50' bloggers 
on Katherines (Of Katherines Corner fame) 'Between The Lines Blog Series'.
To coincide with this, I thought it would be a great opportunity 
to share a little more to new readers and my wonderful followers.

When did 'Mia Bella Passions' blog begin?
It all began in September 2012.  
I managed to crash my blog twice in the first year whilst learning about widgets, buttons and html.
I also learned very quickly how to resuscitate a crashed blog! 
Thank goodness for bloggers who write about blogging!!!

What does Mia Bella Passions name mean?
Mia Bella is Italian for My Beautiful. (I have italian heritage ). 
And Passions - well I have so many passions for so many things. 
It was just the obvious choice!

Why did I start blogging?
For years several of my friends were always saying 'you should share what you do!'
Then during a very low time in my life of multiple surgeries, when I thought 'I would never work again', I knew I could still create, craft and bake, so that is when I decided to start the blog of sharing!

Who takes the photographs on your blog?
In first few months, my daughter took the photos.
But she moved to a new town for work, so the inevitable happened.
I picked up a camera and have not stopped clicking!
Photography has become a huge passion for me.
I then discovered how to create inspirational quotes...
Yes - you guessed it....yet another passion!

How much time do I spend blogging a week? 
After once thinking I would never work again, I actually work 5 to 6 days a week now.  Blogging is only a small portion of what I do. I'm also a fulltime artist, do photography work, and as well as a bit of volunteering.  
The biggest joy for me as a blogger,  is 'inspiring ' others by spreading love and positivity via art, crafts, DIY, baking, decor design, and beautiful things! 


How would I describe my blogger image?
It's real.  What you see is what you get. 
I am sharing the creative side of my life with my followers.
 I like to keep the personal stuff away from my blog because Mia Bella Passions is all about sharing what I do day to day. 
It's all about the inspiration, positivity and creativity.

And just in case you were wondering - yes - the grey hair is real! I haven't dyed my hair since age 45.
I love red lipstick!  I love 50s fashion! 
Being an individual is very important to me. 
And being 50 certainly does not stop me rocking what I love!


That's a little of the Mia Bella Passions story...
I hope you'll visit with Katherines Corner  'Between The Line Series' to see the answers to this week's questions from myself and the other fabulous 'over 50' bloggers featured.

Visit HERE

and remember:


The Magic Of The Universe Inspirational...

Quotes
                                                                     
Take time out to:
enjoy the universal beauty that is around us.
Breathe.
Look.
Meditate or Pray.
Resuscitate your soul.


#quotes #quote #dandelion


A Pallet Box Of Pretty Pansies...


Here is a super easy way to pretty up an outdoor table.
Whip up a pallet box.
Paint it.
Attach some plaited rope handle accents.
Upcycle some plastic pots
By spray painting in the colour of your choice.
 Then pop into the painted pots some pretty pansies.
Just the look I adore...
Simple...
Rustic...
and a little bit pretty!
To make the box you, will need to cut the pallet wood into the following lengths:

Base = 2 x wood lengths at 400mm
Sides = 2 x wood lengths at 395mm
Ends = 2 x wood lengths at 175mm
(to convert to inches use an online measurement calculator)

It is a basic build:
Nail one side to each base piece.
Nail the ends in place attaching to side wood
Then nail the base pieces to the end pieces to hold it in shape.
Plait some rope to create a handle for each end.
Staple gun in place.
I haven't ever made a box before and it was simple to do.  
;)

Fabulous for the covered deck mosaic table!


Love Is...Inspirational Quote....

Love is the beauty of the soul!
Yes it is...
I have so many favourite quotes.
Yip - you guessed it...this is one of them!
Use on the mood board,
frame for the home decor,
on a homemade card...
or as a screensaver.

Enjoy in black and white or in purple with a hint of pink....


Flower Quote


#quotes #quote #flowerquote


DIY Pretty Fabric Wrapped Books...


Wrapped books are such a wonderful idea...
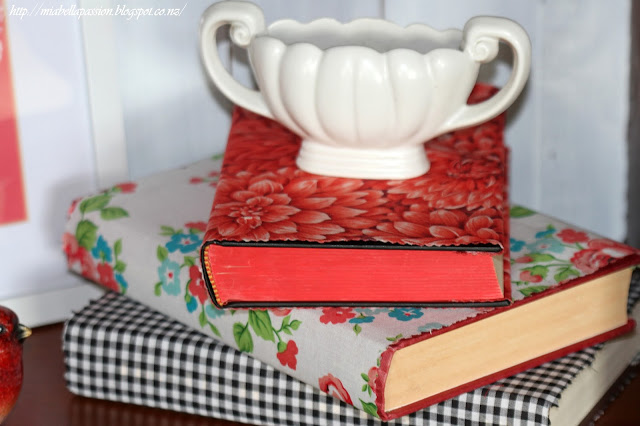
They add height and interest to a tabletop, shelf or sideboard vignette.
And they are such an easy thing to create!
Today I am going to make fabric wrapped books!


You will need:

Old books (I used three)
Fabric
soft stick sellotape 
a ruler for measuring
a pen for marking size before cutting fabric
pinking shears

 I've chosen fabric in contrasting colourways
 that will compliment the items on my shelf.


 Because I want to reuse the books for future crafts, 
or to change the fabric colours, I am not using glue.


 The first step is to measure the fabric to cover the book from the cover.


 You need to allow fabric for the inside cover edges.
Also remember the spine of the book fabric allowance.


 These are my very vintage pinking shears.
Using these I am cutting an edge on the long length of the fabric top and bottom.


 Using a soft stick sellotape (one that removes without to much tearing to the paper cover) stick the fabric to the inside of the front and back covers.


On the outside edge you have the pinking pattern which also stops the fabric fraying.


 It doesn't matter if the fabric overhangs the book, 
or it shows a little cover if the cover is a complimentary colour.


This is was the shelf looked like before the books...


 This is with one book added.

If you are interested in finding out how to make the 
Mini Pallet Love Sign, you will find the tutorial HERE.


 And here is the shelf with the three pretty fabric wrapped books.
Essentially what you are doing is adding a riser.
The books are the riser (added height).


It's quite amazing what adding a little height with a riser can do to the visual of a vignette.
This is effective on a coffee table, side board or on a shelf, or bedside table.


#oldbooks #craft #homedecor #bookstack #fabriccovered


The Pink Hyacinth...

The delightful scent and beautiful form make the hyacinth one of those most sought after flowering bulbs.
 If grown indoors the pot needs to be in a warm position.
 The position of the pot also requires good light conditions.
 Keep the soil slightly moist.
Too much watering will make the hyacinth grow tall and leggy.
The scent will fill the room the plant is in!
 To help stop the plants growing towards the strongest light source,
just give the pot a half turn everyday.
Hyacinths come in the most gorgeous colours.
I chose bright pink for a pop of colour in the decor,
but they come in a range of hues in the colours of white, purple, mauve, pink, and peach.

But:


Classic Banana Cake...

Banana Cake
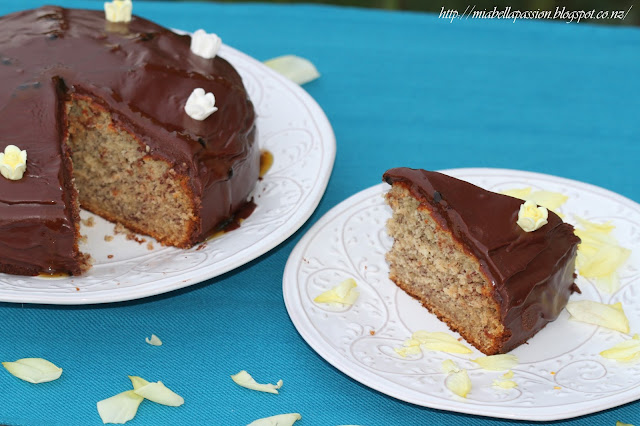
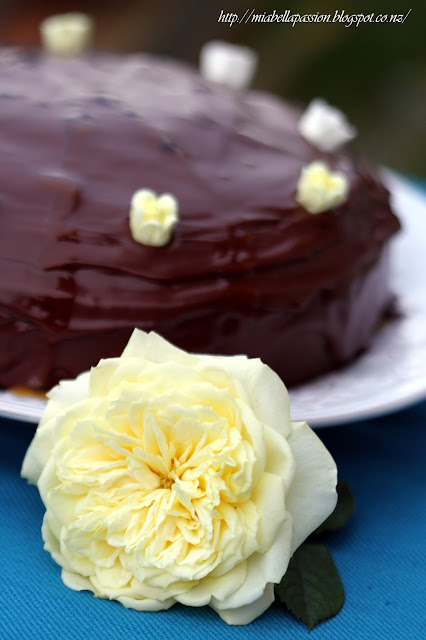
Nothing beats a classic banana cake!
Banana Cake
Always popular and delicious too.
Drizzle cake with passionfruit topping for an extra tropical flavour.
Banana Cake
Another sure fire way to use up your over ripe bananas in the fruit bowl!
Banana Cake
This cake recipe is from the 'Edmonds Sure To Rise Cookery Book'.
You'll find this iconic cookbook on the shelf
 in most New Zealand Bookstores or supermarkets.
Or online via Fishpond.
This book is probably the most used in my cookery book collection.
It's so used the cover has come off and a few pages are loose!
I just bought my son a new Edmonds cookbook because he is about to leave home, and you simply must have this cookbook in your kitchen!
Banana Cake
Get the banana cake printable recipe HERE.


Chocolate Cake
  • Ingredients: 
  •  125g butter, softened
  •   ¾ cup fine white caster sugar
  •   2 eggs
  •   1 - 1 ½ cups or 3-4 mashed ripe bananas
  •   1 and a half teaspoons Baking soda 
  •   2 Tablespoons hot Milk
  •   2 cups white flour
  •   1 tsp Baking Powder

  •   Chocolate Icing
  •  1 and 1/2 cups powdered icing sugar 
  •  1 Tablespoon Dark Cocoa Powder
  •  25 grams melted butter
  • Milk to mix to consistency.
  1. Method:
  2. Preheat the oven to 180ºC. Butter the inside of a 20cm deep round cake tin and line the base with baking paper.
  3. Cream the butter and sugar until light and fluffy, then add the eggs one at a time, beating well after each addition.
  4. Add the mashed banana and mix well.
  5. Stir the baking soda into the hot milk and add to creamed mixture, then sift the dry ingredients together and fold through the creamed mixture.
  6. Scoop the mixture into the prepared tin, level the top, and bake for about 50 minutes or until cake springs back when lightly touched.
  7. Leave in tin for 10 minutes before turning out onto a wire rack to cool. When cold ice with Chocolate Icing or dust with icing sugar.

#banana #bananarecipes #bananacake

Related Posts Plugin for WordPress, Blogger...