DIY Coffee Table Succulent Bowl...


As y'all know it's winter here in the southern hemisphere,
so I'm always on the lookout for some greenery in the decor.
Succulents in a bowl are a much needed pop of nature during the cold, bleak wintery days.

I selected two baby succulent plants from the garden centre.


This fish bowl was in the blog bit's and pieces I might need one day cupboard.

I gathered some stones from the garden path...
and placed those in the base of the glass bowl

The next layer was a quality potting mix, 
into which the little succulents were planted.

This one is a baby plant off a succulent in the garden.

The next step once the plants were in the bowl was...

To add a layer of white decorative pot plant stones.
The bowl was placed on a wooden tray with a shabby green paper base.
(I got this from The Warehouse for $12 in a sale).
Just remember there is no drainage in a planter like this,
and the plants are succulents so minimal watering is required.
These plants get afternoon sun for 5 hours sited on this table, 
so you need to move them in a sunbath area regularly if sunlight limited. 

Some wonderful living decor for the winter months.


Dream Then Do It!


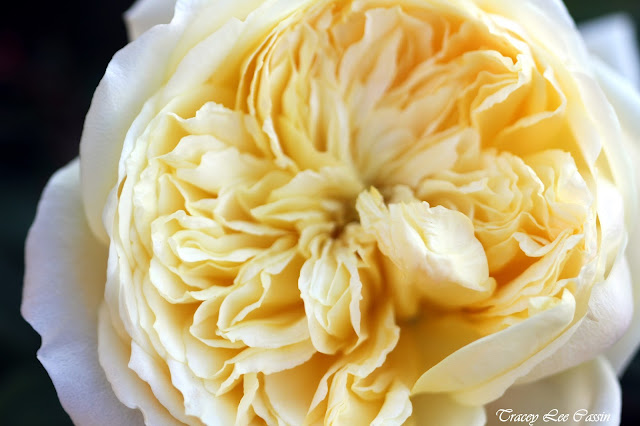
Oh, am I totally crushing on yellow roses at the moment.
Especially the beautiful 'David Austin' varieties.
I admit they are my ultimate favourite in rose varieties.
Scented, multi-petaled gorgeousness!
And beautiful to photograph.


Dream it - then do it...
The latest mood board inspirational features a yellow Austin rose.

This rose has been in the garden for years, but I am not sure of its name.
You might find it here on Wairere Nurseries list:
http://www.wairere.co.nz/Roses/Austin
I have bought mail order roses from them for many years,
with the rose plants arriving cocooned in wrap, ready to plant.
I would highly recommend Wairere online service to New Zealand gardeners.

Dream it - then do it...
I might create another rose garden!


#quotes #rosequote #quote #davidaustinroses


Posh Up A Pillow...

I saw this idea in one of those posh interior shops...

you know the ones that have cushion covers for sale at $40, 
and then the inner is another $50!
OUCH!
So I thought - I could make that.
My very good quality and stylish cushion was $12.
 A navy blue marl fabric is on one side...


And a wool handknit on the other side.
$12 for the whole thing!
We are talking cover and inner.
(Found at 'The Warehouse'.)
I had some creamy white wool.
So I simply made the wool lengths into 4 ply chunky.

 And crocheted a simple chain.

Crochet 101 have a video tutorial HERE.
They make the chain quite loose because it is the base start for a crochet project.
But because you are making the chain to use as is, 
you need to do it quite tight.
Once you have made the chain long enough to shape into a heart,
finish end.

Make a tassel for the bottom if desired.

Place the chain into the desired heart shape, and pin in place.

Hand stitch onto cover.
And there you go...
one posh pillow without the posh price tag.

I love the way it picks up the blues in this duvet cover
(sourced from Bed Bath & Beyond sale for $20!)


Your Own Kind Of Beautiful Inspirational...


Flower Quote


A sweet macro shot of a daisy flower centre with a fabulous message:
Be your own kind of beautiful.

#quotes #quote #flowerquote


Super Sweet Caramel Lamingtons...

Caramel Lamingtons
And when I say 'super sweet'
that is what I mean!
Caramel Lamingtons
Super Sweet Caramel Lamingtons are not for the savoury fans...they are especially for those with a 'SUPER SWEET TOOTH'!
All you do is cut your homemade 
(I used the New Zealand Edmonds Cookbook sponge cake recipe)
or store-bought rectangle sponge into ten pieces.
The caramel icing mixture uses a caramel topping in the ingredients.
I used Delmaine Caramel Topping.
All you do is make a runny icing:
25 grams melted butter, 1/4 cup caramel topping, 
4 tablespoons boiling water and 1 1/2 cups sifted icing sugar.
Mix to smooth.
Dip your sponge portions quickly into this 
and coat each one in coconut (about 2 cups required).
Caramel Lamingtons
Place on a baking paper lined plate, and chill for an hour.
Caramel Lamingtons
Slice each portion in half and fill with whipped cream.
Drizzle with more caramel topping.
Or you can make mini fingers that have no cream filling.
Great party dessert treats.
Caramel Lamingtons
Or simply to satisfy the sweet tooth craving.

Printable recipe HERE

#lamingtons #caramel


DIY Faux Cactus In A Pot...


Pinterest is overloaded with fabulous DIY and craft ideas,
and this one's interesting!
Faux cactus in a pot!

Initially I couldn't decide whether I loved it, or hated it...
but finally decided it was pretty darn funky and fun!
And so the plant themed DIY on Mia Bella Passions continues with:
Faux cactus in a pot made from stones.


 I have always had a love of cactus in their many shapes and forms.
I remember as a child helping my Grandfather tend his vast collection.
Dangerously ugly in my child mind, but when they flowered...
MY OH MY!  
I had a cactus garden as a young homemaker.
But it was removed after a puppy fell face first into a cactus!
Not a pretty sight, hours of spike removal,
 and no fun for the puppy either.
Maybe that is why this idea was so appealing.
A bit of funky cacti fun with no dangers attached!


It's really simple to create,
and a super craft with the kids activity.
Select as many flat shaped stones that you want to put in the pot.
I used four in varied shapes.

You could use a terracotta pot and distress paint it.
But I used a square ceramic one, 
because I have super skinny window sills in my house.
Find out more about them HERE and my kitchen sill mini planters.

I used a selection of green acrylic paint.
Because this project is not going outdoors,
I didn't seal the stones first.

 I mixed up greens to create a bright colour...
you could keep the colour more realistic if preferred.

Once the green paint had dried,
 I put some crosses and line detail on the stones in white paint.

Filled the pot with potting mix to an inch from the top.


 Planter stones were added.


 Silver stones to add a little contrast to the bright green and white.


Then the cacti stones were placed into the pot.

I don't think this project will be staying at my place...
because my son wants to take it when he moves into his new flat.
He can't wait to ask his flatmates to:
 'Make sure you water the cactus when I'm away!' 
LOL


This project is definitely in the ' A bit of FUN' basket!
And I'm sure the kids would love to make too.


'Between The Lines' The Mia Bella' Story...

It is an honor to be featured this week with other 'over 50' bloggers 
on Katherines (Of Katherines Corner fame) 'Between The Lines Blog Series'.
To coincide with this, I thought it would be a great opportunity 
to share a little more to new readers and my wonderful followers.

When did 'Mia Bella Passions' blog begin?
It all began in September 2012.  
I managed to crash my blog twice in the first year whilst learning about widgets, buttons and html.
I also learned very quickly how to resuscitate a crashed blog! 
Thank goodness for bloggers who write about blogging!!!

What does Mia Bella Passions name mean?
Mia Bella is Italian for My Beautiful. (I have italian heritage ). 
And Passions - well I have so many passions for so many things. 
It was just the obvious choice!

Why did I start blogging?
For years several of my friends were always saying 'you should share what you do!'
Then during a very low time in my life of multiple surgeries, when I thought 'I would never work again', I knew I could still create, craft and bake, so that is when I decided to start the blog of sharing!

Who takes the photographs on your blog?
In first few months, my daughter took the photos.
But she moved to a new town for work, so the inevitable happened.
I picked up a camera and have not stopped clicking!
Photography has become a huge passion for me.
I then discovered how to create inspirational quotes...
Yes - you guessed it....yet another passion!

How much time do I spend blogging a week? 
After once thinking I would never work again, I actually work 5 to 6 days a week now.  Blogging is only a small portion of what I do. I'm also a fulltime artist, do photography work, and as well as a bit of volunteering.  
The biggest joy for me as a blogger,  is 'inspiring ' others by spreading love and positivity via art, crafts, DIY, baking, decor design, and beautiful things! 


How would I describe my blogger image?
It's real.  What you see is what you get. 
I am sharing the creative side of my life with my followers.
 I like to keep the personal stuff away from my blog because Mia Bella Passions is all about sharing what I do day to day. 
It's all about the inspiration, positivity and creativity.

And just in case you were wondering - yes - the grey hair is real! I haven't dyed my hair since age 45.
I love red lipstick!  I love 50s fashion! 
Being an individual is very important to me. 
And being 50 certainly does not stop me rocking what I love!


That's a little of the Mia Bella Passions story...
I hope you'll visit with Katherines Corner  'Between The Line Series' to see the answers to this week's questions from myself and the other fabulous 'over 50' bloggers featured.

Visit HERE

and remember:


The Magic Of The Universe Inspirational...

Quotes
                                                                     
Take time out to:
enjoy the universal beauty that is around us.
Breathe.
Look.
Meditate or Pray.
Resuscitate your soul.


#quotes #quote #dandelion


A Pallet Box Of Pretty Pansies...


Here is a super easy way to pretty up an outdoor table.
Whip up a pallet box.
Paint it.
Attach some plaited rope handle accents.
Upcycle some plastic pots
By spray painting in the colour of your choice.
 Then pop into the painted pots some pretty pansies.
Just the look I adore...
Simple...
Rustic...
and a little bit pretty!
To make the box you, will need to cut the pallet wood into the following lengths:

Base = 2 x wood lengths at 400mm
Sides = 2 x wood lengths at 395mm
Ends = 2 x wood lengths at 175mm
(to convert to inches use an online measurement calculator)

It is a basic build:
Nail one side to each base piece.
Nail the ends in place attaching to side wood
Then nail the base pieces to the end pieces to hold it in shape.
Plait some rope to create a handle for each end.
Staple gun in place.
I haven't ever made a box before and it was simple to do.  
;)

Fabulous for the covered deck mosaic table!


Related Posts Plugin for WordPress, Blogger...