The Pink Bedroom Makeover...and lessons learned by a rookie about wallpapering!

I love pink...but it was time for change.  
Which meant saying goodbye to the pink painted walls in this bedroom.
A trip to the the décor shop, 
and an armful of gorgeous (and rather expensive) wallpaper, I'm good to start!
Or so I thought!
Now this was the first lesson of the pink bedroom makeover.
  • Never - EVER- buy the wallpaper first: thinking 'how hard can it be to you hang it yourself!
The stripping of layers of paint began!
Layers is an understatement!
I remember 28 years ago choosing the prettiest Laura Ashley wallpaper
 to put up on the walls - I even found a little snippet of what that looked like...
Then in the years following the room was updated with layers of mauve paint, 
ragged with pink, became blue, and then lime green.. 
to be returned once more to the glory of pink!
Work that out folks!
wallpaper...
and then...FIVE layers of paint.
Which actually turns into TEN layers of paint with a double coating!
I LOVE stripping wallpaper, I think it is therapeutic, but this was a nightmare!!!!

Here is a little excerpt from an email to a friend:
{ Man I have lived this old house for such a long time!
Thank goodness my daughter is helping me with the stripping.  Horrid job, when you get to the original wallpaper backing paper and old glue.
Therapeutic it is no longer,  and I am already declaring 'never again' and wondering why the heck I thought it was a good idea. LOL
I have decided painting things is much, much easier.  
In fact I think I LOVE PAINT!  (Yip - that wallpaper love affair is officially over!)
And the hallways which were to be wallpapered too are now just going to have a lick of paint to freshen them up.  }

Thank goodness someone whispered in my ear 
  • that adding a large cap of fabric softener to the soaking water helps soften the old glue. (You just soak the wall with it and leave for ten minutes before scraping.)    That's lesson number two! It really works!  I have a moment of happiness!
 Finally after a week of stripping, it was done!
But this is where lesson number three happened.  
If you have an old house with old style plasterboard, get a professional tradesman to advise pre wallpaper preparation requirements.
Best to do this before stripping so you can calculate your costs accurately.
And what happened next was...'
The professional tradesman stayed!
I was shattered from the stripping process...and crying because of the cost.
Which leads to Lesson number Four:
  • Always do your homework and costings before doing any home upgrade, especially if your home is an older style, even if you think it will be easy and cheap to do!
 DO NOT ASSUME ANYTHING!
So my darling Tradesman rescued the situation....
He painted the walls with a special sealer.
(If you are into clean and green and breathing pure air, 
then I can assure you it is best to move out and stay with friends whilst this stage is happening!)
The fumes were nasty even with the French doors open! Two days later:He plastered the gouges and evened up the walls.
When it was dry - he sanded it.
And then....
 Because I had completely given up on the idea of attempting to wallpaper myself:
 The wallpapering table and special pasting machine appeared.
 And just like magic...
Grey and white gorgeousness became a reality!
But because I had pre-bought the wallpaper, we were 1 roll short.
Once again my clever master tradesman resolved the situation,
 matched and cut in a few inconspicuous places, 
which thanks to his skill and my busy pattern you really cannot tell.
So that is lesson number five:
  • Always buy an extra roll of wallpaper.  Especially if you pre buy on sale as I did!  That way you will have a enough to do the job, and for future repairs.
This wallpaper is:


Review of 'The Lessons' for a Wallpaper Rookie:
  1. Never - EVER - buy the wallpaper first, thinking you will be able to hang it yourself!
  2. Add a large cap of fabric softener to warm water to wet walls before stripping.   Leave 10 minutes and then strip.  The softener helps loosen the old glue and makes for an easier stripping process.
  3. If you have an old house with old style plasterboard, get a professional tradesman to advise pre wallpaper preparation requirements BEFORE you buy the wallpaper!
  4. Always do your homework and costings before doing any home upgrade, especially if your home is an older style,  even if you think it will be easy and cheap to do! NEVER EVER MAKE ASSUMPTIONS!
  5. Always buy an extra roll of wallpaper, that way you will have a enough to do the job, and for future repairs.  If you pre buy on sale as I did you may not be able to source more, or acquire it at the same price.
so now it's time for the fun part - 
(the job I should really stick to - décor styling)
It's time to dress the room!


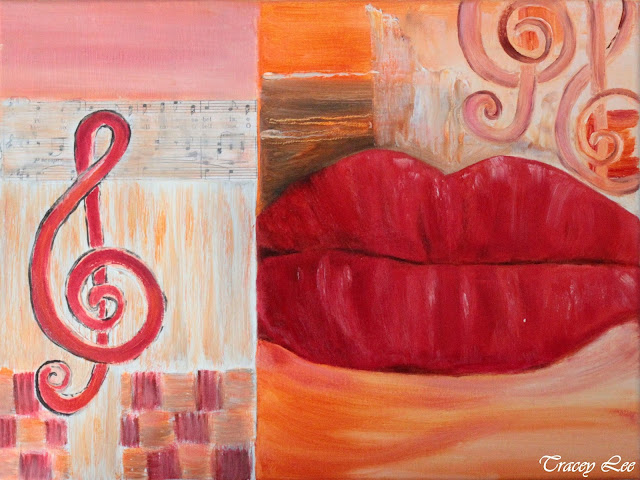
The Sia Series Painting #3


New Zealand Contemporary Artists
You saw a sneek peek of this painting while in progress,   
and here it is finished.
This is painting number three in the Sia series.
(Did I tell you there are eight paintings in this series?)
Sia's album 1000 Forms Of Fear is the inspiration for this painting, 
of whose title has been taken from the lyric line - 'Your Melody's An Art'.
This is in oils on canvas.

Mia Bella Passions DIY, Food and all those other fabulous things will be returning soon.
My time has been so very busy filled with art study, learning new, exciting techniques, and painting, which has given me a much needed blogging holiday.
Sometimes we all need to have a holiday!   :) 
Check in next week for a foodie post...
- it's all about almonds!


The Sia Series Painting #2...


New Zealand Contemporary Artists


Today's viewing from the studio is of painting number two in the Sia series.
Sia's album 1000 Forms Of Fear, 
and her hauntingly beautiful lyrics is the inspiration for this painting, 
of whose title has been taken from the lyric line :- 
'Wash Away All The Things That You Have Taken'.
This abstract is in oils on canvas.


The Sia Series Painting #1

Painting #1 in the Sia Series completed today.
Tracey Lee Cassin
Loving the lime green tones with the purple, mauves and aqua.
Also loving the painterly brush stroke effects.
Sia's album 1000 Forms Of Fear is the inspiration for this painting, 
of whose title has been taken from the lyric line - 'Feel the acid rain'.
It is done in oils on canvas.


Bush Beauty...

The latest from the art studio...
Bush Beauty.
New Zealand Contemporary Artists
Oils with ink detailing on canvas.
LOVING the colours of this piece!
:)


#New Zealand Contemporary Artists


NEW Photographic Images FREE to Print...

JUST FOR YOU...


These images are for personal use only - copyright applies.
Use as a home computer screensaver, for card making, 
to print and frame for your home décor, or for a gift.
 ENJOY!


Your Melody's An Art - Sneek Peek...


A sneek peek of the painting called 'Your Melody's An Art.'
This series of painting was inspired by the lyrics of Sia and her album '1000 Forms of Fear'.


Walnut Peach Meringue Torte...

Walnut Peach Meringue Torte is a scrumptious dessert!
Not only that, it is super easy to create, looks fabulous, and is a great whip it up dessert when you only have a few hours to create something 'special' for unexpected guests, or a pot luck dinner party.
 Prepare your trays. Line two with baking paper and draw a 23cm circle on each.
 Use a plate as a guide.
 Measure 150 grams of toasted walnuts.
If you don't like walnuts - use macadamias, pecans, or almonds.
Chop roughly.
 Beat four egg whites until thick. Add 1 cup caster sugar and whip till thick and glossy.
Add the chopped nuts and whip until combined.
 Place the mixture evenly between the two trays inside the circles.  
Spread out to the edge of the marked circle.
 Bake for 1 hour in a slow oven.  
100-120 Celcius depending on the heat of your oven.
Remove and cool.
 Purée 1 cup of  tinned peaches in a blender. 
Beat 500ml cream with 1 tablespoon icing sugar until thick.  
Add the peach purée and combine.
Sandwich the two meringue circles together with the cream.
 Put more peach cream on top,
Decorate with more tinned peaches.
 Sprinkle with half a cup of finely chopped walnuts....
Chill for an hour and serve cut in wedges.
Click here for the printable recipe:
Walnut Peach Meringue Torte


Mia Bella Passions Blog
 For the latest posts CLICK  :)

#pavalova #meringue #torte #layerdesserts


Funky Upcycled Jersey Cushion...

An old jersey upcycle...
into cushion cover!

Don't you love those gorgeous Aran jerseys...
I found this one at the goodwill shop.
Looking a bit sad - as it was a little grubby, and very out of shape,
it's jersey days long past.
 But once washed, and clean again you can see it's gorgeousness, 
so lovingly hand knitted by someone...
but now it's time for a new life as a cushion cover.
 I unstitched the arms at the seam...
these pieces will be upcycled into boot toppers or leg warmers.
Turn the jersey inside out and place the cushion inner inside.
Pin down each side and across the top (where the jersey neck is).
Remove the inner.
Overlock stitch by machine pinned seams.
Then trim. 
Overlock the cut edge.
You will now have a double overlocked seam.
Stitch across bottom seam leaving an opening. 
 Turn pillow in the right way.
 Fold the cushion inner in half and pop through the hole.
Wiggle to fit into the casing.
Handstitch the hole shut.
Gorgeous!
Soft, fluffy with a little bit of funky texture. 
And only half an hour to make!


#diy #cushion #upcycle 


Have you ever seen the flower of the vanilla bean?

If you have never seen the flower of the vanilla bean, this is it!
Beautiful, orchid like, and oh what a fabulous perfume...
The plant is vine like.
I snapped this variety of vanilla while visiting the island nation of Niue.


Distressed Stamped Décor Pots...


Distressed with white paint, and stamped with cute pictures,
these DIY décor pots, are fabulous for holding bits and bobs.
Or make some for gifts.
 You will need terracotta pots.
I used small sized ones.
All you do is dry brush the pots with white paint.
Dry brushing gives an instant distressed look.
 Use a back and forth motion to brush the paint on.
This brush is really soft and fluffy.
 You can see here that there is not a lot of paint on the brush.
Build up your layers of paint colour until it's to your liking.
Leave to dry.
 Stamping pots is a little bit tricky...
Choose an image that is not too large. Press stamp into black ink.
Make sure the stamp is evenly covered with the ink.
 Roll the stamp as you press it to the shape of the pot.
Practice on a bit of paper that you are holding onto the pot first if you haven't done this before. 
You roll the stamp from the side of the image to the middle and then to the other side while following the curve of the pot using a firm pressure.
Remember - You only get ONE chance to get it right!
 Let ink dry,
then seal pot with a clear coat spray sealer.
Just what I need in the art studio to hold all those bits and pieces.
And so very pretty too!


#distressed #diy #paintedpots #stamping


Related Posts Plugin for WordPress, Blogger...