Banoffee Icecream Tart.....

Now y'all know of my love of SIMPLE and EASY...
well, this dessert is outstandingly simple and easy to create.
Best yet I think!

The Banoffee Ice Cream Tart is a great summer season dessert.
Or a 'Cheer yourself up' treat when you hit the speed bumps in life!

All you do is:
Crush one 250-gram packet of plain biscuits in a food processor.
 Add 100 grams of melted butter.  Combine.

Press the crumb mixture into the base of a 25 cm high side flan dish with a removable bottom. 
(Spray a little cooking oil on it before putting the crumbs in.)
Refrigerate for 10 minutes.
Leave your chosen ice cream to soften for a few minutes.

Place spoonfuls onto the biscuit base.
(I used a milk chocolate chip ice cream from the Cadbury range.)

I used about 3/4 a tub of ice cream to fill the flan.

Press into the flan and even out the top with a spatula so that it is level but you still have about half an inch from the filling to the flan dish top.
Freeze for two hours.
.
Just before serving:
Remove the tart from the freezer.
Leave for about four minutes to soften slightly for ease of removal from the tin.
Spread thick whipped cream over the ice cream layer.
Slice bananas and arrange over the top.
Drizzle with readymade or homemade caramel sauce topping.
Sprinkle with toasted sliced almonds.

Pop out of flan. Slice and serve.

SIMPLE and EASY  - Banoffee Ice Cream Tart.
Dessert deliciousness that will have them raving,
and asking for MORE!
.
.
.
Instructions to copy and paste to print:


Banana Icecream Tart


Ingredients:

250-gram packet of plain biscuits

100 grams of melted butter

3/4 of a 2 Litre tub of ice cream

Thick whipped cream

3 sliced bananas

Ready-made caramel or salted caramel topping

70 grams of oven-dry roasted flaked almonds


Base:

Crush one 250-gram packet of plain biscuits in a food processor.

Add 100 grams of melted butter. Combine.

Press the crumb mixture into the base of a 25 cm high side flan dish with a removable bottom. 

(Spray a little cooking oil on it before putting the crumbs in.)

Refrigerate for 10 minutes.

Leave your chosen ice cream to soften for a few minutes.

Filling:

Place spoonfuls of ice cream onto the biscuit base.

(I used a milk chocolate chip ice cream from the Cadbury range.)

I used about 3/4 a tub of ice cream to fill the flan.

Press into the flan and even out the top with a spatula so that it is level but you still have about half an inch from the filling to the flan dish top.

Freeze for two hours.

Topping:

Just before serving:

Remove tart from the freezer.

Leave about 4 minutes to soften slightly for ease of removal from the tin.

Spread thick whipped cream over the ice cream layer.

Slice bananas and arrange them over the top.

Drizzle with readymade or homemade caramel sauce topping.

Sprinkle with toasted sliced almonds.

Pop-out of flan.

Slice and serve.


The printable recipe is HERE


Note: An ingredient conversion chart can be found HERE


GRAB A COFFEE AND POP OVER TO MY GIFT STORES AT

FINE ART AMERICA

REDBUBBLE

SAATCHI ART


#banoffee #tart #dessert #bananas #caramel


How To Make a No Sew Fabric Pumpkin...

In the Southern hemisphere it is autumn.
Or as the Northern side of the world knows it 'Fall'.
So it's time to put away all the Easter decor, 
and bring in a little rusticness with a Fall theme. 
I wanted some simple pieces for the sideboard display,
and created a cute fabric pumpkin.
Because I have deer antlers to include in the display,
I chose a deer printed fabric.
Size of the fabric depends on how big you want your pumpkin to be.
All you do is:
Make a ball shape with some soft wadding.
Pull a tuft in the centre for the stem.
Put  rubber band on it to help hold it.
Place in the centre of the fabric.
Bring up a corner.
Then the other corners.
Tuck in loose ends.
Put another band at the top to hold it together.
Poof, primp and tuck until you are happy with the pumpkin shape.
Wind twine around the top to make a stem.
Wrap twine around the fabric pumpkin.
And that is it.
You now have a cute fabric pumpkin for your home decor.
These are great fun to make in different sizes and look fab in groups. 
 Also very cool for Halloween decor.


#halloween #craft #pumpkin #fabric


The Little Things...

Inspirational Quotes

Today's photographic quote is a reminder to enjoy the little things...

Have you ever noticed how beautiful a dahlia flower really is?


Thyme In A Teapot...


Fresh herbs in the kitchen are a must have...
So convenient and so useful.
Thyme is a herb I seem to use a lot of.
And as I was giving my indoor potted herbs 
(Visit that post here:  Potted fresh herbs in kitchen...)

a break from being indoors and outside in the sun,
I thought a single thyme plant would suffice until the other herbs returned to the sunny kitchen corner.

 This is Grandma's teapot...
I LOVE it because it is shiny and black!
How funky is that?
Not used for tea as it is a notoriously bad pourer!

It is often used as a vase or in decor displays, 
but I thought why not pop a thyme plant in it.

 So that is exactly what I did.
And that thyme simply LOVES the sunny kitchen corner, 
as it is growing as fast as I can use it.
There is nothing like fresh herbs near at hand for adding to home cooking.
And I love the way they look in the kitchen decor!


Make A Wish....


make a wish quote

A new free printable inspirational...
(as always, for personal use only - save as to your computer)


#quote #quotes #wishquote


How to Paint Robins Eggs...


Let's make Robin eggs using small plastic eggs
to put inside a found bird nest.
These eggs are from the $2 store.
 Poke a skewer through the hole in the bottom of the eggs,
 and then put this into a piece of florist foam.
This make's them much easier to paint.
 In a dish place a dob of white acrylic artists paint, 
and a dob of Cobalt Turquoise Light Artists paint.
 Mix together so that you have a lovely blue colour.
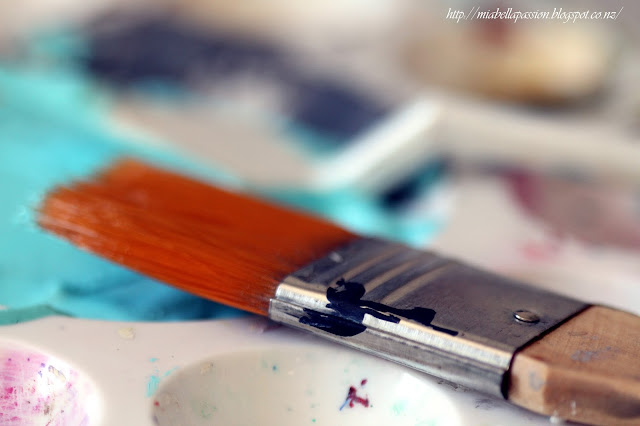
 Use a large brush like this...
 And paint the blue onto the eggs.
 Leave to dry and the give them a second coat.
Once dry, you can give them a very light sand with fine sanding paper to smooth.
 Place a dob of bronze acrylic paint on the dish.
 Mix with water like this.
You will need a firm bristle brush.
Dip into the paint...
Then flick onto the eggs.
I used mine to put into a bird nest that I found.
The nest is sitting in a pottery bowl which is also in the aqua hues.
I added a rabbit
and a candle, 
for a lovely Easter vignette on the white shabby sideboard.


#easter #paintedeggs


DIY ART - Super Easy Faux Solar Leaf print...


This is a DIY art piece that is reminiscent of Solar art.
Solar Art is created by using a special light sensitive paper, 
laying objects on it and leaving it in the sun to create an artistic image.
I've made my faux version using art paper, plastic leaves and spray paint!
Place and tape three large piece of art paper on a plastic sheet.
Separate the leaves from the stems using wire cutters.
Do the 2 to 3 minute shake it dance with your can of spray paint. 
This ensures the paint is well mixed.
Place your leaves onto the paper.
Spray with the paint.
You are not looking for perfect coverage.
It does not matter if the spray goes under the leaves a bit.
Because this is what you want.
As it gives that blurred solar art effect!
Leave the paintings to dry.
To frame:
I used a multi panel frame.
So I cut each leaf out and placed on different angles on the grid.
Arrange as you desire and tape the mini paintings in place at the back.
Place back in the frame and hang.
You could also frame these in a set of matching frames
 to display as a set of three, four or six.
I have photoshopped this image so you can see what it would look like
 if using a darker grey or black paint.

But I prefer my pale grey version as it fits well with the main bathroom colours.
Subtle and pretty.
I'm chuffed with how it turned out, 
and believe it is the quickest artwork I have ever created!


#diy #artwork #create


Related Posts Plugin for WordPress, Blogger...