Dining Table Décor - An Olive Tree In A Pot...

I have seen the potted olive tree idea so often...and I LOVE IT!
Large trees in wicker baskets in lounges, in large pottery urns on porches, 
and small trees on dining tables, or on kitchen bench tops.
It took quite some time to locate the perfect olive tree for this project,
most were at least two metres tall...
just a little large for the table top decorating idea!
But once found, my 60 cm tall olive tree,
 was root-pruned and potted into a new plastic pot, 
Baby Tears covers the soil in the pot.
Which was then placed inside a lovely French pressed metal display pot.
Then a with a few snips of the secateurs, the tree was shaped into a standard.
The dining table runner was updated with this newly made one in neutral grey stripes.
(And yes the table and chairs are on the paint and distress 'To do list'.  :) )
This runner is just a strip of remnant fabric, overlocked and hemmed on all four sides.
For another Mia Bella Passions super easy to make table runner, click the link here:
DIY Table Runner Instructions
It is so nice to make a few simple changes to a room that will instantly give a fresh new look to your décor.
All you need to do is rearrange , move a few things to new places, 
add a new table runner, potted plants or vases of flowers....
What I did is: clear the clutter,
(amazing how piles of papers, and things do appear over time),
added a new dining table runner and the potted olive tree...
It now looks fresh and FABULOUS!!!
So while we are in the dining room, I'll show you around...
This room is the centre hub,
with the TV Room, Kitchen and sitting room all connecting to it.
It's not big, but the flow is good.
 There are two china cabinets in the dining room.
This is the large one.
The vignettes on top  are always changing.
There's an antique heirloom chair  
(Must do up one day!)
That's the a peek at the dining room...
now rocking a potted olive tree.
   :)
Are you inspired to freshen up your dining room?


#olivetree #potplants


How to store walnuts...


The walnut grove in Mia Bella Gardens is having a well earned winter rest...
 And this year there's been a bumper crop of nuts.
 Keeping nuts fresh for any length of time is always difficult, 
because more often than not they will turn rancid and become inedible .
 I love to have walnuts readily available for baking,
 so I thought I would share how I store them.
 I find the easiest way is to freeze them.
And all I do is put the shelled nuts into small freezer bags, and pop them in the freezer.

Then you pull out the quantity needed. Thaw then use. 
Freezer life of the walnuts is one year.


#walnuts #howtofreezewalnuts


Maple Syrup Butter Cookies...


I am loving these cute biscuits...
not only do they look good they taste amazing.
Kind of like a melting moment biscuit but with a maple syrup flavour.
 I have this cool vintage biscuit maker.  There are about four different patterns...
but for these biscuits I chose a daisy flower.
 The biscuit maker pops out the cutest daintiest biscuits.
It is such a fun device to use.

Maple Syrup Butter Kisses

Preheat oven to 180 degrees Celsius.
Line two oven trays with baking paper.

Cream 125 grams butter, 1 teaspoon vanilla essence or paste and 1/2 cup maple syrup.
When creamy and pale add 2 cups plain flour and 1 cup cornflour that has been pre-sifted.
Roll into small balls and flatten with a fork,
or place mixture into a biscuit making device and press out biscuits.
Bake for about 15 minutes until a pale golden colour.
Remove from oven and cool.

When cold,  join biscuits with maple icing:
Cream 50 grams soft butter, 3 tablespoons maple syrup and  1 1/2 cups icing sugar.

yield is about 32 biscuits (not joined.) 

I think it's time for afternoon tea   :)


Photo Inspiration - BE YOU...


Sharing some photo inspiration...
Such a strong message and so empowering.
Be true to yourself.

BE YOU - the world will adjust.

Free to copy, print, pop in a frame, use in card making or canvas art for your home décor
- for personal use only.


DIY Strawberry Planter With Measurements...

Finally I have the DIY Strawberry planter measurements for those who which to build it.
Mia Bella Gardens original DIY Strawberry Planter was made from a photograph off Pinterest.
 This had no links to the original maker, whom I have never managed to track down, 
and therefore there was no plan.
It was a guess the measurements from the picture situation.
But it worked out really well!
As ya all want the measurements I used - here they are:
You will have to use the pictures as a guide to building it, 
as it has no step by step photographic tutorial, :(
This was made long before I started to do the tutorial thing.


Above is the original picture from Pinterest and I have added the measurements to it.
I'm not a professional builder so I hope this all makes sense.
 Use the first photograph as a guide and adjust measurements if necessary. 
You can see the  end caps on the original picture above are not even so I changed that on my version.
Concrete with Quick mix fast set concrete the two long posts into the ground. 
 When set attach the 1300x 45mm lengths.
Then the ends. 
Put in the centre supports.
The rectangle planters should sit nicely in the gaps.
You will need six planters.
The lip of the planter needs to sit on the wood edge.

Then plant with strawberries (or herbs).


Persimmon & Apricot Pudding Cake...

 Moist and full of fruit,
with a hint of spice...
Meet - Persimmon Apricot Pudding Cake.
 Reminiscent of steamed pudding...but baked in the oven.
This dessert cake is simply delicious!
And did I mention moist?
 Serve with vanilla ice cream and slivers of persimmon....

Persimmon & Apricot Pudding Cake...

Preheat oven to 190 degrees Celsius
Grease a 13 x 9 inch glass baking pan.

Into a bowl sift:
 2 cups plain flour
1 Tablespoon baking soda, 1/2 teaspoon salt, and 1 teaspoon ground cinnamon. 

Peel, dice 6 - 8 persimmons to make up 2 cups, and cook in microwave until soft. 
Mash with a potato masher.
Add 50 grams of butter and stir through hot mash until melted. 
Add 3/4 cup finely diced dried apricots, 
1 cup white sugar, 1 cup packed brown sugar and 1 teaspoon vanilla essence.  
Mix then fold in 3 lightly beaten eggs (Number 6 size)
Add sifted flours - mix well. 
Place in greased pan.  

Bake 45 to 55 minutes until skewer comes out clean.
If it browns to quickly on top place a foil cover over top of pan.
Cool.
Serve warm with ice cream or cream. 

What are you waiting for?
Let's eat...
And then finish with a fruit tea.


The Beauty Of Flowers - PINK...

 The beauty of flowers - PINK (with a teeny hint of yellow... )
Do you gather inspiration from nature when you decorate you home?
Pink orchids with yellow in the throats...
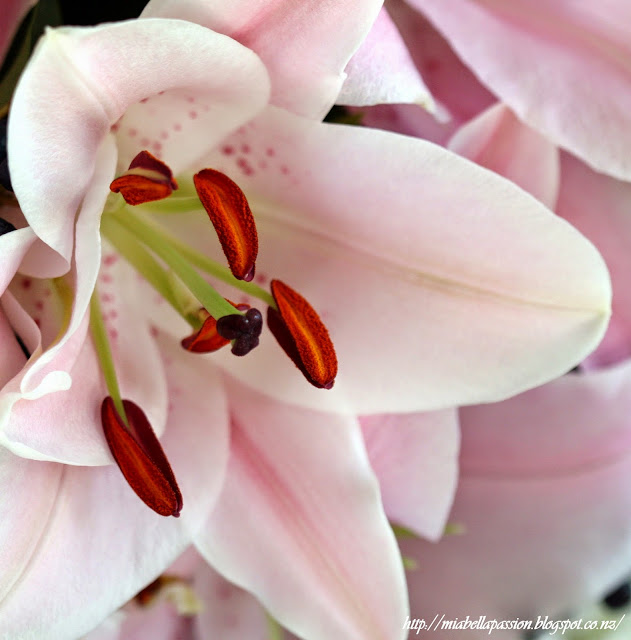
The centre furl of an Asiatic lilly..
Ahhhh....pink love.
A garden flower posy for gifting....
Pink rose love...
Hydrangea's in shades of pink
With tiny blue pinhead centres...
And a beautiful lily to end 'The Beauty Of Flowers - PINK'  photo story.


Potted Fresh Herbs In The Kitchen....


Do you have space for a kitchen herb garden...on your bench top?
 This awkward corner space in the Mia Bella kitchen is a perfect spot...
for potted thyme, oregano, parsley and chives.
 With lovely bright morning sun, the pots are happy to stay in place for the entire summer.
 Add a jug of hydroponic lettuces (roots intact and sitting in water)...
for fresh picked lettuce for the sandwiches.
Add a vase of pretty blooms...
 Like these crisp white paper whites, with their glorious scent!
 And you have a beautiful kitchen vignette.
During the winter months as it is now in New Zealand, 
 the growth of the plants has slowed
and the pots need a little time in the sunshine outdoors.
Southern Hemisphere temperatures mean you can pop them outside for a week,'
then bring them in again.
(I do this 2 or 3 times over the winter, especially when we have a rainy weather week.)
I've had my kitchen herb garden on the bench top for over a year now...
and I LOVE the convenience, and the look of it!


Related Posts Plugin for WordPress, Blogger...