Showing posts with label Flowers & Plants. Show all posts

DIY Christmas Gift: Coconut Succulent Hanging Planters


Coconut Succulent Hanging Planters
There is a certain joy in creating your own gifts for giving.

So here is a little DIY Christmas gift inspiration for you.

Coconut Succulent Hangers are a little bit quirky.

A  little bit cute.

They are fabulous for giving this holiday season.

(Or for birthdays, house warming, Mothers day or Fathers Day)

To make two hangers, you will need:

Two small coconuts that have had top 1/4 sawn off and scraped clean of the coconut flesh.

String

Potting mix

Succulents

Succulent plants (cuttings will work fine)

Coconut Hanging Planters

Cut six lengths of string about 53 inches (135cm) long.

Coconut Hanging Planters

Gather three together, fold in half and knot at loop for the hanger at the top.

Coconut Hanging Planters

Then knot 3 inches (8cm) down two strings together.

Coconut Hanging Planters

Then again at 4 inches (10cm) down.

Coconut Hanging Planters

Knot again 4 inches (10cm) down, but split the strings. As shown.

This makes the holder shape for the coconut shell.

Coconut Hanging Planters

Then split knot again about 2 1/2 inches (7cm) down.

Coconut Hanging Planters

Place the coconut shell in place.

Knot all the strings together under the coconut.

Trim ends of the string.

Coconut Hanging Planters

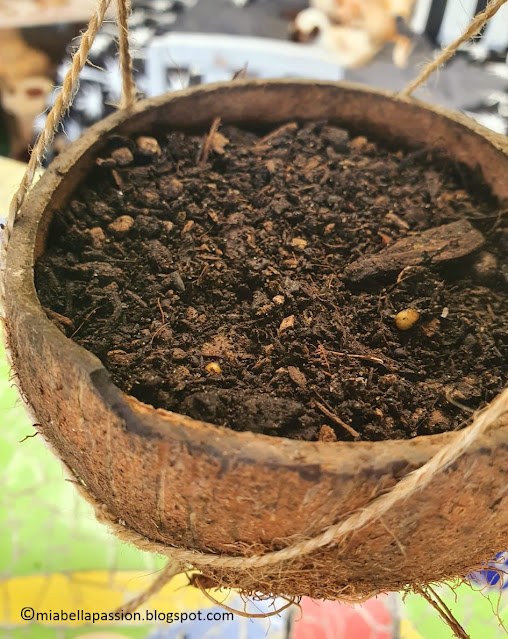
Fill each coconut with potting mix and add water until damp.

Place the succulent cuttings into the potting mix.

Coconut Succulent Hanging Planters

Hang.

I have hung mine under the candle chandelier over my covered deck mosaic table.

Coconut Hanging Planters

Note: There are no drainage holes in the shell, 

so only water when the soil has dried out.

You might also be interested in:

The DIY Seascape  Pallet Painting

(step by step tutorial)

and

The outdoor candelabra DIY


#homemadegifts #diychristmasgifts #DIY


A peek at Mia Bella Passions Garden

Life has been so very busy,

and my next crafty DIY just has not been created.

So instead of a craft tutorial,

(I'll save that for the next post).

I'm just going to show you a snippet of my back of the house garden.

I adore this time of the year.

New growth over spring and now into early summer.

Lush greens.

New annuals heading up for display.

And the rhododendron in full bloom.

This back garden is my favourite place to be.

Enjoy your peek. 


Echeveria sp. 'Green Waterlily'...❥


Let me introduce you to this FABULOUS succulent plant.
It is called 'Green Waterlily' and is from the Echeveria species.
I simply adore the shape of this plant.
It resembles a waterlily, hence its name.
This beautiful succulent forms a compact large rosette.
The leaves are mid green with the tips tinged with pink.
It really is a beautiful addition to pots.
And that is exactly what I have done with it...


planted it in a low squat pot...


 for on the summer outdoor table.

The Green Waterlily is a low maintenance plant that tolerates dry conditions.
All you need to do to keep it healthy is a once-yearly fertilise with slow release type fertiliser.
Water only water once the soil is dry.
Keep in a full sun location and protect it from frosts.

And your happy Echeveria will reward you with interesting spikes of flowers in Spring.


#echeveria #succulents #pottedplants  #droughtresistant


Succulent Love...❥


I just can't resist succulents...
The form of them is so interesting.
While visiting the Garden Centre for a Sunday BROWSE (As YOU Do!)
I came across a little Sempervivum.
I love, love, love the dark-tipped grey-green leaves.
It will look amazing when it eventually grows into its mat-forming form.
And even as a single rosette, I think it's amazing!

But meanwhile, as it's still a baby, 
I am going to place it in a grey green pot for my home office deck table.
This pot is a perfect match to the leaf colour of this Sempervivum.
Then when I take my work coffee breaks I can enjoy it,
while sitting in the sun.

Sempervivum
Sempervivum Tect.Calceraum will as all succulents grow new plants from a leaf section planted into seed raising mix.
This plant requires a full sun position and will need protection from frosts.
It grows into a many head mat with a height of 10cm.
Not only great in a pot, but also in a rockery garden, or a garden border edge.


Plant sourced from Mitre 10 Garden Centre.
Plant pot by Lifestyle Homewares.


#Sempervivum #succulents


Pickle Plant...❥


succulents
Well, ain't this just the cutest little succulent plant?

succulents
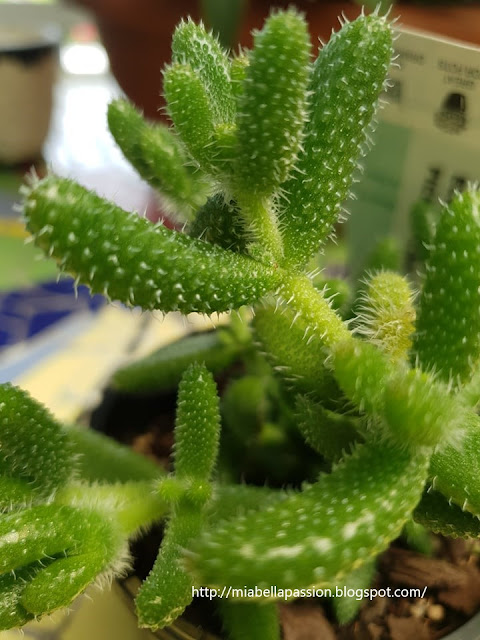
It's called a pickle plant.
because of its cute pickle like resemblance.
The official Latin name is Delosperma Echinatum.
Succulents are so easy to grow.
You just need the right conditions for them.  This one LOVES full sun.
And it is great for pots.

succulents
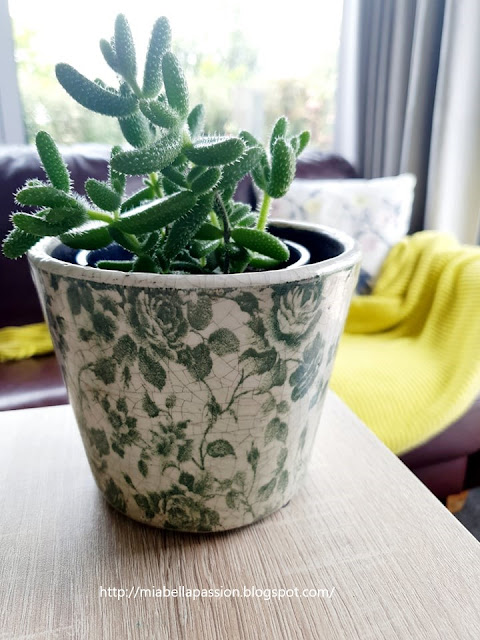
I found this little pot in the Garden Centre too.
So pretty with a gorgeous green decoupage effect on its glaze.

succulents
I'm placing this cutie now planted,
 on the corner of my office desk as it gets a lot of sunshine there.
Then eventually I will move it outside onto the little office deck!


succulents
Like all succulents, this will be easy to propagate...
by planting a fleshy pickle into a little soil to eventually grow a new plant.


Delosperma Echinatum.
Check out the cute yellow flower bud!

Delosperma Echinatum.
Which became this cute little flower!

Plant sourced from Mitre 10 Garden Centre.
Plant Pot By CC Interiors NZ.


#succulents 


Hippeastrum Plant ❥

Hippeastrum
I remember seeing this plant when I was just a teenager when I visited my cousins' house.
And I fell in love with it.
A leafless elegant long stem.
With flowers on top.
The most amazing flowers!
So when I saw this one - I had to have it!
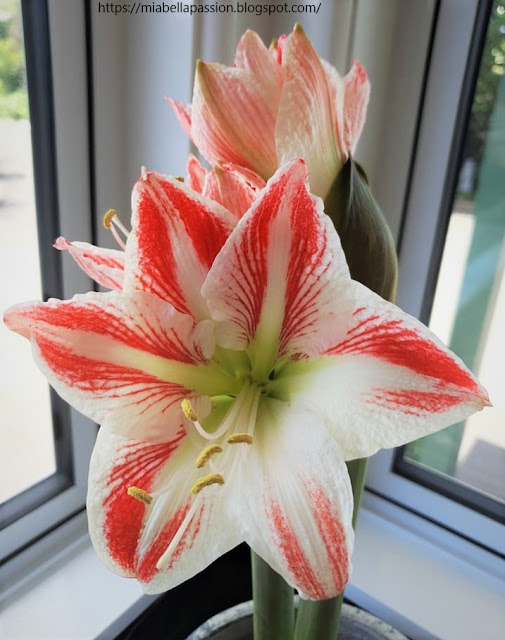
White and red with peach cream undertones.
It really is a stunner.

Hippeastrum
What joy it brought to my kitchen...

Hippeastrum
As day by day, I watched the blooms open.

Hippeastrum
'Hippeastrums'  are from the Amarilys family.
And there are many, many colours available.
The flower heads can be from 13 to 20cm in size.
They are funnel-shaped but do come in double forms.

To grow: 
  •   Place in bright light with some sun for part of the day.

        (I grew mine on my kitchen bench which has morning sun and bright light for the rest of the day).
  •    When actively growing/flowering, aim to keep the soil moist most of the time.


After Flowering:
  • Cut the spent flower spikes to the base, but keep the leaves growing by watering when the bulb soil is dry.
  • Place bulbs in the pots outside or in a greenhouse or covered patio during the hot summer months.
  •   Only fertilise every 2 weeks while leaves are growing.
  • Keep in a 10 to 13-degree temperature will in its rest period after leaves die back.
  •   Do not water while dormant.
  •   Don't let bulb sit in water as this will cause the bulb to rot.
  •   Do not repot unless the potting medium has broken down, or the plant produces offsets.
  •  Baby offset bulbs take 2 to 3 years to flower.
  •  The plant nor bulb like frost or cold.


Here's a little advice from a grower who has had her 'Hippy' for 26 years!

My amaryllis bulb is about 26 years old and blooms twice every year without fail. I have it in an east-facing window, and I water it as and when I remember! I feed it with Gro-more twice a year as the main stalk starts to show (only adding to one watering each blossoming time). I honestly do not pamper this bulb, never take it out of the window (even in winter but central heating usually keeps the house at about 20 degrees), forget to water regularly (sometimes the leaves start to droop a little) and yet it still gives me 2 beautiful displays every year. The bulb has almost filled the pot for the last 6 years, so I took it from the pot 6 weeks ago, cut back the roots (there was very little soil left anymore) and put some new soil in. I thought I had killed it but it is proudly showing 4 deep red blooms on the stalk. I do strip off the dead 'skins' on the bulb when it gets very flaky - a gentle pull brings most of it off. 


#hippeastrum #floweringpotplant

.


.


Hanging Succulent Plant....❥

Are you like me?
Do you have a habit of killing the plants in your hanging baskets?  
Try as I might I simply cannot remember to water them.
And that is why I am choosing succulents for my covered deck hanging baskets.

I found this sweet plant at 'Bunnings Garden Centre'.

It's called 'Rhipsalis Cereuscula'.
And isn't it dinky?
Great form.
Great green colour.
Great no kill properties!
The plant was $15.
I already had the hanging basket planter from a previous unsuccessful flower planting.
I freshened up the potting mix and popped this green beauty into the basket. 

As it gets older it will grow new hanging jointed leaf spikes that are shaped like rice.
They will hang down over the sides.
In the Spring this interesting hanging succulent plant produces white to pink satiny flowers.

The secret to growing this plant is to keep it dry in the winter. 
Protect it from frost.
It prefers warm conditions, but I have had mine on my covered deck all winter in the afternoon sun, and it has not minded the coldest mornings of 2 degrees at all.
The recommended position is in the full sun to part shade.
In fact, it is sprouting new growth!


And the little white flowers in Spring are just the cutest!

DIY kokedama
 'Rhipsalis Cereuscula' is also a perfect plant to use with the kokedama no pot technique.
Find out how to make a DIY Kokedama HERE.


#succulents #hangingsucculents #hangingbasketplants #droughtresistantplants


https://track.roeye.co.nz/click?pid=880&offer_id=375


Kokedama Christmas Tree...


For something completely untraditional,
a kokedama tree is a  perfect choice for Christmas.
Kokedama in English literally means moss-covered ball.
And this is the technique used to create Kokedama.
The idea originated in Japan.
It's a combination of nearai (meaning no pot) and the kusamono planting style.
(The tree used here is Robina pseudoacacia 'Lace Lady')

To create your own Kokedama 
You will need:
 A sludge mix of potting mix and water.

Soaked sphagnum moss.

A Plant That has been removed from it's pot.
Then:
Loosen and trim the root ball.
Covered it in the wet mix, and then in a thick layer of sphagnum moss.
Wind natural rope fibre around the ball until the moss is mostly covered.
tie a knot.

Wind rope around and around...

Until the moss is mostly covered and it is firm.
Soak root ball in a container of water until the air bubbles stop.
(this is also how you water Kokedama plants once established.
Drain off excess water.
Place on a waterproof tray.
DIY Kokedama
Pot plants are great fun to kokedama.
Here is one we made using 'Rhipsalis Cereuscula'.
DIY kokedama
A kokedama plant will last 2 to 3 years.
It's a great diy to create.
Fun, and a unique gift too.

Kokedama is a great way to create a modern Christmas tree statement as we have done.
The tree we made this year will move outdoors onto the deck once the Christmas season is over, so we can still enjoy it.


#kokedama #diyplanters


GRAB A COFFEE AND POP OVER TO MY GIFT STORES AT

FINE ART AMERICA

REDBUBBLE

SAATCHI ART


Related Posts Plugin for WordPress, Blogger...