Showing posts with label Halloween. Show all posts

Ghost Cake & Icecream Cone Toppers...

Spooky cute seems to be the thing for my Halloween preparations this year.
With more little ghosts.

These ones are the edible kind.
Made from meringue, 
these guys are perfect as a cake topper or ice cream cone topper.
They really are not difficult to make.
You will need meringue.
For the printable meringue recipe click HERE.

Note cooking time differs from what's stated in the recipe.
The Ghosts need to be baked at 100 degrees Celsius for 40 minutes.

Once the meringue is whipped up, 
 onto a baking paper lined tray, 
pipe spirals - large to small with a peak.
You decide the size.
Ice cream topper = smaller
Cake topper = bigger

No icing tip is needed. 
Just a plastic bag filled with meringue that has had the corner cut off.
Once baked and cold.
Pipe dots for eyes using black icing.
Store in an airtight container until needed.

Top your favourite cake, or your cone of ice cream with a spooky cute meringue ghost.

Or pop them on a cake stand and eat as is.

MORE HALLOWEEN IDEAS & PRINTABLES HERE

#halloween #baking #caketopper #meringue #ghosts


Driftwood Ghost Halloween Banner....

The Halloween sideboard display is coming together nicely...
But I needed a banner for the background wall.
Just something small but a little spooky.
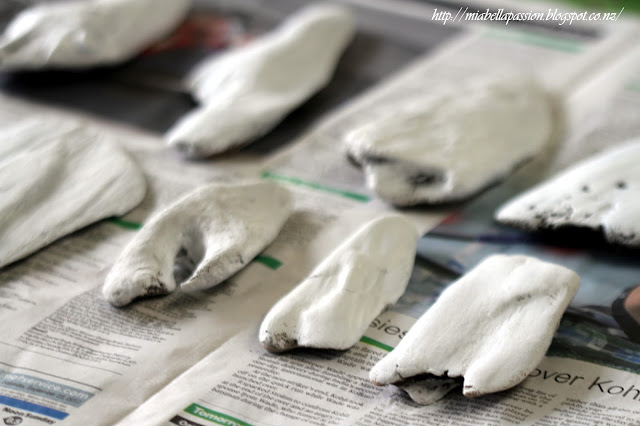
So I went to the beach and collected some flat ghost shaped pieces of driftwood.


Then got out my trusty chalk paint ...

 and gave the fronts a coat of white.

Next some ghostly eyes and mouth using a permanent marker pen.
I'm not sure these are very spooky as they are kinda cute!

To make the banner I hot glued the backside of the driftwood pieces along the string.

And hung it up.

How easy to create.
And a fun activity to do with the kids pre-Halloween.


#halloween #craft #driftwood #ghosts


Halloween 'Goodie' Jars - upcycled of course! ❥

I'm sure you must have some jars or glass containers hiding away in the back of the cupboard.


Just like the ones that were upcycled into these fab 'Goodie' jars for halloween.

These jars were part of my endless AQUA collection,
and they were destined for the goodwill store.
But then I came up with this cool idea to 'Halloween' them to use on my 'Halloween' sideboard vignette.

All I did was spray the glass jars with bright orange paint.
I let the paint drip down in places for effect.

And then I let them dry for a week...
Don't they look pretty?

 The next step was to make a label.
I used dollar store gift tag labels.

 Then painted them black on both sides.

 I'm not the best calligrapher so wanted an easy option for writing.
That was stick on letters in gold.

 I chose the words 'Boo' and 'Treat'...

Here are the jars all finished and ready to fill with treats.
Call back soon for the next creation I'll be making for the "Halloween' display.


#spraypaint #upcycling #orange #jars #makeover #diy #Halloween


How To Make a No Sew Fabric Pumpkin...

In the Southern hemisphere it is autumn.
Or as the Northern side of the world knows it 'Fall'.
So it's time to put away all the Easter decor, 
and bring in a little rusticness with a Fall theme. 
I wanted some simple pieces for the sideboard display,
and created a cute fabric pumpkin.
Because I have deer antlers to include in the display,
I chose a deer printed fabric.
Size of the fabric depends on how big you want your pumpkin to be.
All you do is:
Make a ball shape with some soft wadding.
Pull a tuft in the centre for the stem.
Put  rubber band on it to help hold it.
Place in the centre of the fabric.
Bring up a corner.
Then the other corners.
Tuck in loose ends.
Put another band at the top to hold it together.
Poof, primp and tuck until you are happy with the pumpkin shape.
Wind twine around the top to make a stem.
Wrap twine around the fabric pumpkin.
And that is it.
You now have a cute fabric pumpkin for your home decor.
These are great fun to make in different sizes and look fab in groups. 
 Also very cool for Halloween decor.


#halloween #craft #pumpkin #fabric


Related Posts Plugin for WordPress, Blogger...