Showing posts with label Yummy Stuff. Show all posts

Avocado Chocolate Bites...

Just THREE ingredients...
and
SUPER EASY to whip up.
If you adore AVOCADO,
Then you will adore these 'Avocado Chocolate Bites'!

All you do is:

Mash half an avocado.

                     
I chopped the Avo...
and blitzed it in the Nutri.bullet!

Avocado Chocolate Bites
MELT 1/2 cup of dark chocolate (the darker the better!)
ADD mashed avocado and mix.
Chill for a few minutes in the refrigerator until you can roll into bite-size balls.

        
                   And then finish them off with a roll around in Dark cocoa powder.
   Keep stored in the refrigerator in a sealed container.
Avocado Chocolate Bites
An Avocado lovers health treat!


Printable recipe HERE


#healthytreats #healthysweets


Valentines Dippy Treats...❥

Kids Party Food
Valentine's Dippy Treats are elegant, light, textured Corinthians that have been dipped in melted white chocolate and sprinkled with pretty 'sprinkles'.
I mean who does not like wafer biscuits?
And sprinkles?
And chocolate?

And crisp wafer biscuits with a yummy strawberry filling?

I'm not doing a recipe link because they are so EASY to whip up.
The kids LOVE making them!
All you do is:
Melt chocolate (using the microwave or over hot water technique)
Dip the wafers in it.
Place on a tray that has been lined with baking paper.
Sprinkle with 'sprinkles'.
Then place in the refrigerator to set.

And you know what?
If you don't like white chocolate, 
change up the dip to dark or milk chocolate.
And red and white themed 'sprinkles'.
You can also change the strawberry wafer biscuits to chocolate or vanilla.
Also tubes to rectangles.
Rectangles dip just as nicely.

Valentines Day Treats
 Keep in the refrigerator until serving as they are so tasty good COLD!
Valentine's Dippy Treats are also great for parties - adults and kids will LOVE them!

Note: An ingredient conversion chart can be found HERE


GRAB A COFFEE AND POP OVER TO MY GIFT STORES AT

FINE ART AMERICA

REDBUBBLE

SAATCHI ART


#valentinesday #Kidspartyfood


Marshmallow Slice...

Marshmallow
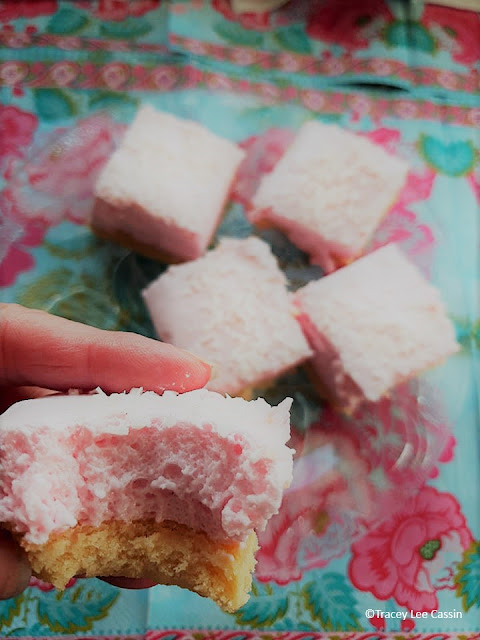
Mmmmm, a buttery base with a thick marshmallow topping.
I remember my mother making this slice often.  
But she did it the hard way...
with gelatin or jelly.
And we beat and beat that mixture using hand beaters.
For what seemed like hours to my young mind, 
until the topping turned pale pink and creamy.
But I discovered a super-easy way to make the marshmallow topping.
Using MARSHMALLOWS!
You do need an electric beater to create it quickly.
10 minutes is all you need.
And then you pile it on the prebaked cooled shortcake base.
Leave to set.
And then cut into squares.

Marshmallow
It is so delicious.
 Fluffy.
And not too sweet.

Marshmallow
Try it.
 Bake it with the kids.
It will become a family favourite.


Marshmallow
Or serve it on Valentine's Day as a treat - 
just top with a berry jus, berries (from a  can or fresh),
 and a dollop of cream or ice cream (or both).

You'll find the recipe HERE

or copy and Paste the recipe:

Marshmallow Slice

For the Base:
125 grams of soft butter
1 cup of white sugar
1 egg
1 teaspoon of vanilla essence
1 cup of sifted self-raising flour
Beat the butter, sugar and vanilla until pale and creamy.
Mix in the sifted flour
With clean floured fingers, press the mixture into a greased 20 x 30cm slice pan that has been lined with baking paper that has come up the sides by at least 2 inches.
(you will need this height for the marshmallow topping stage.
Bake at 180 degrees for 20 minutes and cool completely.

Marshmallow Topping:
In a pot place 1/2 a cup of water.
Add 1 packet (520 grams) f pink and white marshmallows
(I used the Pascall Big Softie Brand)
Heat over medium heat stirring until the marshmallows melt.
Set aside to cool.
Place the marshmallow mixture in the bowl of an electric cake mixer.
Beat slowly at first, and then increase the speed as it thickens.
Beat for at least 10 minutes.
When the marshmallow mixture is thick. pale and creamy pile on top of the cooled, cooked base.
Sprinkle with coconut.
Refrigerate until set.
Cut into squares.
Keep in an airtight container in the refrigerator.


Help with ingredient conversion here.
.

Grab a cuppa, and visit

 my Fine Art America gift store

:)


#marshmallow #homebaking #slices #sweettreats
#sweetslices #homebaking #baked


Snow Fudge with Cranberries...

 Christmas Fudge 
SNOW FUDGE WITH CRANBERRIES
Now that is what I call the taste of Christmas!

Christmas Fudge
And talking about NOW - it is the perfect time of year to make fudge.
(Actually when is not a good time of year to make fudge?)

This fudge has a completely KISS status!
(KISS = keep it simple stupid)
It is SO EASY to whip up.
Sets QUICKLY.
And a go-to recipe for Christmas 'Bring A Plate' functions and parties.
In fact a go-to recipe for any party in any season!


All you do is:
Prepare a slice tray by lining it with baking paper
Place 3 x 290-gram packets of white chocolate 
(I used Nestle White Chocolate Melts)
into a microwave-proof bowl
(I used glass)
Add 1 x 395 gram tin of condensed milk.
Mix.
Microwave for one minute.
Remove from microwave and stir smooth.
Microwave another 20 seconds if a little more melt time is required.
Add 2 teaspoons of vanilla bean extract with seeds.
And 150 grams of dried cranberries.


Mix quickly and put into slice tray.
Refrigerate till set.
Cut into pieces when set.
Store in an airtight container.

Christmas Fudge
This Fudge is superb for gifting as it is not sticky.
Therefore you can put in little cello bags or decorated boxes to give.
Homemade always hits the heart with those feel good vibes more than a storebought gift!

Christmas Fudge
You will make more than one batch - I guarantee you!


Note: An ingredient conversion chart can be found HERE


GRAB A COFFEE AND POP OVER TO MY GIFT STORES AT

FINE ART AMERICA

REDBUBBLE

SAATCHI ART


#christmas #christmasgiftstobake


Berry Semifreddo Icecream...


Homemade Berry Icecream
Berry Semifreddo Icecream is exceptionally easy to make!
A perfect treat for using berries fresh or frozen.

Homemade Berry Icecream
Step one: You will need to make a berry puree.
I used 1 1/2 cups of frozen berries - raspberry and blueberry.
To this you add 1/4 cup caster sugar and a tablespoon of lemon juice.
Heat in a saucepan over low heat until berries become pulp like.  Set aside to cool.

Step Two:  Puree the pulp.
I used my Magic Bullet to do this.

This Nutr.Bullet is seriously the best small appliance I have in my kitchen.
I used it for making sauces, smoothies, and milkshakes.
I'm big on making pure fruit healthy smoothies!

Homemade Berry Icecream
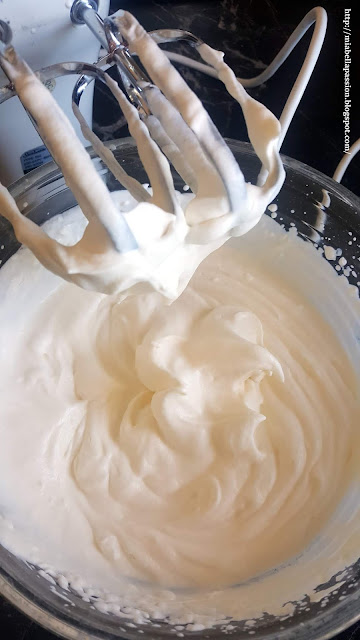
 Step Three: Whip 300 ml of pure cream with 1/4 cup sugar.
Step Four:  Whip till peaks form 2 egg whites.
Fold into cream.

 Step Five:  Fold 150 ml of natural sweetened yoghurt into the whipped cream mixture.
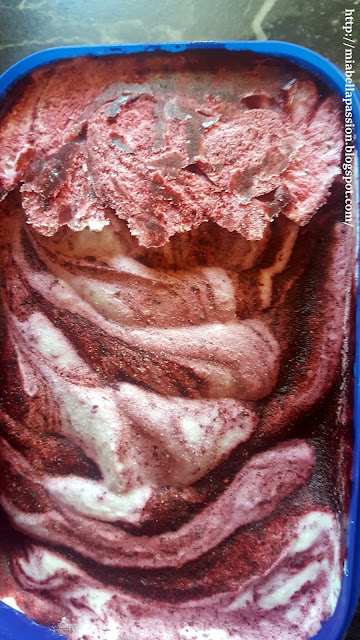
Then swirl through half of the berry puree.

Homemade Berry Icecream
      Place it in a small tub.

 The last step is to use a knife to swirl the remaining berry puree through the icecream.

Homemade Berry Icecream
Cover and freeze.

Homemade Berry Icecream
 Semifreddo is much more of an icy texture than icecream.
But is so refreshing on a summers day.
To serve:  Remove from freezer and let thaw for five minutes.  Use a metal Icecream scoop that has been heated in hot water.  Roll balls and serve with fresh or tinned berries or a berry compote sauce.

Berry delishishness...
Not a real word but you'll know what I mean!
Put it on your must-try list when your summer season arrives!

The printable recipe is HERE.

#icecream #homemade #berry #dessert


FUN Christmas Ice Cream Cake...

What a fun Christmas foodie activity.

Chirstmascake
 Believe me, you will be laughing so much doing this!

Take one pre-prepared ice cream cake.

A tray full of edible decorations.


Take turns adding something to the cake.
You will be laughing and shouting things like...
Quick it's melting...
oh no my candy cane has fallen over... 
hurry up, hurry up...
noooo the creams lost its fluff...
it won't stand up...
quickly get the sprinkles!
When we created our cake we simply laughed ourselves silly!

Once it's all pretty and Christmasy devour it!

Now that is what you call perfect fun for the foodies!

To prepare cake:
Use a round tin preferably with removable click release side.
Slightly soften 1 Litre of ice cream.
(I used vanilla, but you can use any flavour you desire.)
Tip into a tin.
Use some more ice cream to fill in the side and level the top.
Freeze.
On the day of decorating.  Remove from freezer and plate.
Cover with plastic wrap and place back in the freezer until required to decorate.

Then decorate:
Drizzle with a layer of chocolate crack topping. 
Let it drip down the sides...


before embellishing with edibles...
ready to use canned cream, Christmas-themed biscuits, chocolates and sprinkles.


#christmasfood #christmasdessert #icecreamcake


Five Fabulous Christmas Foodie Treats...

This week, Mia Bella Passions is sharing our most popular 
and favourite Christmas sweet treats...
There's Bailey's homemade ice cream cake, a wreath inspired chocolate treat using TimTams,  Gingerbread cupcakes, 
a classic vintage Christmas cake and an arty creative white chocolate Tim Tam biscuit Present!

Christmas Baking
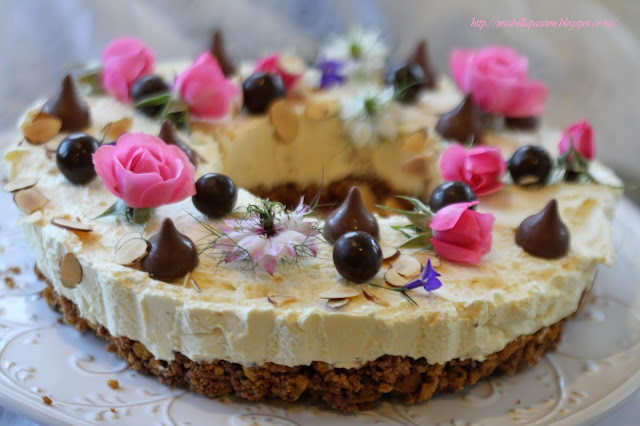
Homemade Icecream Wreath with Baileys...
so pretty and so delicious!

Christmas Baking
How super Christmasy is this Tim Tam chocolate Biscuit Wreath?
Step by step photographic instructions on how to create are a link click away -

Christmas Baking
Christmas cute ginger cupcakes with ginger butter icing,
 and a gingerbread mistletoe leaf biscuit topper. 
Leftover biscuit mix also makes coffee dipping cookies!

Christmas Baking
Christmas cake that has a self-deciding fruit content!  
This recipe is was gifted to my mother in 1969!

Christmas Baking
And lastly, there is the stunning white chocolate Tim Tam Christmas Pressie.
A bit of fun for the arty Chrsitmas cook!

Christmas creative baking is so joyful, 
especially when you make, create and bake with family, and friends.
Enjoy.


#christmas #christmasbaking #christmastreats #baileys, #icecream #ginger #christmascake


Stabilised Whipped Cream Frosting & Banoffee Slice...❥

Ever wondered how to get whipped cream firm enough to pipe in a piping bag?
Wonder no more, for I have the secret for you.
All you do is add a little gelatin to the whipped cream!
Stabilised Cream Frosting
TO MAKE:
Sprinkle 1 teaspoon of gelatin powder that is unflavoured over 2 Tablespoons of cold water in a small cup.

Microwave for 10 seconds on high. stir until dissolved
Cool for a few minutes then add 2 Tablespoons of runny cream.
This helps it cool down more.
Then whip 500ml of regular cream with 1 tablespoon icing sugar.
When soft peaks form, add the gelatin mixture to the whipped cream gently folding through to combine.

Place into a piping bag and pipe onto cakes, cupcakes, slices, or cheesecakes.

You can print the recipe HERE.

I used my stabilised Whipped Cream to decorate a delicious Banoffee Slice.
This is super simple to whip up for a quick dessert.

All you do is make a plain biscuit and butter crumb base.
Press into a slice or low-sided square pan.
Refrigerate until firm.
Top with sliced bananas.
Spread over the top one can of pre-made caramel.
Then over the caramel layer, some of the stabilised cream.
Place more cream in a piping bag.
Stabilised Cream Frosting
And then pipe your stabilised cream on top in whatever design you like.
I used a Wilton 2D tip
Refrigerate again for 2 hours, then serve!
Banoffee Slice
OH YUMMY!

NZ Bloggers
For the latest posts CLICK  :)


#stabilisedwhippedcream #cream #frosting #cakedecoration 


Related Posts Plugin for WordPress, Blogger...