Simple Halloween Wafer Ghosts

 My Grandson Quinn helped me whip up these simple wafer biscuit ghosts.Halloween Food Ideas

And boy oh boy, they are so sweet 'n' cute!Halloween Food Ideas

Making these is a perfect Halloween activity for the kids to do.

Simple Halloween Wafer Ghosts

Halloween Food Ideas

You Will Need:

Baking parchment paper

26 rectangle vanilla wafer biscuits (the type joined together with icing layers).

290-gram packet (or 1.44 US cups) of white chocolate or melts

Candy eyes.

Approximately two teaspoons of brown or black icing for mouth decoration.

To Make:

Halloween Food Ideas

Place baking parchment paper on a bench or to cover a tray.

Halloween Food Ideas

Melt the chocolate in a microwave or in a bowl over hot water.

Halloween Food Ideas

Dip each biscuit into the chocolate when it is runny, then place it on the paper.

Halloween Food Ideas

Place two eyes at the top of the chocolate before it sets.

Set aside for the chocolate to set firm.

Halloween Food Ideas Halloween Food Ideas

Then use brown or black icing to create the ghost's oval-shaped mouths on the biscuit just below the eyes.

I used the handle of a teaspoon to place the icing mouths. 

Halloween Food Ideas

Leave to set completely.

Halloween Food Ideas

Carefully remove from the paper to plate and serve.

These will store well in an airtight container in a cool place.

Makes 26 Ghostly servings. 

Halloween Food Ideas

Printable Instructions HERE.

MORE HALLOWEEN IDEAS & PRINTABLES HERE


For the latest posts JOIN :)


#halloweenfoodideas #halloweenfood #ghosts


Funky DIY Rope Ghosts

I've got quite the thing for Ghosts.

Halloween Craft

The cute spooky type of ghosts.

Halloween Craft

And these rope ghosts offer funky fun and cuteness in overload.

They are also easy to make.

Another great project for the children to create for Halloween.

Plus they resemble macrame, which is very cool!

They really are rope craft at it's best!

Halloween Craft

To Make One Ghost You Will Need:

Sharpie marker pen

A hot glue gun and glue sticks

Scissors

A bowl with a 8 1/2 inch ( 21.5cm) diameter for the backing. 

Black felt and/or craft eyes.

Black felt for the mouth.

Cardboard (recycled from a box).

White cotton craft rope (about 12 metres/13 yards)

Twine or ribbon.


 How To Create:

Halloween Craft

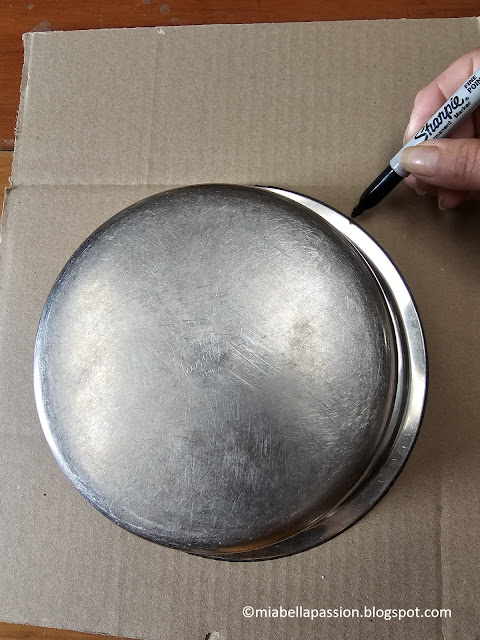
1/. Place the bowl onto the cardboard and draw around it using the Sharpie marker pen. 

Halloween CraftHalloween Craft

2/. Work out the centre and rule a line. Cut the circle in half to get a base for the ghost.

Halloween CraftHalloween Craft

3/. Cut your guide rope to 133cm (52 inches) in length.

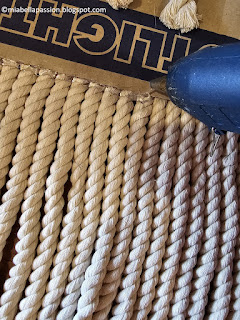
Centre and glue in place.

Halloween CraftHalloween Craft

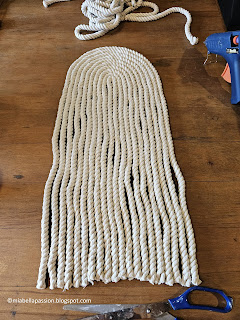
4/. Use the first rope placement as a guide for the next rope and glue in place.

Halloween CraftHalloween Craft

5/. Continue in the same manner until the rope fully fills the arc shape.

Trim the ends.

Halloween CraftHalloween Craft

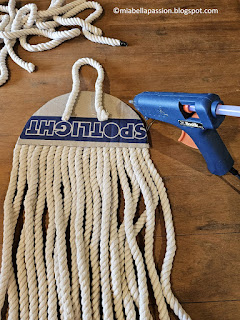
6/. Flip it over. Glue on a hanger. Then run a line of glue along the cardboard as shown.

Rope CraftHalloween Craft

Halloween Craft

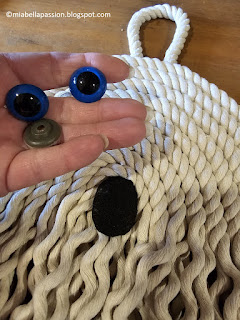
6/. Untwist the hanging part of the rope. 

Halloween CraftHalloween Craft

7/. Glue on felt eyes and mouth.

Or you can use craft eyes as I have.

DIY Rope Ghost

8/. Hang to display.

(Note: The size I have made takes quite a lot of cotton craft rope, but you can downsize this pattern/technique to make a smaller size).

DIY Rope Ghost

The History of Ghosts in Halloween Decor

For centuries, ghosts have been a crucial part of Halloween lore. Back in ancient times, people believed that the veil between the living and the dead was at its thinnest on Halloween night, the 31st of October. 

To ward off evil spirits, they would light bonfires and put on costumes.

As Halloween transitioned from a more somber holiday to one that celebrated both fun and fright, ghosts became a popular decoration. 

Nowadays, it's hard to imagine Halloween decor without the presence of these spectral beings lurking in the shadows.

DIY Driftwood Ghost Banner
You might like to make a Ghost Banner made from driftwood too.
Click HERE to find out how.

MORE HALLOWEEN IDEAS & PRINTABLES HERE

Home and garden blogs
For the latest posts JOIN :)


#halloween #halloweendecor #DIYHalloween #halloweenideas #halloweencraft #halloweenhistory


Free Halloween Animal Art Pintables

Free Halloween Printables
I've created eleven Halloween art design images for you, with the colour orange in mind.
Free Halloween Printables
They all have a hint of cute to them.
Free Halloween Printables
Because this Halloween is just not such a spooky theme.
Free Halloween Printables
There is more than one cat because I love cats!
Free Halloween Printables
I had a hard time picking which one I'd print and put into a frame for my Halloween decor as I simply adore all these images.
Free Halloween Printables
You are welcome to print to frame and use in your home decor too.Free Halloween Printables
Or use in cardmaking and scrapbooking projects.Free Halloween Printables
Copy images and save them to print via your home printer.Free Halloween Printables

Please note:

These images are copyrighted for 'personal non-commercial' use.

Free Halloween Printables

Emmm, decisions, decisions....what shall I choose to use?Free Halloween Printables

The Bat it is...

Free Halloween Printables
Rather cute he is!
Free Halloween Printables

Free Halloween Printables
Looking stunning framed in shiny gold.

MORE HALLOWEEN IDEAS & PRINTABLES HERE

Home and garden blogs
For the latest posts JOIN :)


#freehalloweenprintables #halloweenprints


Halloween SPIDER Fizzy Drink

 With the orange hues being a classic Halloween (or Fall colour), I thought I would share this very quick and easy drink EVERYONE is bound to love.

Halloween Drinks

(Read to the end to find out the Southern Hemisphere history of this drink which we call a 'SPIDER' and the chemistry lesson.)

Halloween Drinks

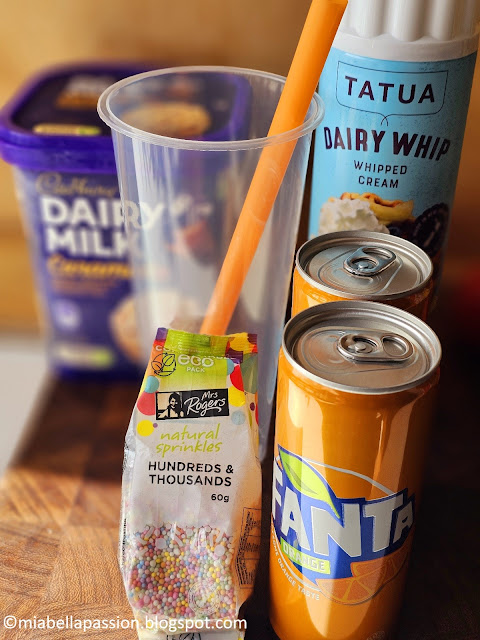
Classic orange Fanta is the fizzy drink element.

Icecream the filler component in the vessel.

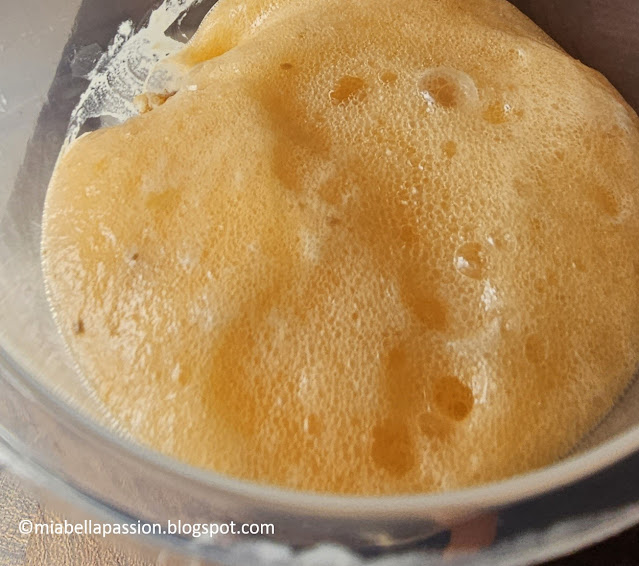
Then watch the fun frothy reaction when you pour the Fanta onto the icecream.

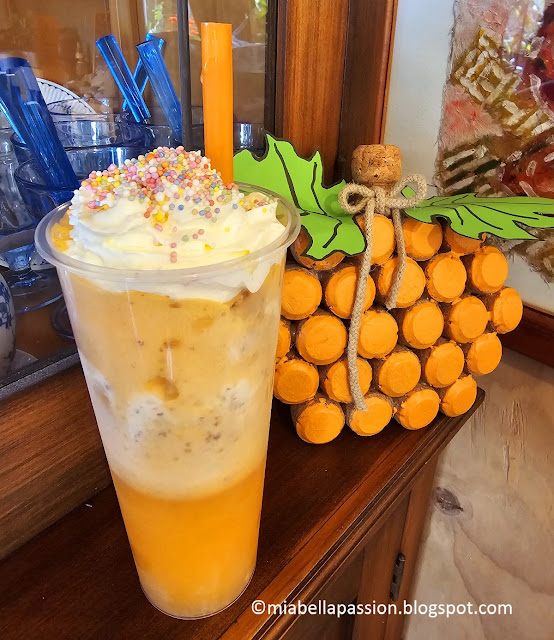
Top with whippy canned cream, add sprinkles and a straw.

Use the straw to poke the icecream into the Fanta if it settles and devour.

It's like pudding in a glass!

So yummy!

And one of these at a time is never enough.

They are loads of fun for the kids to build their own 'SPIDER'.

🕷

SPIDER History:

An icecream float elsewhere, but in New Zealand and Australia it is called a 'SPIDER'.

Due to the spider like frothy web in the drink.

It's a fizzy but creamy beverage made from fizz/soda and icecream served in a tall glass, with or without the added topping of whipped cream and sprinkles.

I have fond memories going to the tearooms in town for a special occassion, where the children always ordered a SPIDER!

It was such a treat in those days.

And it still is.

Only now we can recreate the drink at home.

Halloween Drinks

SPIDER Chemistry Lesson:

Halloween Drinks

The chemical reaction between the icecream and the fizzy/soda drink is caused by the gas molecules from the fizz/soda gathering on the tiny ice crystals that are on the surface of the icecream.

Together they become bubbles of gas. (The frothy reaction).

If the icecream in the glass is melting (not dry) the reaction is not as prevelant.

So you need straight from the freezer into the glass quick pour to get a good froth!


To Make:

Halloween DrinksHalloween DrinksHalloween Drinks

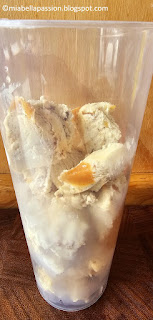
3/4 fill a tall glass with ice cream as shown

Pour over one can of ice cold Orange Fanta

Top with canned whipped cream

Add Sprinkles.

Serve with a straw.  

Note: 

I used caramel swirl icecream, but you usually use plain vanilla, or french vanilla flavours.

You can also use other fizz/soda flavours like cola, lime, raspberry, passion, lemonade, ginger beer, etc.

Printable recipe HERE.

Halloween Ideas

To learn how to make the Cork Pumpkin visit HERE.

Find more HALLOWEEN IDEAS HERE.

Home and garden blogs
For the latest posts JOIN :)


#halloweendrinks #halloweenideas #halloween


Related Posts Plugin for WordPress, Blogger...