DIY Christmas signs...

Sign making at Mia Bella Gardens was so much fun...
DIY Christmas signs to be precise.
I love the rustic look of pallet wood don't you?
Chopping up my pallet into usable pieces,
I thought I would make a JOY sign for the front porch...
And a BELIEVE sign for the sitting room.
I used red paint for the background of the 'JOY' sign, 
and white for the 'BELIEVE' sign.
The paint was just dragged across the wood in a random manner
as I wanted the worn look of the pallet to show through.
Now I am the worst calligrapher ever, 
so I cheated somewhat with my techniques.
 I simply created lettering using word and computer fonts.
Enlarged them so they were the right size to fit my pallet strip.
Printed them.
Then cut each letter out.
The BELIEVE word was modpodged directly onto to the pallet.
(EASY PEASY!)
And it really did look good!
The JOY letters were used as a stencil.
Pencil outline on the pallet, 
then painted in white paint.
Outline using a black paint marker...
then...
Give it all a coat of modpodge.
(These are not going to be in the weather elements,
but if they were, 
I would probably give the  a couple of coats of clear sealer instead of modpodge.)
And there you have a little bit of Chrstmas DIY...
 Fabulous 'JOY' and 'BELIEVE' signs.
The DIY Christmas sign creating did not end there...
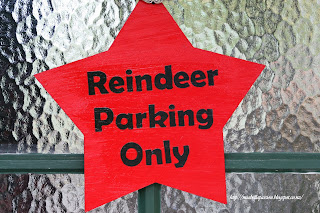
a 'REINDEER PARKING ONLY' sign 
was a definite much needed addition to the front porch, 
so for that, I used a precut MDF star.  
Painted it red.
Printed my lettering
 (again using computer and home printer)...
Touched up the black lettering with a paint marker pen...
Cut around the letters so it was tidy...
Modpodged on to the star board.
then painted in the same red used for the background 
around each black letter, 
(so the printed background blended better).
Modpodged over it all to seal it.
Then strung some natural string on it so it could be hung.

Fun DIY Christmas signs..
to welcome Christmas into your home.

Reindeer Gracie!

Gracie suddenly morphed into a reindeer...
 Not that she was impressed at all!
 Yes the ears are cute,
 How many photos do you actually need ?
Reminder needed here I think...
I am a dog...  
D-O-G
not a reindeer!
I am seriously unimpressed, you know!

Brick Garden Plant Labels...

I saw this idea on pinterest, 
and I thought it was a goodie!
Brick garden plant labels...
How simple!
How sturdy...
won't break in hurry!
Won't blow away in the wind!
So I set about makng a few.
First stop - the builders supply store to purchase some bricks...
 All you do is write your plant names on the bricks using a pencil...
The pencil just rubs off if you make a mistake.
Then simply outline over it with a marker pen.
 Calligraphy is not one of my finer skills... 
but even with my atrocious attempt at lettering,
 the outcome was pretty darn cool!
 My font was a little bit gothic....
 But the beetroot didn't mind!
 Basil is my favourite one, as it turned out the best!
 I think I'll definitely be making some more of these...
DIY brick garden plant labels...
welcome you your new home
 in the glasshouse at Mia Bella Gardens.


Kereru...

The Kereru is a very large wood pigeon that is native to New Zealand.  
They are one of the largest pigeons in the world, 
weigh 650 grams and are 51 cm long.
Mia Bella Gardens Aviaries had the privilege
 of temporarily caring for one who had flown into a window and stunned itself.
It took a few days to recover, 
but he was soon released back into the native bush area near where he was found.
Here is a painting by New Zealand artist Craig Platt 
showing the Kereru in its natural habitat.
They are eating the berries from a nikau palm.


Felt Rose & Book Page Butterfly Wreath...

What's your colour theme for Christmas this year?
Every year I plan my decorating around a colour theme...
and this year I have decided to keep it more traditional 
with red, white and green.
Christmas wreaths are so much fun to create,
so using the willow wreath previously made
I made a ton of gorgeous wee felt roses to decorate it with.
All you do it cut strips of felt using the adage...the thinner the strip, the smaller the rose.
Roll a centre, 
 
then twist the felt as you tightly wind it around.
Hot glue the end and hold until the glue firms.
DIY Felt rose Christmas wreath
I made green, red and white ones... 
DIY Felt rose Christmas wreath
Which will be perfect for this years Christmas colour theme.
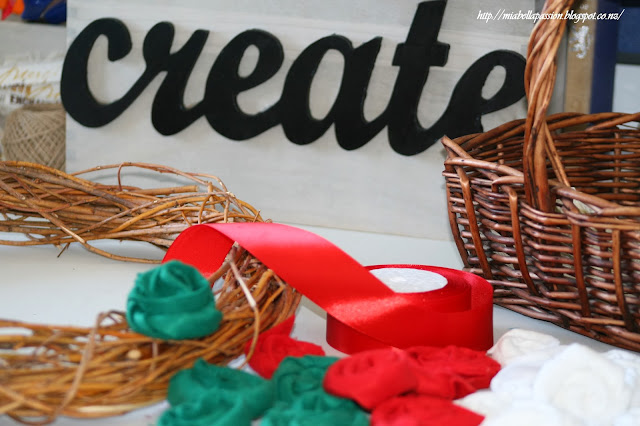
DIY Wreath
 I LOVE Christmas creating...
don't you?
DIY Felt rose Christmas wreath
 Once you have made your roses,
simply hotglue them around the wreath.
For the focal bow,
I made a bow out of red satin ribbon, but this was not quite right.
So I made another bow from green felt.
And it was perfect!
DIY Felt rose Christmas wreath
The book paper butterflies made the other day
were added...
If you want to know how to make these follow this link...
http://miabellapassion.blogspot.co.nz/2013/11/diy-book-paper-butterflies.html
And it was finished!
A rather large but beautiful Christmas wreath.
DIY Felt rose Christmas wreath
Next on the list of 'Christmas Things To Do' is...
A porch sign.
What super fun Christmas is!


Related Posts Plugin for WordPress, Blogger...