Showing posts with label DIY & Crafts. Show all posts

Beach Inspired Air Plant Holder

Air Plant

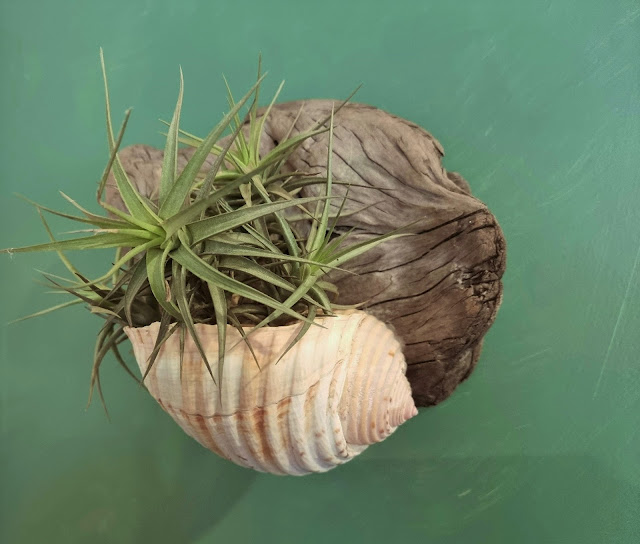
Here is a very easy beach-inspired air plant holder,

using found beach items.

A piece of driftwood.

And a large shell.

Now, this shell already had a drainage hole in the base created by nature.

But if your shell has no hole in it, use an electric drill with a small fine bit or a thin sharp nail and a hammer to create a drainage hole. 

Because you are dealing with odd shapes it's best to decide how you will hang the driftwood.

Attach a wire loop hanger to the back using a small staple nail.

 Use hot-glue to attach the shell to the driftwood.

Push a piece of air plant into the shell.

Hang in a desirable position.

If inside you can remove the air plant from the shell and water.

If outside and drip damage is not an issue, you can spray water directly on to it.

I put mine inside on the wall of our office room.

DIY Beach Decor

My partner and I both paint seascapes,

and camp by the sea often in the New Zealand summer,

so it's a lovely memory inspired wall hanging.

If you are a beach lover I'm sure this easy-care planter will tempt you too.


Note: 

If you cannot source an air plant, you could alternately use a small-leaved hanging succulent or a plant not requiring a lot of watering.

Put stones over drainage hole and plant in potting mix.

.

Visit my 'Saatchi Art & Photography' store HERE

Original art store HERE

#diyplanter #airplants #driftwood #shellplanter


DIY Fringed Throw

DIY Throw

Isn't is funny what you remember from your childhood.

 Things like pretending builders' sawhorses were our ponies, complete with reins and saddles.

And helping Mum fray the edges to create a fringe on the homemade fabric doilies and coffee table runners she was making. 

Oh, how I particularly loved to do this.

And that 'fray' memory is what this blog post is all about.

DIY Throw

I purchased 2 x 2.4 metres of cotton fabric from Spotlight online.

DIY Throw

It has a loose weave.

Perfect for fraying.

And that really is the secret.

DIY Throw

The fabric has to have a weave that is not tight.

DIY Throw

As you need to be able to pick with a needle the individual weave strands to pull.

DIY Throw

Mum always stitched by machine about 1 inch from the edge around the entire fabric piece if she frayed all four edges. 

DIY Throw

If she only frayed the top and bottom,

she would roll, iron and stitch a small side seam after fraying was complete.

DIY Throw
So this is my frayed edge DIY fringed throw.

It was fun to make.

And in doing so returned to mind some lovely memories.

With its boho look, this throw is super pretty in the decor too.

.

Visit my 'Saatchi Art & Photography' store HERE

Original art HERE


.

#diyprojects #homemade #diydecor


DIY Tropical Themed Wood Art Blocks


Wood block art

Tropical is my inspiration at the moment.

I'm loving it a lot.

Tropical inspires for me, those warm feelings.

Memories of past Pacific island holidays,

the clear bright colours,

the heat of the sun

and the smell of frangipani and other beautiful tropical flowers.

So because I am adding some new tropical elements to Mia Bella Passions homestead,

I decided to create some simple art blocks for the bedside table.

Which is still on order, and yet to arrive.

Meantime, this little project is a perfect time filler before kitset table antics begin.

Mia Bella Passions Blog

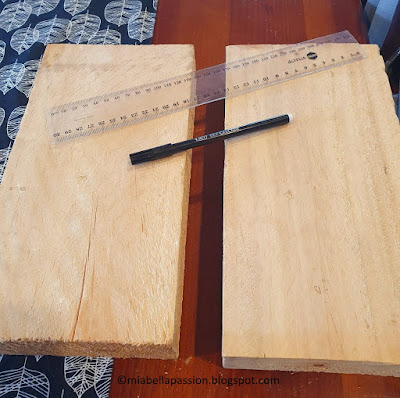
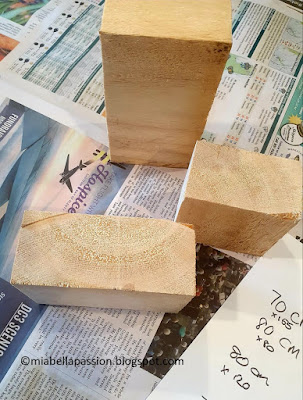
First I cut three blocks of wood.

You can make these as big as you wish.

These wood blocks are  70mm x 155mm, 80mm x 120mm and 80mm x 80mm in size.

(mm =millimetres)

Mia Bella Passions Blog

Once cut, you can use sandpaper to smooth the rough cut edges.

Or leave raw.

Wood Block Art

Paint the blocks white leaving the sides of two natural woodgrain.

Chalk Paint

I used white chalk paint.

Wood block art

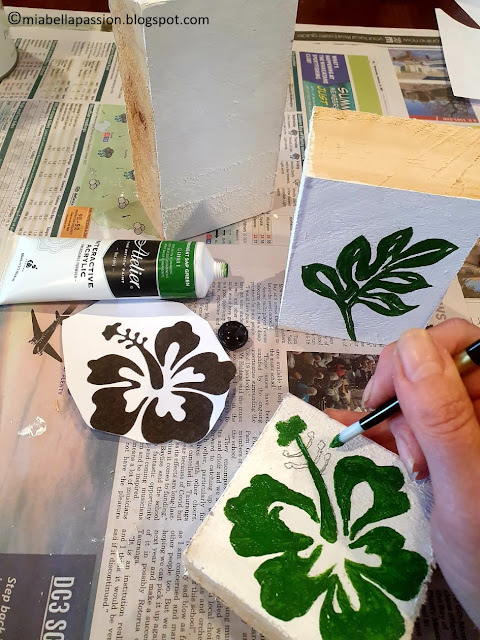
I printed some tropical designs off the internet.   

There are many free silhouette images available.

A palm tree, leaf and hibiscus flower were my choices.

If you are not feeling arty to freehand draw in pencil on to the block, use the image as a stencil guide by cutting it out first.

Wood block art

Paint the images.

Wood block art

I chose a lovely green acrylic paint.

Wood block art

Once dry I detailed using a white paint pen.

And a final coat of clear spray varnish for waterproofing.

Wood block art

For now, these are going to be displayed in my TV room on a little white French half table.

I think they look quite lovely here for the moment until I place them in the upcoming Tropical inspired guestroom...that makeover is coming to you soon.

Wood block art

The plant in this post is Rhipsalis Cereuscula.

It's a potless kokedama DIY.

You can find out more about the art of Kokedama HERE.


 #woodblockart #kokedama #potplants


You might like to also visit:
My store at Fine Art America Redbubble   :)


Christmas Art Rocks

Painted Christmas Rocks

Painting rocks.

One of my favourite things to do!

And these simple designs are perfect for the kids to make on a weekend.

Perfect to decorate the home for Christmas.

Painted Christmas Rocks

Perfect to gift to the grandparents, aunties, uncle or teacher.

TO CREATE:

 Painted Christmas Rocks

Select smooth rocks with a flat front surface.

                   Painted Christmas RocksPainted Christmas Rocks

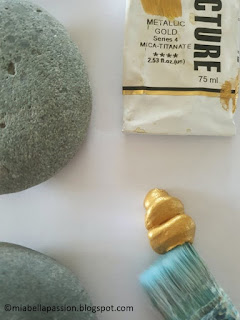
Using gold acrylic paint, paint the rock a shown.

Painted Christmas Rocks

While the paint is drying, sketch some ideas to decorate the rocks.

Painted Christmas Rocks

Use a black marker pen 

(Sharpie is best as other brands tend to run when you spray varnish the rocks)

Painted Christmas Rocks

Decorate the rocks as desired.

Painted Christmas Rocks

When dry spray a light coat of varnish sealer over them.

Painted Christmas Rocks

Place in the decor or gift.


#paintedrocks #christmascrafts 


A Snippet Of Teacup History...


Teacup History
The history of the humble teacup dates back thousands of years.
The first vessels shipped to European countries were without handles.
They were small hand-formed and bowl-like.
Tea vessels as they were known were shipped from China and Japan in the 17th century.
Tea drunk from these vessels was warm, not hot, so holding the vessels was not a problem.
The first Europen imitations also without handles were made at Meissen in Germany using hard-paste porcelain. 
The handle on the teacup, also a German invention, with designs as early as 1707.
The handle developed on the cup due to the fact the English preferred to drink tea hot.
The saucers first role in early European times was to pour tea onto it to cool then drink from.
The saucer later evolved as a cup placement vessel when handles were added to cups.
Teacups have over the centuries been loved both by tea drinkers and teacup collectors.

Mia Bella Passions Blog
In the 21st century, they are used not only for tea drinking, but as home decor accessories, candles, jewellery holders, and vases for mini posies or a little bunch of one flower type.

Mia Bella Passions Blog
How many of us acquired a teacup and saucer or if so lucky, a tea set from Grandmas collection.
My brother gifted an antique teacup and saucer as my 21st birthday gift.
And even though I am no longer actively collecting, the teacups and sets that I do have are used. 

Flower Flat Lay
For tea drinking and tea parties and in my home decor.


You may like this teacup craft idea.
Instructions HERE.


#teacups #vintage #antique #teacuphistory


Old Bottle Decor Piece

Bottle Craft
Take an old key.
And an old bottle.
Grab a little rustic twine.
Put it all together and you have a table display piece to add to your vignettes.
There is nothing difficult about this DIY.
Old bottles are thrift shop finds.
You could also use a new bottle in an interesting colour or shape or empty liqueur bottle as they are often stylish designs.

Old Bottle
Old Bottle
Old bottle
All you do is:
Wrap twine around the neck of the bottle of your choice to make a collar.
I have left my bottle drastically dirty as I think it makes it much more interesting.   
But you can use a sparkly clean bottle if you wish.

Old Bottle
Then attach an old key to the string at the neck and knot to secure.

Bottle craft
Place in your decor vignette.


#bottlecraft 


DIY Tray Makeover...

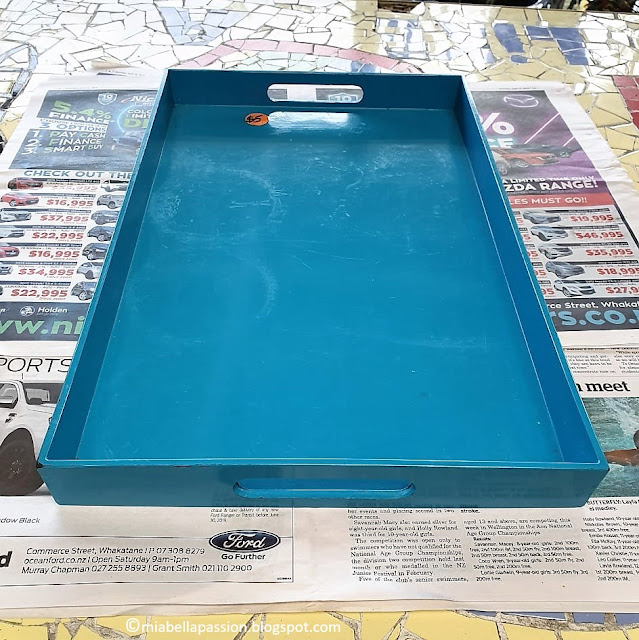
Take an old tray
(found at the Thrift Store)
and give it a facelift!
 DIY Home Decor
I love upcycling old things and giving them a new lease of life.
This is what happened to this very aqua-blue tray.
From this....

DIY Home Decor
To this!

DIY Home Decor
I actually love the blue,
but it just did not compliment my home decor.

upcycling
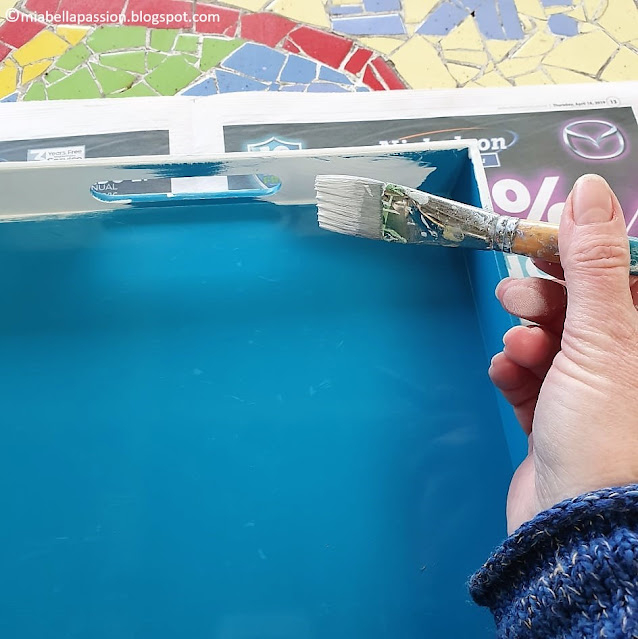
So it was out with the blue,

Upcycling
and in with the grey.

Resene DIY
Manorburn Double by Resene was the colour used.

Kalanchoe
I love candles.
So the tray contained all my candle pots in one place.
I added a potted yellow flowering succulent plant to the vignette.

Kalanchoe
This is a 'Kalanchoe'.
A great repeat-flowering indoor plant.
Easy care.
Just give it bright natural light (No direct sun) and do not overwater.
Remember it is a succulent and they hate wet soggy feet.

DIY Home Decor
But something was missing...
a coffee table runner.

So I looked in my fabric stash to see what I had that would be complimentary.
This natural light linen-look fabric was perfect.
With a contrasting herringbone pattern, 
it adds interest to the table vignette.

Sew a table runner
All I did was measured the table and hemmed all four sides to fit.
I'm loving the fabric table runner
and the tray vignette.

DIY Home Decor
And easy low-cost upgrade to freshen my sitting room.

.

Visit my 'Saatchi Art & Photography' store HERE

Original art store HERE

.

#diy #upcycling #homedecorideas #diyhome #
Kalanchoe
#diyhomedecor


Related Posts Plugin for WordPress, Blogger...