Showing posts with label French Country & Shabby Chic. Show all posts

DIY Farmhouse Vase Topper...❥

Do you have vases that you place the flowers in to and they instantly fall to the side.
Flower or foliage placement is a disaster as the stems just don't stay put?
Then your flower arrangement looks hickley pickley,
 and is not the fabulously arranged vision of beauty you had in your mind.

Do you enjoy Farmhouse styling?
Well here is an easy DIY solution to that flower arranging frustration!
Make a Farmhouse wire net vase topper.
Here's how...

You'll need a vase...
 This large decorative bowl leaks so I placed an internal vase inside it.

 You will need some chicken wire netting, and some wire cutters.
Also some gloves to protect your hands.

 Place the netting on top of the vase.
Cut the netting into a circle with a 3 centimetre excess.

 With gloved hands turn under the wire netting to make a finished edge.

 You can twist and blend all those loose wire ends or trim off.

 If you are using an internal vase in a larger vessel, fill with water.
Place your Farmhouse vase topper in place.
And prepare your chosen flowers.

Poke your trimmed flower and foliage stems into place through the holes in the wire netting.
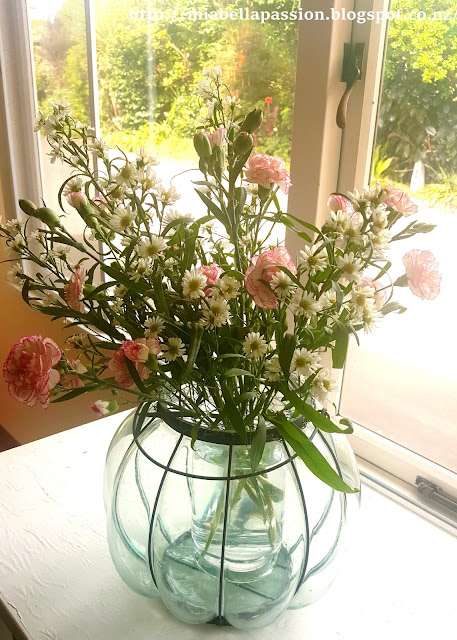
The netting holds each stem in perfect position! 

Wire Vase Topper
Such a simple solution to holding the flowers and foliage stems in place.
The Farmhouse Vase topper makes for easy arrangements.
I truly wish I had made one DIY style before now.


#farmhouse #DIY #Flowerarranging #vasetopper

You might like to also visit:
My stores at Fine Art America

Bird Silhouette
& Redbubble 
for art prints, and gift ideas.

:)


'Reserved For The Cat' cushion...❥

Ever since I saw this cushion with words only on Etsy I wanted one.
But cos I am a DIY'er I had to create my own.
I found a stone coloured linen cushion by haven gallery at Farmers reduced to $20 from $70!
I just love the simplicity of the fabric weave.

The first step was to design the wording and I also added a crown image.
I printed this in black ink onto an A4 paper sheet.

Then cut a piece of cotton fabric to the same size.
The Fabric was sellotaped to the paper.

Onto a bright sunny window this was taped.

Then I used a fabric marker pen in black to copy the crown and wording.
Once dry, I removed it from the window and paper back, 
and I ironed the reverse side of the fabric to set the ink.

Fabric Marker Pens come in all colours but I used black for this project.

With the iron I pressed in place 5cm turned edges.
Then I removed the cushion inner from the cover.

Measured the centre placement and pined the fabric written wording onto the cushion cover.
It was really just a matter of a quick double stitched outline to keep it all in place, using a sewing machine.
Place the inner back into the cushion cover,
and...

Reserved For The Cat Cushion
voila - I now have my own 'Reserved For The Cat' Cushion.

DIY Cushion Graphics
Lovely little Lola the Rescue Kitty looks so tiny behind it...
The Lola story is yet to be told...
Another day.  :)
Until then I am crushing on my cushion!


#diy #cushion #design #reservedforthecat #sewing


You might like to also visit:
My store at Redbubble


Upcycled Egg cups...


This upcycle began as a set of very retro egg cups found at the second hand shop...
They were from the 70s made from wood and ceramic.

I got all four for for 40 CENTS.
Gotta love a bargain!!
Now if I was a Retro fan they would just be left in all their original glory...
but y'all know me now I'm sure...
and white is for me.

So out came that trusty spray paint...
Rustoleum of course,
and in a matter of minutes - Retro became French Country.
A crime to some I'm sure.
But for me white is the obvious match for my white dinner set.

Though I did leave the insides of the egg cups the original gold ceramic for a nice contrast.

These sweet textured and now white egg cups will be used...


as quirky window flower vases,
for this Easter, the themed decor has extended to the kitchen.
And aren't these so sweet on the window sill.


And also to be used as an egg cup.

Because I love boiled eggs too!

What a win win!
cute and pretty...but also practical!


DIY Upcycled Headboard and Beautiful Art!

I wanted to show y'all this upcycled headboard... 
Chalk paint
And this beautiful new artwork print.

My daughter was in need of a new headboard for a queen size bed,
I searched what was available from stores in my town.
The result was:
Don't like that...
Nice but won't suit the décor style...
or
perfect but too expensive!
Next was an online search...
and there was soooooooo many to choose from.
But most were way out of my price range,
or the freight charges to my tiny township were exorbitant!
SO that left the DIY upcycle option...
And that is exactly what happened.
I came across a damaged modern country style pine headboard.
With a little bartering I managed to acquire it for just $60.

 The broken end knobs were removed and wood sealed.
Then the entire headboard was sanded.


And then two coats of chalk paint in pure white was applied.
Once dry it was waxed.

And here it is attached to the queen size bed.

upcycled headboard
A string of battery operated fairy lights were twisted around it...
A gals just gotta have pretty!

 
And here is a closeup of a Tabatha Forbes print.
Isn't it beautiful?
This artwork is from Tabatha's 'Ei Katu' collection.
(You can read about this and her other projects HERE.)
This limited Edition print was chosen as a memorial piece to the 'Little White Dog - Gracie'
who crossed the Rainbow Bridge in October last year.
Beautiful flowers for a beautiful dog in lei form which in the Pacific Island of Rarotonga is worn to celebrate.
We celebrate our memories of Gracie.
Also Tabatha has connections to Rarotonga, as we also do, 
with many fond times spent there.
That is why this beautiful art seemed all the more perfect!

 As this artwork is the focal point of the room,
 the decor pieces were selected to compliment it.


Softs greys, whites, pastel pinks and sage greens.

With a pop of bright colours too.

And flowers...in brights,

 And soft pink hues.
This room with it's new artwork , decor pieces, and headboard 
is soft and welcoming...
everything my daughter wished for!


#diy #headboard #pastels #upcycled #pinks #bedroom #decor


Table Decor: Succulents Of Course!


After all the Christmas and New Year Bling was packed away my coffee table was left empty...
What does one do about that?
Create an indoor decor succulent bowl of course!

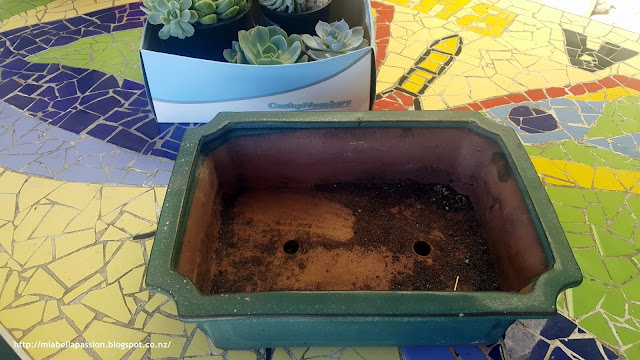
I had an old bonsai planter in the garden shed.
Don't you just love the shape of this planter?


Even though the carpet in the room this succulent planter is going is green,
I decided to freshen it up and paint it white.

I used Rust-Oleum spray paint because it is my favourite.
For coverage , easy use and of course the long lasting wear factor.

If you make this decor succulent planter for outdoors,
DON'T plug the holes as I have done here.
Leave them open for drainage.
Because I did not want water leakage on to my indoor coffee table,
I blocked the holes.
The other way is to simply place the planter with unblocked holes onto a small tray to protect the table and runner on it.


DIY Succulent Planter
I potted up my cute selection of succulents.

Succulents in home decor
 Then placed tiny aquarium stones around the plant.

DIY Succulent Planter
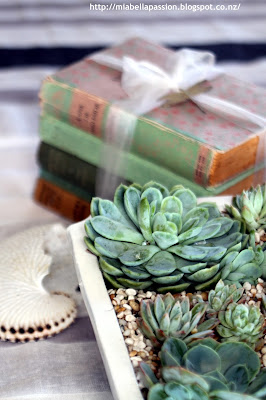
To the table top I placed the decor succulent bowl and contrasting pieces 
- a vintage book stack and a beach found shell.
This table gets full afternoon sun, 
but I will still pop the succulents outside in direct sun once a week to help maintain their health.

DIY Succulent PlanterDIY Succulent Planter
The vintage book stack picks up all the colours in the succulents and stones,
and the shell the white of the planter.
Fresh, gorgeous, vintage, nature and beachy -
which completely ticks all the boxes for me!

You'll find the instructions on how to create the vintage book stack HERE.


#succulents #homedecor #decor #home #indoorplants


Related Posts Plugin for WordPress, Blogger...