Faux Succulent Jars...

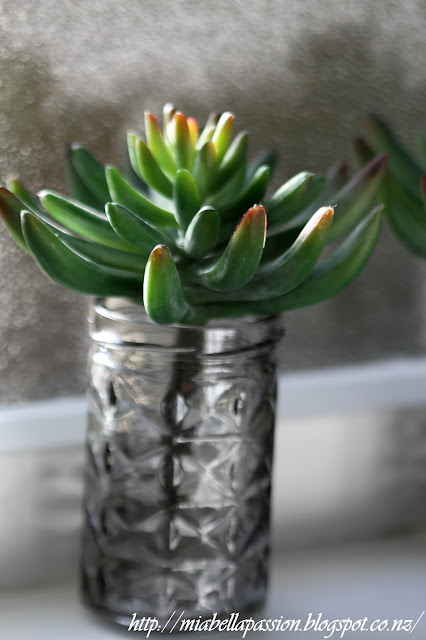
Faux succulents
I love placing decor pieces on a windowsill, don't you?
A popular trend at the moment is textured glass, so I was very happy to happen upon these sweet cut glass vases on sale!

Tilly@Home is a range that you'll find at Farmers
and honestly, there are some very, very, very cool things available.

These jars were $7.99 each - I paid $4 on sale.
Three is always the most gentle on the eye, so I bought three.

Now you could place mini bunches of fresh garden flowers in these,
 but I chose to buy the faux succulents to put in my jars.
(unkillable plant = love, and they look soooo real!)
They too were on sale and were bargained at $5 each.

Easiest decor spruce up ever -

Faux succulents
Take your shopping home...
Unwrap the packages...
Place on the sill.
And voila'...

Faux succulents
A fresh pop in the bathroom decor!
And the best thing is:
I can't kill these plants.
And I do not have to water them!


#fauxsucculents #easyhomedecorideas


A Painterly Quote About Attitude...

Tracey Lee Cassin


#quote #artquote #quotes #attitude


DIY Pallet Poolside Towel Hanger...


Add a little poolside whimsy with a DIY towel hanger.

All you need to make this is:
a hanger ($12 from KMart)
A larger piece of pallet wood that is painted white to attach the hanger 
Pool word clipart
(see bottom for the link and printable)
Modpodge glue
Scissors
Rope
Staple Gun

Print your word art

 Cut it out.

Mod Podge onto pallet wood.
When dry, seal with an outdoor spray on sealer for added weather protection.

Nail the hanger in place onto the pallet.

Staple rope to sides and use it to attach to the pool fence.
It must be time for a pool party!

Note:
The free download for the 'Pool' word clip art is via 
I resized it.
By saving it to word.
Right click.
Then click size and position.
Rotate.
And use corner arrows to adjust size.

This is a one summer project - as the ink will gradually fade on the pool word if in the sunshine.
To make it more permanent - paint (use acrylics) the word using the template as a guide and then seal.


Silver A Little Seaside Charm...


I am forever changing up the decor in my home.
And wanted something simple...
silver...and...
beachy...
that also incorporated old music sheets 
for on top of the coffee table.
So I created a little 'Silver Seaside Charm'.

Painted Shells
I used a simple box from my collection,
a French Country style tray
an old music sheet
beach found shells

Painted Shells
and my favourite silver spray paint.
Painted Shells
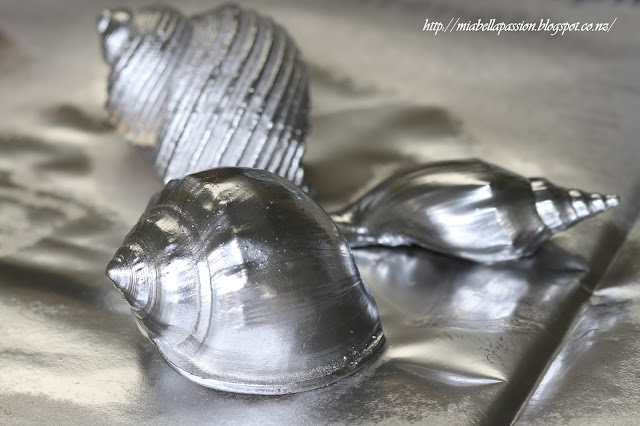
What I love about this spray paint is its metallic mirror-like gloss.
It is very effective when sprayed onto shells.
Painted Shells
Honestly, this project was completed in 20 minutes.
All I did was:

Measured and cut a piece of old music sheet to fit the little box tray.
Spray-painted the shells using 'PlastiKote' Brilliant Metallic.

Painted Shells
I waited 15 minutes for the paint to dry.
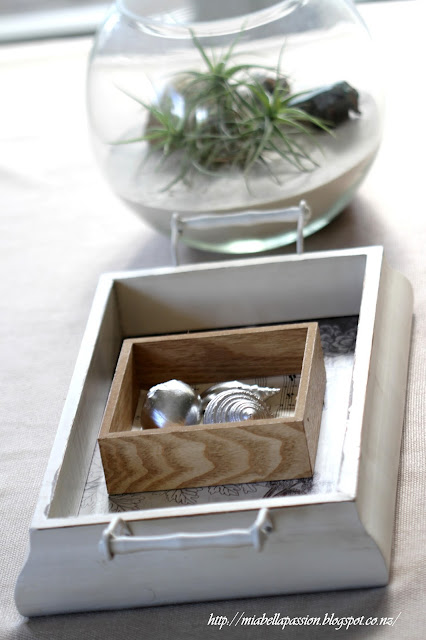
Then put the shells onto the music sheet paper in the box.


Painted Shells
Onto the coffee table, it went.
It was perfect for inside the botanical tray.

Painted Shells
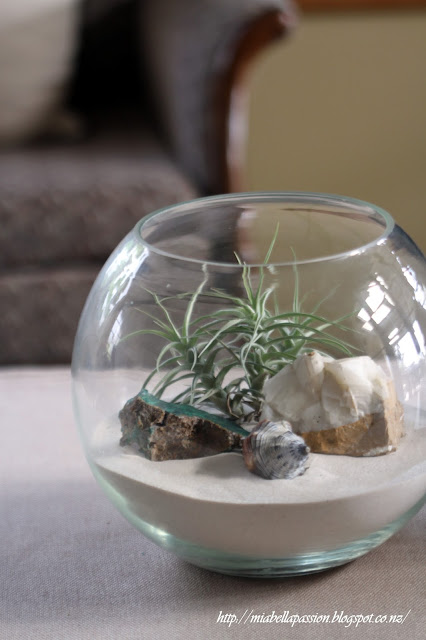
And even more perfect beside the 'Beach Lovers Terrarium'.
DIY Terrariums
(You can find out how to make that HERE.)
.
Honestly, this project was completed in 20 minutes.
You can use whatever metallic paint colour you like, gold, bronze, or copper, but just select the super glossy type so you get the shiny shell end result.
And if you don't have a beach near to collect shells from, most craft stores sell shells, or you can source them from places like Amazon online.
I'm really happy with how the painted shells turned out for this simple DIY shell decor project.

Shell Craft
For the latest posts CLICK  :)


#diy #paint #shellcraft #paintedshells


What You Chose - Most Popular - Craft & DIY...


The upcycled rake head bird or butterfly feeder was top of the 2016 Craft & DIY list.
It was a super simple DIY that you folk LOVED.
And then there actually was a whole heap of banter and debate regarding its safety.
(I kid you not!)
Some thought those spiky tips on the rake were dangerous.
But I am not about to jump over a fence, and the Mia Bella Passions cats are so used to all the feeders in the garden,
plus they are so well fed, fat and lazy it really wasn't a bother to them.
So you will be pleased to know no one got impaled!
Find out how to make one HERE.

Number two in popularity was this uptake on an old fashioned macrame pot plant hanger.
It brought out a whole lot of nostalgia in y'all!
Find out how to create one HERE.


Next on the list is:
The 'On A Wire' Hanging Frames.
I loved how some added suggestions to this creation like: 
Decorating the picture hook hanger that the wires are hung with, with beads,
 or paint the hook in a contrasting colour.
Instructions on making one are HERE.

So those were the top three most popular DIY's for 2016...
I can't wait to share more creations with you this coming year.
HAPPY NEW YEAR EVERYONE.


Linking at:

Christmas Message From Mia Bella Passions...

Wishing you all
a
happy, safe and joyous festive season.

And in case you are wondering what the flower is in the photograph...
It is the New Zealand Pohutukawa.
Also known as the New Zealand christmas tree,
as it is in full bloom during the holidays.

Mia Bella Passions will return in the new year...
Happy Holidays y'all!

XOXOX


TIM TAM Pressie Treat...

What a fun one this is...
Tim Tams...Berry Lollies...and an Icing bow.


So:
Let me show you how to create a TIM TAM Pressie Treat.

You will need:
5 packets of white chocolate tim tams
melted white chocolate
Berry lollies
Red Ready to Roll Icing
and Soft White icing 
(I used Dr.Oetker brand available from Countdown)

 On a prepared board -
 place 18 tim tams to form a square shape.
Join all the tim tams with a dots of melted white chocolate to stabilize.
Add another layer of 14 tim tams as shown.
'Glue' in place with more melted chocolate.

Counter layer the final layer as shown.

Then add two tim tams as the base for the bow.
The bow is created using ready to roll icing.

Two rectangles supported by wax paper covered rolls.
Two long pieces for ribbons.
A small centre wrap for the middle of the bow.

Leave the rolls in for 24 hours until the icing has hardened.

Add lollies and icing decoration as desired.

Then pipe the detail.

What more could a Tim Tam lover wish for?


#christmas #treats #timtams #foodcraft


Mia Bella Passions Red & White Christmas....

Here's a peek at this years Christmas decor 
in the red sitting room.


I really do have a soft spot for the colour red.
I wear lots of red.
I adore red lipstick.
One cannot have too many pairs of red shoes
(or shoes in any colour!)
I love strawberries, cherries...
in fact any red berry will do!
And the couch in the sitting room is red too!
(How's that for a little impromptu poetry?)

Maybe I love red so much because... 

it reminds me of Christmas cheer and joy...

 So this year Mia Bella Passions 'red' sitting room is decorated:
red & white.  


The mantel displays a collection of snowmen
(now that is wishful thinking isn't it as my Christmas is a summer Christmas.)
'Air New Zealand' have made this funny Christmas video;
- watch it and you will understand my longing for snow.


The wreath is decorated with berries lights and antlers.

There is of course a sack or two.
And a rust covered HOHO...
(find out how to make faux rust here.)

I've reused music sheet angel wings from a previous Christmas - find out how to create here.
There are loads of white, and red ornaments.
Some shop bought, others crafted.
And yes that is a Bearington Bear atop of the tree.

There's a painted carafe and berries...
(find out why I had to paint my berries here).

My favourite handcrafted ornament this year is the white scottie dog.
(Tutorial here).

with the felt reindeer nudging in at second place.
(Tutorial here.)

I hope you have enjoyed a peek into my summer red & white Christmas.

It's beginning to feel a lot like Christmas!


Linking at:
Related Posts Plugin for WordPress, Blogger...