'Save the birds' Crystal Hanger

DIY Crystal Hanger 

Have you ever had birds fly into your house windows?

Yip - so have I!

Recently I cleaned my filthy windows and then the very next day, a beautiful wax eye bird was dead on the ground.

The windows simply reflected the native bush behind 'The Barn', and that poor bird thought it was flying into the bush!

So sad.

If you are a long-time follower of Mia Bella Passions, you are probably wondering, bush?

But the 'Mia Bella Passions' garden is Italian and cottage!

So...

I haven't told you about my new beginnings and the happenings over the past two years.

Now's the time to do that.

I made the decision to leave my marriage.

For myself.

Not for anyone else or because of anyone else.

Simply because it was the right thing to do after such a long time of unfixable unhappiness.

The truth is 'Mia Bella Passions' - the house, the gardens and the blog carried me through terrible years of sadness and difficulty.

Not long after the separation, I met 'Him'.

I exhibited paintings in a gallery he was the curator of.

Another creative.

My perfect match.

We became a team.

 I shifted from 'Mia Bella Gardens Homestead' and transitioned to a gypsy-type life travelling, photographing, writing, painting and melding into the amazing small Lakeside community I now live in.

So that is where the bush comes into the picture.

Our creative studios and office are in a big blue barn that backs onto the native New Zealand bush.

To create some reflective light in the windows so those poor birds do not think there is a bush ahead, I have made pretty beaded crystal hangers.

I call them my 'Save the birds' crystal hangers.

Bead Craft
To make a 'Save the birds' crystal hanger, you will need
Glass beads in your choice of colour and shape.
Very thin wire or jewellery wire.
Jewellry Crimps
Jewellery crimps.
Pliers.
A larger bead and crystal for the bottom of the hanger.

Start by cutting the wire to about 20 inches long (50cm) and attach your bottom crystal through the top hole in it, and twist the wire.
Then add a feature bead.
I used a glass heart which had a hole through the bottom and top.
Bead craft
Add more beads in whatever pattern and size you desire leaving about 3 inches (7.5cm) of wire to create a hanger loop.
 Using a metal crimp place one at the top of the bead chain, and squeeze to flatten with the pliers.

Mia Bella Passions blog
Put another metal crimp on and thread the wire through to create a loop.
I actually put two crimps on for the loop but you only need one.
Squeeze the crimp flat and trim the excess wire.
DIY Crystal Hanger
Hang it in a window where the birds tend to fly into.
The beads create shimmer to distract,
and the crystal creates beautiful rainbow patterns on a sunny day.
This has been the perfect solution that stops the birds flying to the barn office windows.
And they are very pretty too.

#diycraft #beadcraft 


Easy Sausage Two Cheese Canapes

Canape

Need to whip up a finger food plate for visitors or a party?

These sausage two cheese canapes are small meaty bites that will delight!

They are great for a kid's party platter too.

Easy Canapes

Super easy to make.

All you do is:

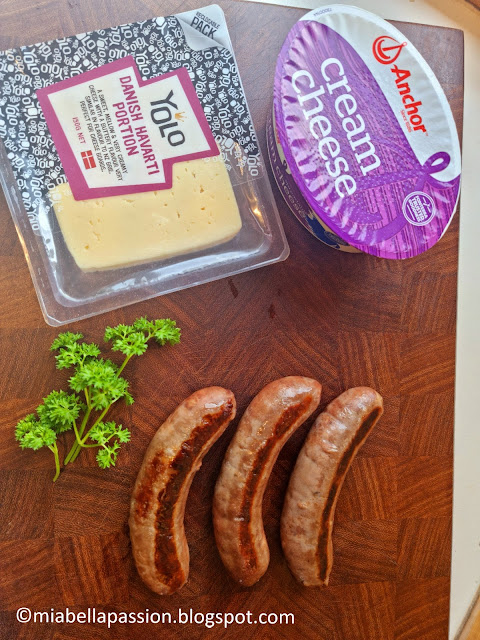
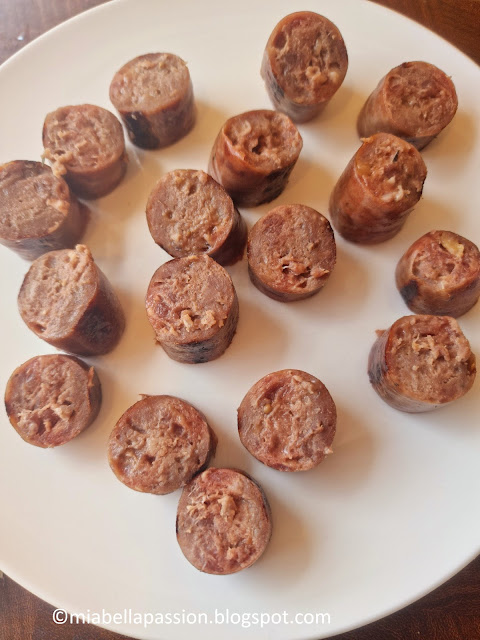
Fry your sausages in a little oil.

Make sure you prick the sausage skins to prevent bursts out of the ends.

Cool.

Sausage canapes
Slice the sausages into 1-inch rounds.

Canapes

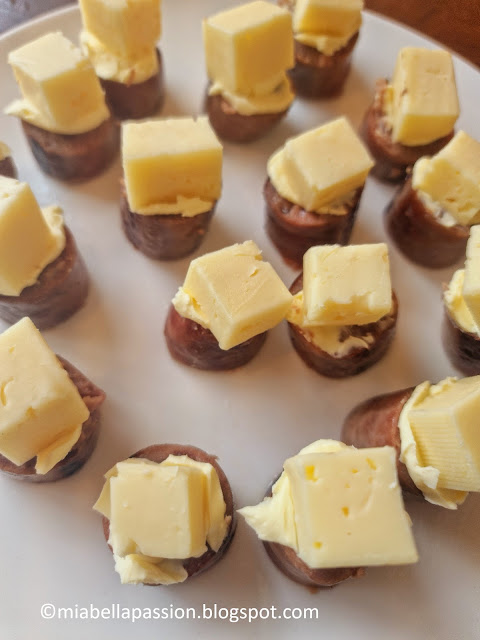
Spread each sausage piece with a thin layer of cream cheese.

Easy Canapes

Pop a chunk of tasty cheese on top.

(I used creamy Danish Harvati cheese for the chunks).

Easy Canapes

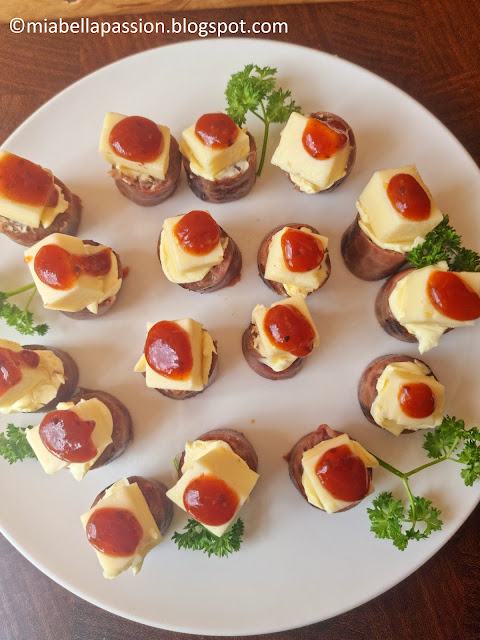
Then on to that a dollop of tomato sauce.

(I used Texan BBQ flavoured tomato flavour).

Carefully put a toothpick through the cheese into the sausage if you wish to transport it to another venue.

But if you are serving them straight from your home kitchen, the cream cheese on the sausage holds it together.

Keep refrigerated until 10 to 15 minutes before serving time.

Easy canapes

Plate.

Put a little parsley around the plate to decorate.

Easy, huh?

A favourite easy-to-prepare canape your meat-loving guests will love to eat!

Printable recipe HERE.

#Horsdoeuvres #appetiser #sausagecanape #canape #easycanapes


Halloween Cork Bats

Halloween Craft 
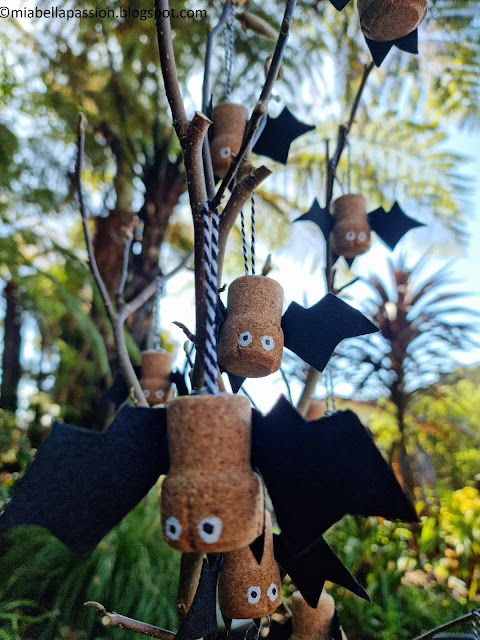
Halloween cork bats are terribly cute!

And terribly easy to create!


You Will Need:

All you need are corks. (approximately 2inches in size).

Black felt.

Craft twine.

Black and white acrylic paint.

A paintbrush.

Scissors.

Hot glue gun.

Halloween Craft

I'm making 12 'terribly cute bats'.

With the thought on Halloween to gift away a bat to the little people trick or treaters.


To Make:

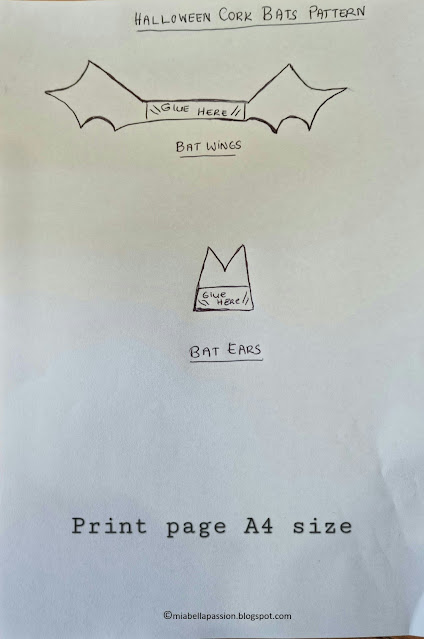
Halloween Template

Copy-paste-print the pattern sheet.


Halloween Craft

Pin pattern onto black felt (or freehand cut if you are confident) and cut out a set of wings for each bat.

Then the ears for each bat.


The Next Step:

Halloween Craft

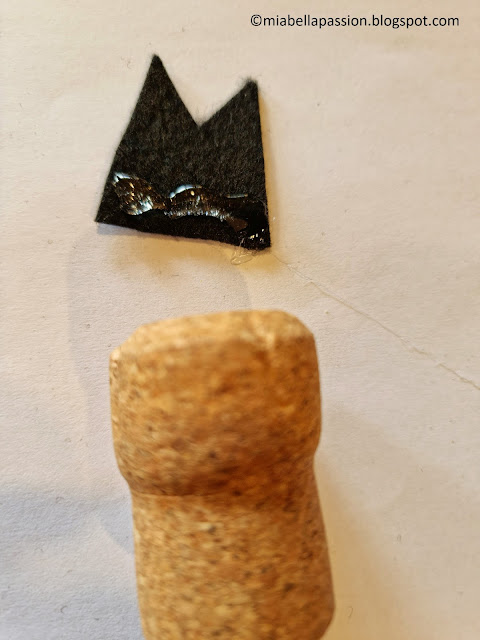
Using a hot glue gun.

Halloween Craft

Glue ears onto cork.

Halloween Craft

Then the wings.

Halloween Craft

Paint white circles of for the eyes.

(Dry with a hairdryer for fast drying)

(You could also use small-size plastic boggle craft eyes instead of painting them.)

Halloween Craft

Then paint the black pupil onto the eye.

(Dry again with a hairdryer).


Halloween CraftHalloween Craft

Glue on a (twine or ribbon)hanger to the bottom of the bat.


Then display it on a raw branch in a vase.

You could paint the branch orange, black or white.

But I have left mine naturally raw.

Halloween Bats

Add to your Halloween display as a table centerpiece, to decorate your trick or treat table or on your sideboard.

Find more HALLOWEEN IDEAS HERE.

#bats #halloweencrafts #halloween 


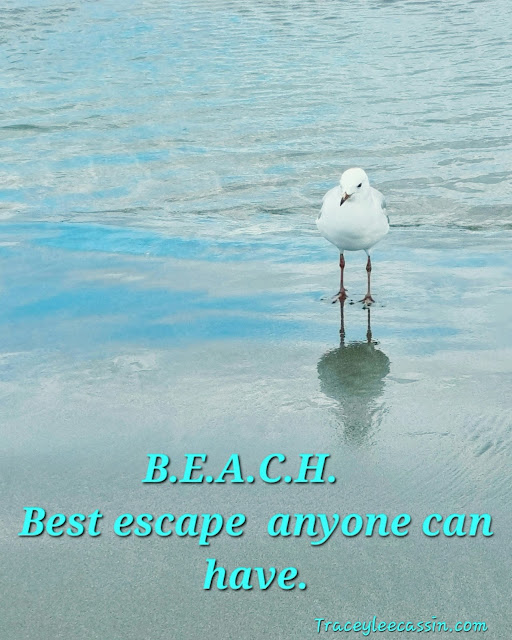
Beach

 The beach is incredibly healing.

Just like the mountains, rivers, streams, waterfalls and lakes.

Because they create negative ions in the air.

Negative ions are invisible, tasteless, odourless molecules we breathe in these environments.

And once these unique molecules called ions get into our bloodstream it is thought they produce biochemical reactions, that cause the level of the mood hormone serotonin to increase.

That is why you feel so good after a visit.

Negative Ions


#beach #beachquotes 


Savoury Cucumber Hors d'oeuvres

Hors d'oeuvres 

Hors d'oeuvres anyone?

What is a hors d'oeuvre you may well ask.

It is a small amount of food served before the main meal.

The word is French.

In English, it is known as an appetiser.

Other words used are:

finger foods

party snacks

starters

canapes

antipasto

noisettes

medallions

morsels

nibbles

nuggets

tidbits

It's now common for plates of hors d'oeuvres to be served as the primary food presented, at gatherings, parties, exhibition openings, training and work events. 

They can be elaborately fancy created from pastry with a creamy sauce filling or as simple as a cube of toast with a topping.

But as many of us are now gluten intolerant, we see more fruit and vegetables being used as the base.

A request for a recent gathering I attended was, 'Please bring a plate of finger food'.

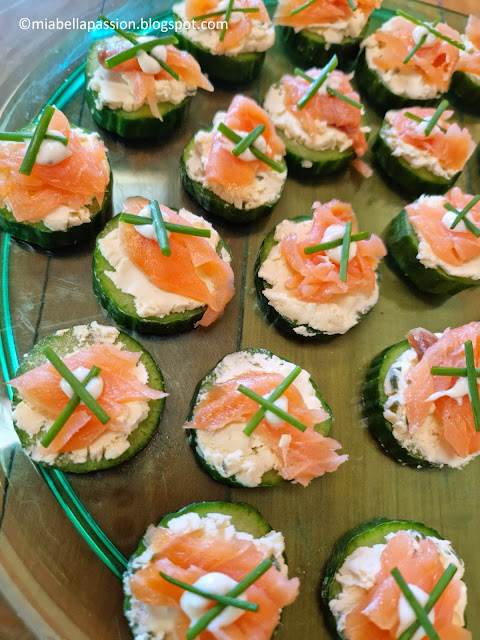
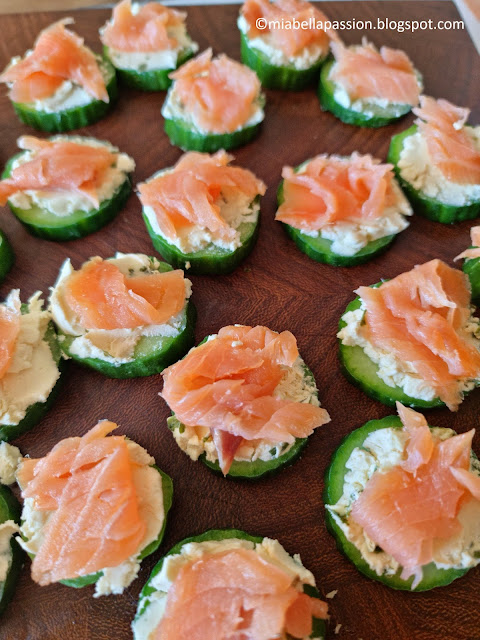
So I created these delightful savoury cucumber hors d'oeuvres with a smoked salmon twist.

Super easy to whip up, gluten-free, keto friendly, crisp, creamy, and delicious.

Hors d'oeuvres

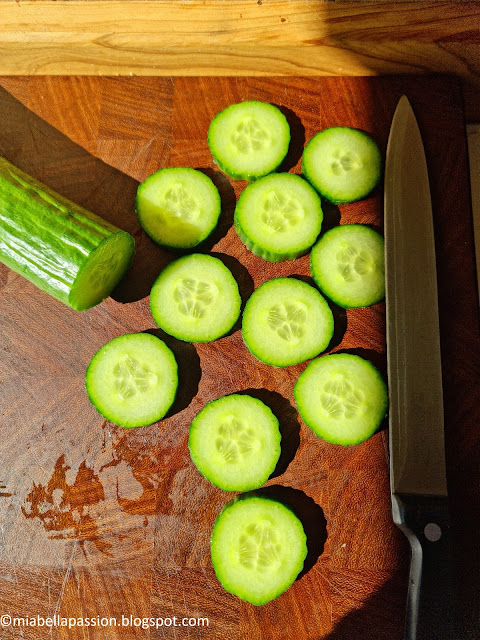
Cut your cucumber into rounds about 1cm in depth.

Hors d'oeuvres

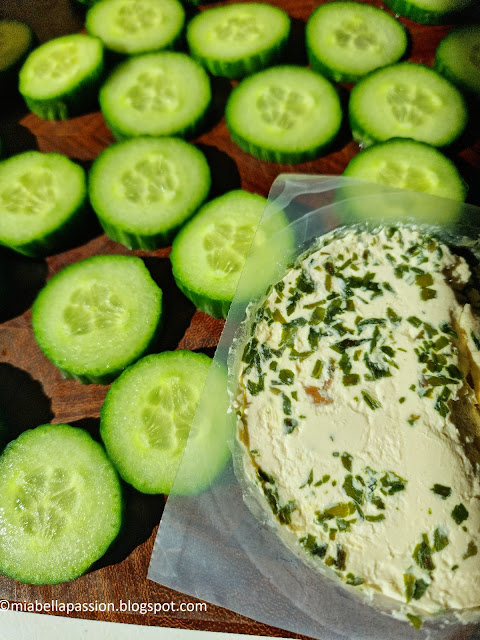
Pat both sides gently with a paper towel to remove excess moisture.

Hors d'oeuvres

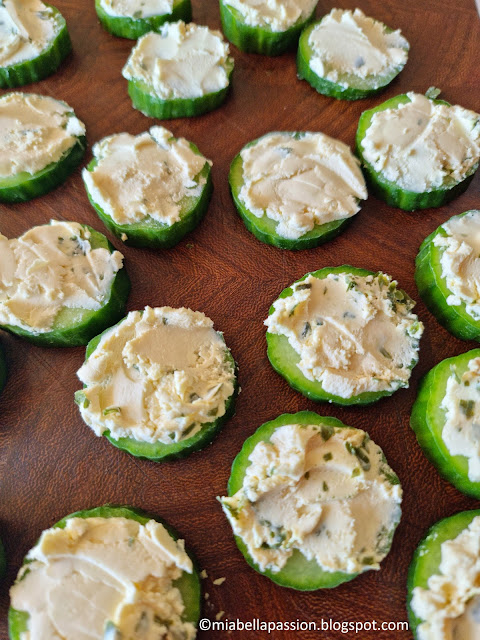
Using a pre-mixed flavoured cream cheese with garlic and chives, spread the top of each cucumber slice with a generous amount of the cheese.

Now if you cannot find a pre-made garlic and chives cream cheese spread, just whip up your own.

Hors d'oeuvres

(recipe at end of blog post)

Hors d'oeuvres

Hors d'oeuvres

Add a chunk of smoked salmon.

Hors d'oeuvres

Then a dot of aioli dressing.

Hors d'oeuvres

Onto the aioli crisis cross two small pieces of chives for a garnish. 

Plate.

Cover with glad wrap plastic film, and place in refrigerator until serving.

___________________________________

Homemade Garlic and Chive Cream Cheese

150-gram pot of cream cheese at room temperature. 

(Philadelphia brand cheese is great).

1 clove of crushed garlic

1 Tablespoon of finely chopped fresh chives

Mix all ingredients together until creamy.

Store in a sealed container in the refrigerator.

______________________________________

Printable recipe HERE

.

Art Prints

Visit my Saatchi Art for prints HERE.

.

#cucumber #creamcheese #salmon  #Horsdoeuvres


Fragility Quote

It's been a while since I've created any photographic quotes.

This leaf embedded in the creases of the pavement stopped me in my tracks.
In its compromised state I see both beauty and fragility.

#quotes


Yuccas

Yucca

Yuccas.

Love 'em or hate 'em.

Sometimes it is a plain good ole fashion compromise when your other half loves yuccas and you simply don't.

Well, this is my situation with yuccas.

I officially sold 'Mia Bella Gardens and Homestead' to a brand new family...and now I live beside a beautiful lake.

The property here is just as beautiful as my previous home, just more of a blank canvas.

A lot has been done here since my arrival here a year and a half ago.

We have removed enormous old and dangerous trees.

The wood has been milled to be put back into the new house which will be built in the next year.

We have tidied and cleared a lot of clutter as well as created gardens and seating spaces that blend nicely with the existing cobbled courtyard (off our creative and artists workshop), brick garden retaining walls and pizza oven.

The sun during winter is lost by 3pm, and we all gravitate to the 'Top Garden' for the last of the day's sun.

This is why the mini courtyard was put here.

Now back to the yucca situation.

I am not a fan. 

I know what they do once they get their roots established if planted in the garden.

They sucker.

They grow enormous.

And eventually takeover!

If you cut them down they regrow!

So this is why the compromise happened

- not to plant them in the garden, but to make a feature of them in pots.

At least in a pot, they can be controlled a little easier.

Garden Pots
Wine barrel look-alikes.

Not wood but high density resin from recycled material that is also lightweight and UV resistant.

The brand is Northcote Pottery.

We already had a smaller set of these, so got the large size for the Yuccas.

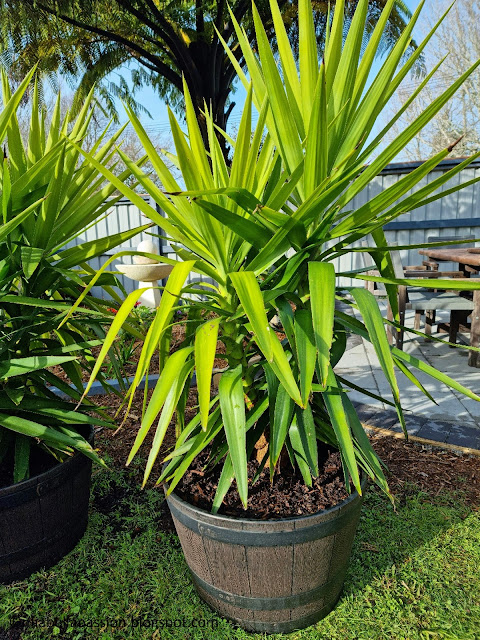
Yucca
Already in a reasonably large bucket pot, they were removed, and quite harshly root pruned by a little more than half.
This yucca is the Spanish Bayonet variety which if planted in the ground will grow 15ft (4.5 metres) and clumps that require attention to stop it from becoming too invasive.
It's interesting that the Bayonet was once used to make clothing, footwear, and baskets. 
The white bell shaped flowers were a culinary treat eaten fried or raw.
A summer flower spike can be up to 2ft (60cm).
This variety is now grown as more often as a security plant because the leaf blades have a sharp point.
Yucca
They were then potted into the new barrels
using a good quality potting mix that contains a slow-release fertiliser.

Cobblestone Courtyard

Watered and placed into their new position.

They make such a nice addition to this courtyard.
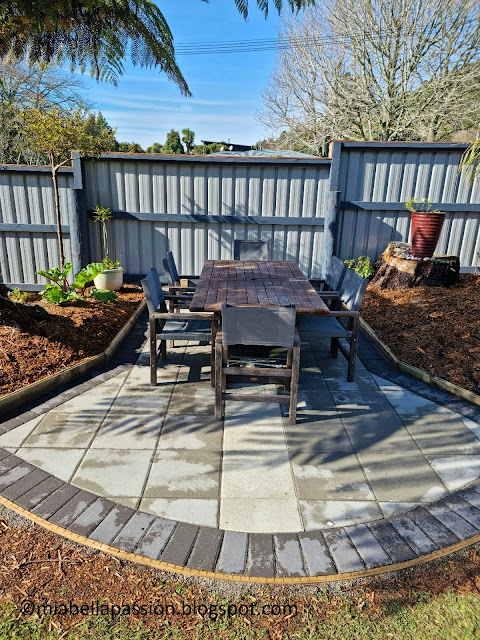
Cobblestone Courtyard

Before:

The eye is drawn to the beautiful cobble detail (a bit wet from rain).

But then lifts to the bare fence behind the courtyard.

Yuccas in pots

After:

The potted yuccas make quite a statement in their resin replica wine barrel pots.

They now soften the view to the fence.

I think I am 'almost' converted into a yucca fan!

.

Other Yucca Facts:

They can be grown as an indoor pot plant.

Native of South Western and Eastern United States, Mexico, and parts of Central America.

They can withstand temperatures minus 12 degrees Celcius.

The leaf tips are extremely sharp!

Even when removed from the garden it will regrow from any remaining roots left in the ground.

The flowers are beautifully creamy white and need full sun to bloom in summer.

There are many different types of yucca. 

Some varieties -  have edible flowers and fruit, and can be used for shampoo, soap making, or as a herbal remedy for arthritis. 

It is easily grown from a new spike offcut.


#yucca #plantfacts #pottedplants


Creamy Mexican Chicken Soup

Mexican Soup

 A mildly spicy but creamy soup is full of goodness and flavour that the whole family will love.

Precooked rotisserie chicken adds to the flavour, though you can leave it out, add another can of beans and change the cream cheese to a vegetarian variety, and you will have a still delicious soup. 

It's a lot of cans of this and that,

but when you haven't a lot of time to whip up a hearty meal,

this easy recipe is a true go-to.

It is ready to eat in just 25 minutes!


Mexican Soup

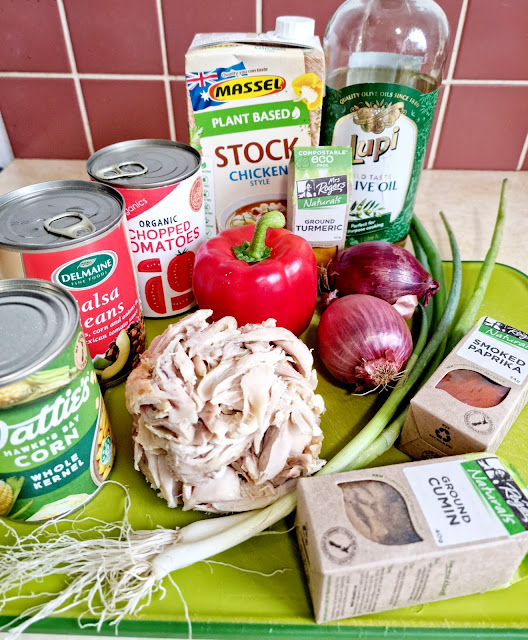
Ingredients:

2 x diced red onions

(You can use white onions but the red is much sweeter to taste)

1 x diced red bell pepper

2 Tablespoons Olive oil

1 x 400g can of chopped organic tomatoes

1 x 400 gram can of salsa beans in a spiced sauce

1 x 300g corn kernels (drained)

2 cups of chicken stock

2 cups of shredded cooked rotisserie chicken

1 teaspoon each of turmeric, smoked paprika and cumin

4 'generous' Tablespoons of Philadelphia cream cheese


 Method:

Fry the diced onion in olive oil in a large soup pot.

When it is soft add the diced bell pepper.

Add the canned tomatoes, beans and corn kernels.

Then the chicken stock and spices.

Bring to boil.

Remove from heat and add the Philadelphia cream cheese.

Stir until creamy.

Add the shredded cooked chicken.

Warm through but do not boil.

Plate.

Top with a garnish of parsley and sliced red pepper.

Serves 6.

Mexican Soup

Serve with warm bread rolls or crunchy toasted bread as an accompaniment.  

The printable recipe is HERE


You will find a pounds and ounces to grams and oven temperature conversions HERE


Grab a cuppa, and visit

 my Fine Art America gift store


:)


Beach & Ocean - Coastal Style

Coastal Style    

 Beach Avant Guarde 

Beach vibes, Hamptons, cane and rattan...rooms with seaside elements and colours...

When decorating Coastal style remember it's just like enjoying time at the beach, with nothing being too overwhelming.

Pops of colour on a neutral base embrace open uncluttered spaces with clean lines and natural light.

The goal is to create calmness.

Coastal Style
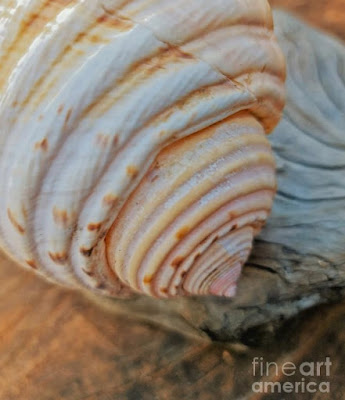
Shell On Driftwood

The main colour palette is beige, tan, white and warm whites.

The accent colours in grey, aqua, seafoam, deep-sea blue, seagrass greens, soft beach toned yellows or coral.

Accessories, fixtures and fittings in brass, wood or distressed wood, cane, rattan, glass, mirrors, seashells, driftwood, jute, seagrass, or rope.

Coastal Style
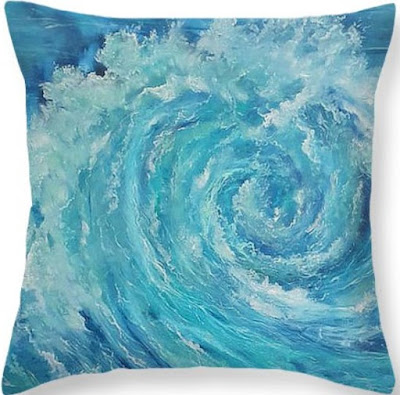
Internal Spirals Throw Pillow

Soft pillows in your accent colours.

Billowy white drapes.

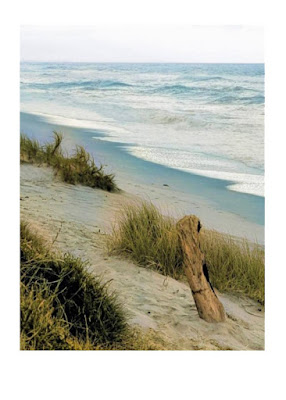
Then add beach-inspired photography or art, like the examples shown.

Then you have successfully succeeded in bringing the beach into your home!

Coastal Style
Coastal Style
Coastal Style

Coastal Style
Surfs Up


Related Posts Plugin for WordPress, Blogger...