DIY Nautical Night Light...

Beach Style Decor
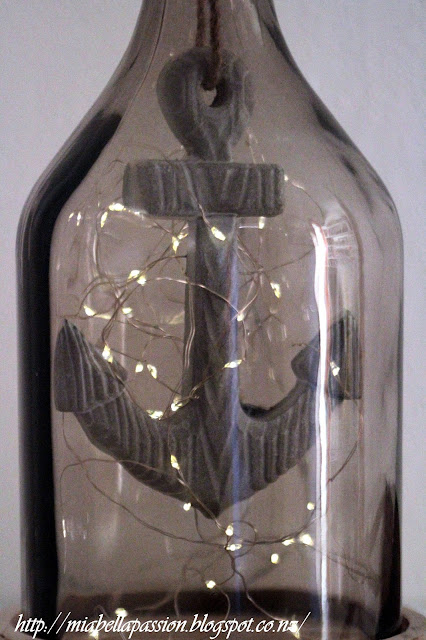
The beach vibe continues with today's nautical DIY,
which is a super quick and easy to create night light.

All you need is:
 a bottle cloche with a base stand
 fairy light mini buds with a clear cord
a focal piece with a rope hanger- I used an anchor for a beach theme
And some dry mini star fish to place on the base below the anchor
some thick twine and scissors.

 The focal I'm using is from  Farmers 'Tilly & Home' range.
On sale at just $4.50.

Thread the battery fairy lights from the top into the bottle.
 (The Bottle Cloche was sourced from The Warehouse also on sale @$18)

 Then place the focal ornament like the anchor inside with the string hanger in the top of the bottle neck.

Pull the string up and thread twine through it.
Wind the twine around the neck of the bottle and tie a knot to hold. 

 Rearrange the lights around the anchor.
Place some dry starfish onto cloche base before place bottle back on it.

 Nautical and  rustic fairy light fun!

 You could use a starfish as a focal inside instead of an anchor.
Or another nautical inspired piece.

Beach Style Decor
But I think this anchor look rocks!


#fairylights #diy #beachdecor #nightlight #nautical


Living With Pain And Invisible Illness - My story...


This week's post was supposed to be all about a very cool Coastal-themed 'Nightlight' DIY...
BUT...
the computer decided to DIE!!!
So here I am on my little ole laptop. 
With no access to photo processing and no way to get the photos from the camera onto the laptop of the above project.
The DIY post has now turned into 'hopefully' an inspiring story.
Few know this part of my personal story.
It is silent.  It is hidden.
I live with chronic pain and illness that is not obvious.
(unless of course you notice the disability parking sticker on my car or I am limping due to a flare-up).
It affects my life daily.
It is a challenge.
Last week I read a blog post elsewhere that featured a story about other bloggers who also live with pain and illness.
Their stories were inspirational.
So I decided I would add my story to the blogosphere.
Perhaps it will help someone who is in the early days of diagnosis.
Perhaps it will give them hope when they are going through all the stages of grief as they deal with the prospects of surgery, medication and their effects, as well as lifestyle changes.
I think for me the lifestyle changes that I had to make were the hardest.
Before my hip deformity diagnosis, reconstructive surgeries, osteoarthritis diagnosis, and heart condition (also which required surgery), I was super active.  
I had a half-acre garden.  Ran the home to perfection. Worked. Volunteered. 
Gosh, I could write an enormous list of how life was.
Then suddenly it all stopped!
Life changed in a moment.
It's taken me many years to adapt to those changes.
It was not easy.
I loved my old life.
Then suddenly I needed to recreate a new one.
I was completely lost.
My friend said to me 'You are still creative - share it'.
In 2012 Mia Bella Passions' blog began.
'Mia Bella Passions' is my creative, positive, happy place.
Blogging was my lifesaver.
Then as time and wellness allowed, I added other things 'I could do'...
Art became my second lifesaver.
And here we are today.
A Blogger and an artist.
Somebody who six years ago thought life was over!
Now - I accept that my path is different.
I have good days.
I have really bad days.
I have learnt to pace myself.
I know when to stop.
I look for beauty in all things, and in places I would never have thought to look before.
Positivity is an important aspect of my life and the way I think.
It takes a while to retrain the brain to think that way but you can do it.
(Sure - I have challenging days when I am miserable, but the next day I pick myself up and carry on).
I go for short walks.
The beach is a haven.
I have my family's love.
Life is good.
I am grateful.
Mindfulness rocks!


And last but not least:
Creativity is incredibly healing.


This leaves me with a quote I'd like to share with you today:

'Do not confuse my bad days as a sign of weakness.
These are actually the days I am fighting my hardest'.


Raindrops on Roses...

In New Zealand autumn has come to a close... and the first days of winter are upon us.
But temperatures are still mild enough for the roses to celebrate a last bloom time.
I love it when it rains at this time of year. 
The light for photography is sublime.
The raindrops on flowers emit a stunning beauty
 that simply takes your breath away.


It reminds me of this quote by 'Rumi'.

"Come out here
where the roses have opened...
Let the soul and world meet".


So I popped it on this shot of this sweet pink rose bloom
as a 'free screensaver' for you.
Enjoy!


#free #screensaver #rose #quote #rumiquote


Easy 'Beach' Decor - DIY a Shell Jar...

Beach Style Decor
Bring the beach into your bathroom decor 
with a simple jar of shells or a ball of shells.
Both are very easy to make.
And also a great project for the kids to create for gifts.
Today I am showing you how to DIY the shell jar.
But I'll share how to create the ball further through the post.
Shell Craft
 You will need a selection of shells in various shapes sizes and colours.
 A jar with a lid.
I'll be recycling a coffee jar.
Scrub the jar clean and remove any printed writing with a steel pad and soapy water.
 While the jar is drying,
spread the shells onto newspaper outside in a well-ventilated area.
 Spray with a gloss varnish.
This brings out the beautiful colours in the shells.
Leave to dry.
 Put shells of your choice into the jar.
Large first then smaller ones.
Place lid on Jar.
Beach Style Decor
  Tie a raw twine bow at the neck of the jar.
Beach Style Decor
 And place to display in your bathroom.
Beach Style Decor
Beachy beauty in an instant! 
Beach Style Decor
 To make the ball of shells like this one that is sitting on the French style urn,
all you need is lots of shells, a polystyrene ball in size of choice, a glue gun, and gloss spray varnish.
Step one: glue shells all over the poly ball.
Step two: Remove excess glue strings.
Step three: Spray with clear gloss.
And that is it...
you have created a shell ball.

Beach Style Decor
Which is a perfect decor partner for the Shell jar.


#beachdecor #decorideas #diy #shells #diygift

An Aquarium In The Decor...


 Have you ever considered incorporating an aquarium in your home decor?
I have discovered the PERFECT small aquarium set up,
 and the PERFECT pet fish to share with you.
Yes you read correctly - Fish.
As in one.

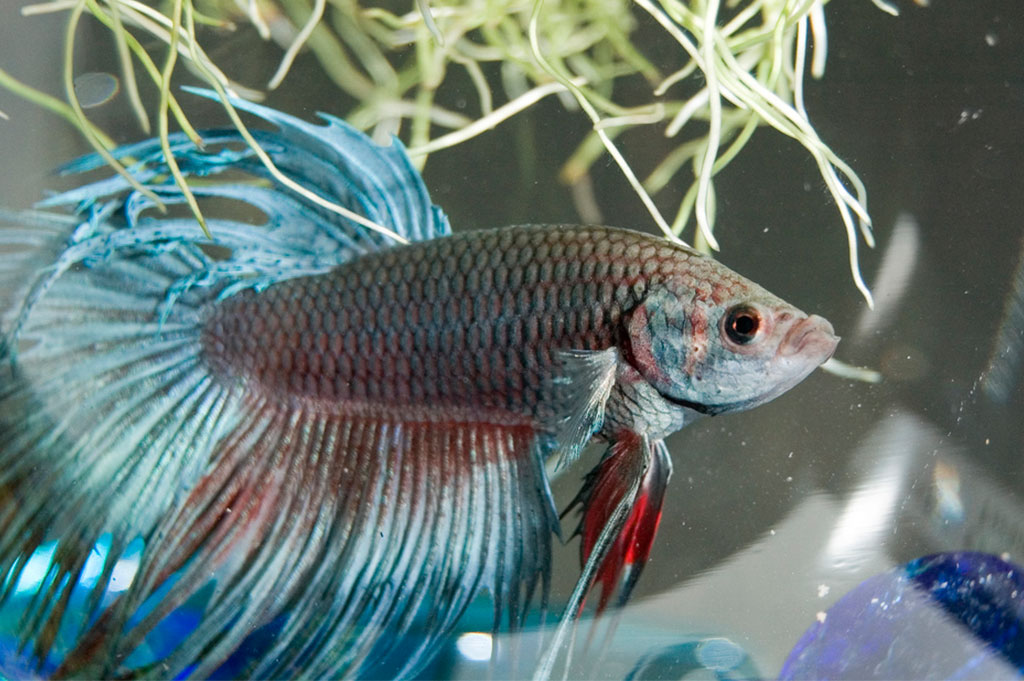
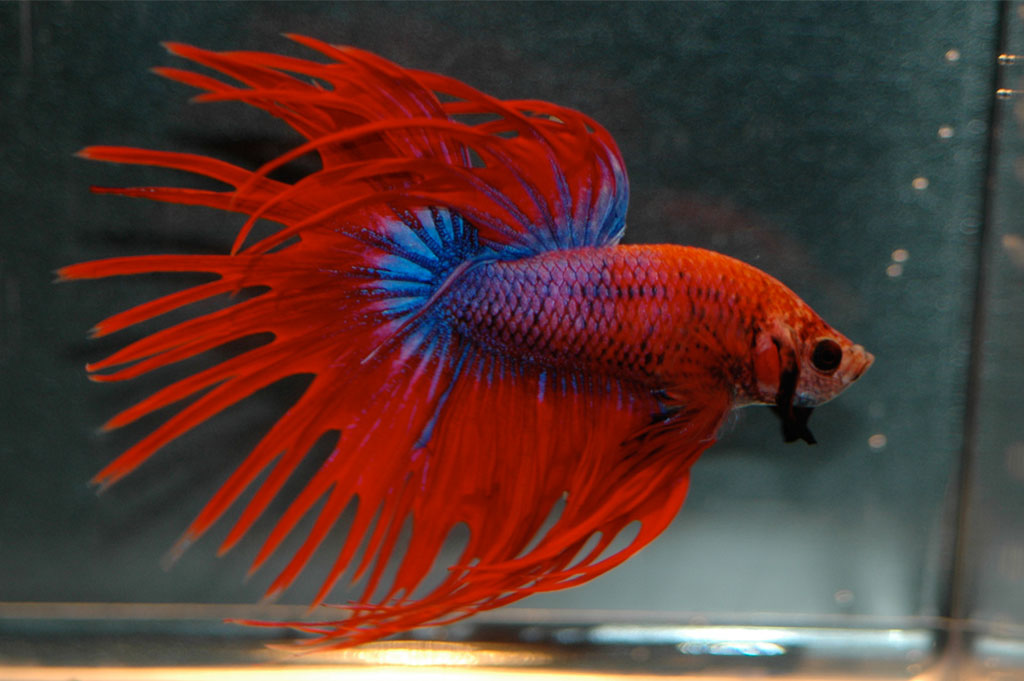
The male Betta which is also known as a Siamese fighting fish is an interesting wee fish with huge personality.
Not only that  - he is BEAUTIFUL!
So while 'Lewis' is having a rest on his leaf bed,
let's talk decor.

This home is a first do upper on a budget. 
The walls which have the original gorgeous textured wallpaper from the 1940s was in superb condition apart from being time yellowed,
 it has been over painted white to freshen. 
The fire brick was grey but for a dramatic touch has been repainted black in semigloss. 
All woodwork in the original rimu simply revarnished.
Carpet black with a dark grey fleck.
Drapes are floor length in grey.

The side door has a simple patterned panel curtain in grey floral.

 The coffee table is wood to compliment the skirtings.
The side board cabinet was a $60 Trade Me purchase,
 which was repainted in Annie Sloan Chalk paint.
The colour is called 'Duck Egg Blue'.
New crystal knobs replaced the originals as several were lost and broken.

Accessories in the decor are pieces the owner loves and has collected over time.  
The artwork was a big influence on colours in this room.

Be a mermaid in a sea full of fish!

 Now back to 'Lewis' the Betta fish.
Betta are extremely characterful.
They know their owners!!!!


 This is Lewis's house.
His aquarium is just the perfect size.
Small!
Which means he's an easy to maintain pet.
His decor accessories include his night bed - the inside of the helicopter ornament.
His day bed - the plastic leaf on the upper side of the aquarium.
And some fake coral for exploration games.
Sometimes he has bubbles switched on for a little excitement!

So do consider including a small aquarium 
into the home decor.
I am certain once you have a Betta fish as a pet, 
you will be in LOVE!

But here are a few facts to start with:
They prefer to be solitary.

Colorful Betta
They come in many shapes and colours.

betta-image2
They breathe oxygen from water and air.
The males blow air bubble nests.

All you need to know about the beautiful quirky betta fish,
is over at 
and also at


#betta #siamesefightingfish #smallaquarium #fishindecor #upcycling #chalkpaint


Shop EZIBUY homeware and fashion HERE


Upcycled Necklace And New Shoes...

This upcycle began with a new pair of shoes...
Try with all my shopping might,
I simply could not find a chunky necklace in a similar colour.

So what does a DIY & UPCYCLE gal do?
DIY & UPCYCLE your own of course!!

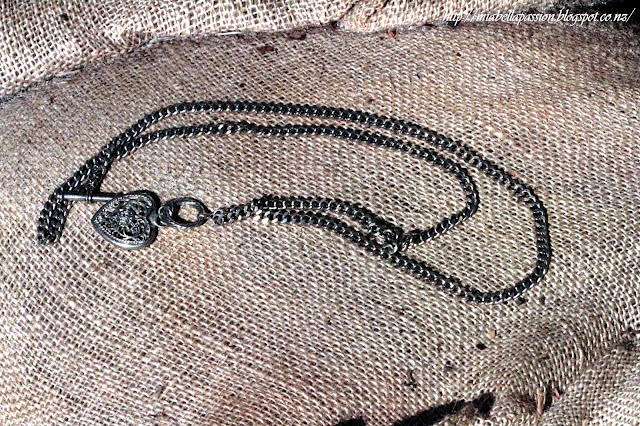
Take one old not so pretty chunky chain with heart necklace.

 And one can of bronze tone metallic paint...
Did I mention I LOVE SPRAY PAINT?

And spray - spray - spray!

Voila - one upcycled diy metallic necklace...

to compliment those gorgeous sparkly bronze sneaker shoes!

 I am so happy with my 'NEW' necklace...
wouldn't one be a fabulous Mother's day gift idea?
Use a necklace no longer worn from your jewel box, or source one from the goodwill or dollar store.

And if interested - these shoes were purchased from 
Ezibuy women fashion shoe collection.


#DIYjewellery #upcycled #mothersdaygiftidea


Waffle Cone S'mores...


This brings back many a campfire memory...
marshmallows toasted over the fire...
and s'mores camp style.
 For those who don't know what a s'more is - 
it is a toasted marshmallow squished between graham crackers with chocolate.
The earliest reference to s'mores is 1927 in USA,
 when they are referred to as 'Some Mores' in a book called 'Tramping and Trailing With the Girl Scouts'.
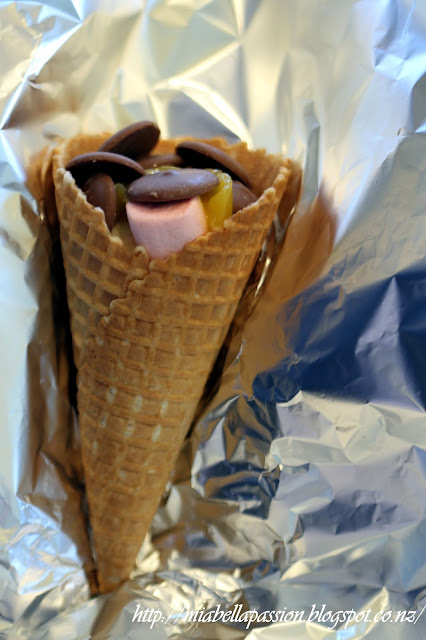
This modern indoor kitchen version of s'mores uses waffle cones and is oven baked.

You'll need marshmallows, waffle cones and chocolate melts in dark or milk.

Banana slices and tinned mango have also been added for a fruity twist.
Once you stuff the cone with all the goodies, you simply wrap each in tinfoil and place on a baking tray into a hot oven.

They are SWEET...
Marshmallow GOOEY...
and CHOCOLATEY.
(Not for the faint hearted, because they are a total sugar overload.)
The kids (big & small) will love them.
So next time you pitch a tent for the kids in the backyard for camp play or an overnight sleepover...

whip up some Waffle Cone Smores too.


#Smores #kidsparty #marshmallow #chocolate #sweets


Related Posts Plugin for WordPress, Blogger...