A Perfect Valentine's RED Petunia...


 I just have to introduce ya all to 'Petunia HOT ROD RED' by 'Enrich with Nature Plants'!
What a perfect Valentine red inspired flower.
 Beautiful, bright, RED...

 A PROLIFIC FLOWERER...
that has an improved resistance to adverse weather!
That's a bonus don't you think?

Grow in full sun. 
Keep moist but not overly wet.

 'Hot Rod Red' Petunia can be grown in the garden bed,
pots, hanging planter baskets or window boxes.

Make an entrance statement with this plant on your porch, or front door entrance.
Incorporate it into your valentine display...
Potted in a dramatic white tin bucket as I have done...
Or bring the plant inside for a short term (2 day's max)
event display.

 'Hot Rod Red' Petunia
  - easy to grow...no problems with disease or bugs,
and loads of the most stunning red flowers...
Mia Bella Passions is in LOVE!


#petunia #gardenplants #floweringplants #redflowers


Easy Valentines Berry Trifle...


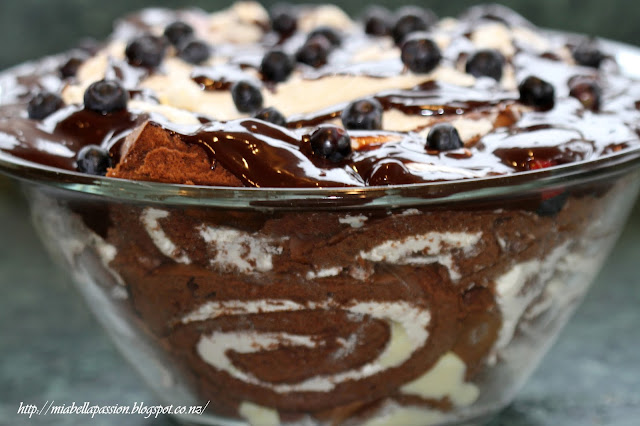
This trifle is the easiest dessert to create in a jiffy.
If you have a busy life, then this is the perfect dessert for Valentines night...

Use: pre a made cream or jam filled rolled sponge roll cake


Pre made custard and a little whipped cream.
Plus fresh berries of your choice.


And an easy to prepare chocolate ganache.
Easy Chocolate Berry Trifle can be alcohol free,
or tipsy it up a little by adding a sprinkle of sherry,
 or chocolate flavoured liqueur to the sponge layers.

All you do is line a glass bowl with slices of sponge.

spread over custard.
Then the berries.

Add a swirl of ganache...

Top with more sponge slices, more whipped cream
and more berries. It's not the prettiest served on the plate,
 but the taste of deliciousness outweighs this by far.
The Chocolate Berry Trifle is a fav in our house,
 and even gets pre-orders as a Birthday dessert!

But I think it is a superb easy fix Valentines dessert too!

Printable recipe HERE.


#trifle #dessert #valentines #chocolate #easydessert


Faux Succulent Jars...

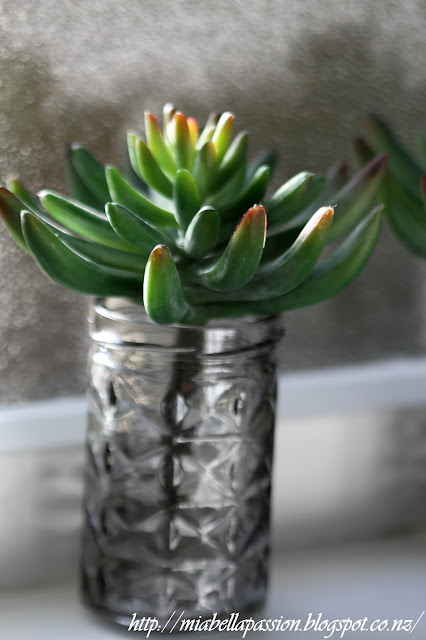
Faux succulents
I love placing decor pieces on a windowsill, don't you?
A popular trend at the moment is textured glass, so I was very happy to happen upon these sweet cut glass vases on sale!

Tilly@Home is a range that you'll find at Farmers
and honestly, there are some very, very, very cool things available.

These jars were $7.99 each - I paid $4 on sale.
Three is always the most gentle on the eye, so I bought three.

Now you could place mini bunches of fresh garden flowers in these,
 but I chose to buy the faux succulents to put in my jars.
(unkillable plant = love, and they look soooo real!)
They too were on sale and were bargained at $5 each.

Easiest decor spruce up ever -

Faux succulents
Take your shopping home...
Unwrap the packages...
Place on the sill.
And voila'...

Faux succulents
A fresh pop in the bathroom decor!
And the best thing is:
I can't kill these plants.
And I do not have to water them!


#fauxsucculents #easyhomedecorideas


A Painterly Quote About Attitude...

Tracey Lee Cassin


#quote #artquote #quotes #attitude


DIY Pallet Poolside Towel Hanger...


Add a little poolside whimsy with a DIY towel hanger.

All you need to make this is:
a hanger ($12 from KMart)
A larger piece of pallet wood that is painted white to attach the hanger 
Pool word clipart
(see bottom for the link and printable)
Modpodge glue
Scissors
Rope
Staple Gun

Print your word art

 Cut it out.

Mod Podge onto pallet wood.
When dry, seal with an outdoor spray on sealer for added weather protection.

Nail the hanger in place onto the pallet.

Staple rope to sides and use it to attach to the pool fence.
It must be time for a pool party!

Note:
The free download for the 'Pool' word clip art is via 
I resized it.
By saving it to word.
Right click.
Then click size and position.
Rotate.
And use corner arrows to adjust size.

This is a one summer project - as the ink will gradually fade on the pool word if in the sunshine.
To make it more permanent - paint (use acrylics) the word using the template as a guide and then seal.


Silver A Little Seaside Charm...


I am forever changing up the decor in my home.
And wanted something simple...
silver...and...
beachy...
that also incorporated old music sheets 
for on top of the coffee table.
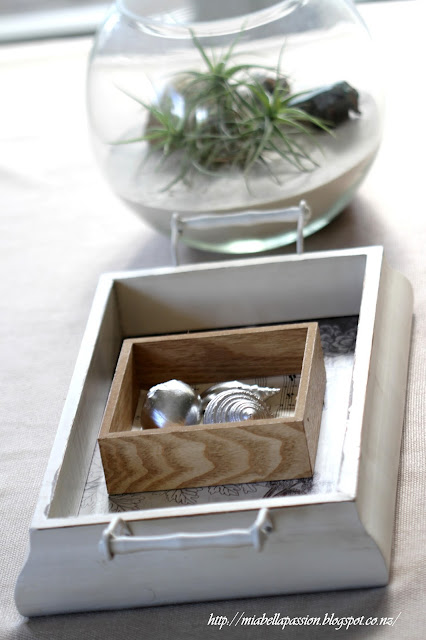
So I created a little 'Silver Seaside Charm'.

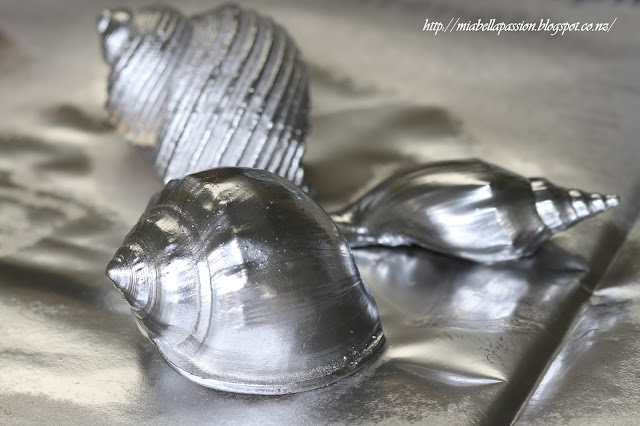
Painted Shells
I used a simple box from my collection,
a French Country style tray
an old music sheet
beach found shells

Painted Shells
and my favourite silver spray paint.
Painted Shells
What I love about this spray paint is its metallic mirror-like gloss.
It is very effective when sprayed onto shells.
Painted Shells
Honestly, this project was completed in 20 minutes.
All I did was:

Measured and cut a piece of old music sheet to fit the little box tray.
Spray-painted the shells using 'PlastiKote' Brilliant Metallic.

Painted Shells
I waited 15 minutes for the paint to dry.
Then put the shells onto the music sheet paper in the box.


Painted Shells
Onto the coffee table, it went.
It was perfect for inside the botanical tray.

Painted Shells
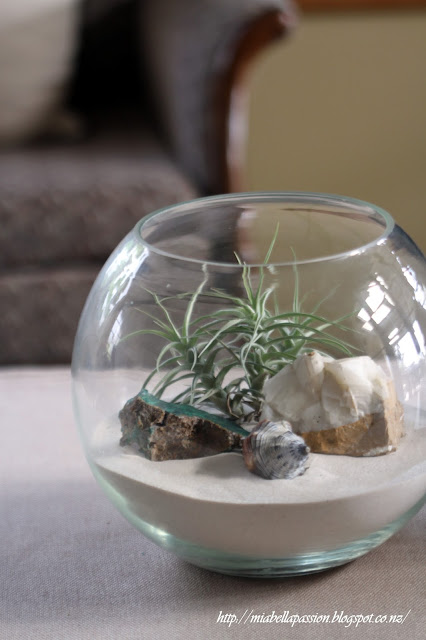
And even more perfect beside the 'Beach Lovers Terrarium'.
DIY Terrariums
(You can find out how to make that HERE.)
.
Honestly, this project was completed in 20 minutes.
You can use whatever metallic paint colour you like, gold, bronze, or copper, but just select the super glossy type so you get the shiny shell end result.
And if you don't have a beach near to collect shells from, most craft stores sell shells, or you can source them from places like Amazon online.
I'm really happy with how the painted shells turned out for this simple DIY shell decor project.

Shell Craft
For the latest posts CLICK  :)


#diy #paint #shellcraft #paintedshells


What You Chose - Most Popular - Craft & DIY...


The upcycled rake head bird or butterfly feeder was top of the 2016 Craft & DIY list.
It was a super simple DIY that you folk LOVED.
And then there actually was a whole heap of banter and debate regarding its safety.
(I kid you not!)
Some thought those spiky tips on the rake were dangerous.
But I am not about to jump over a fence, and the Mia Bella Passions cats are so used to all the feeders in the garden,
plus they are so well fed, fat and lazy it really wasn't a bother to them.
So you will be pleased to know no one got impaled!
Find out how to make one HERE.

Number two in popularity was this uptake on an old fashioned macrame pot plant hanger.
It brought out a whole lot of nostalgia in y'all!
Find out how to create one HERE.


Next on the list is:
The 'On A Wire' Hanging Frames.
I loved how some added suggestions to this creation like: 
Decorating the picture hook hanger that the wires are hung with, with beads,
 or paint the hook in a contrasting colour.
Instructions on making one are HERE.

So those were the top three most popular DIY's for 2016...
I can't wait to share more creations with you this coming year.
HAPPY NEW YEAR EVERYONE.


Linking at:
Related Posts Plugin for WordPress, Blogger...