#nzbloggers #roseleaf #raindrops #quotes
Creative Gift

Pages
- About Tracey Lee...
- Work With Me...
- Advertising Affiliate List
- Contact, disclaimer, disclosure & etiquette...
- Project Library DIY
- Garden Plants & Outdoor Pots
- Porch & Garden DIY
- Pot Plants & Indoor Gardening
- DIY Art
- Healthy Treats
- Delicious Food Ideas
- Sweets & Special Occasion Treats
- Toppings, Fondants and Icings
- Sweet Baking
- Sweet Desserts
- Preserves, Sauces & Dressings
- Cocktails & Canapes
- Creative Food Art
- Dairy-Free Recipes
- Slow Cooker
- Christmas
- Valentines
- St Patricks Day
- Easter
- Halloween
- Thanksgiving
- FREE Conversion Information
- My Health Journey
- Art, Photographic & Inspirational Quotes
- Stella Arcobaleno - Beautiful Words, Images & Reels
- FREE Scrapbookers Printables
- FREE Printables & Templates
- Photography...
- Tracey Lee Cassin Creative
'Baby Tears' Planter...❥
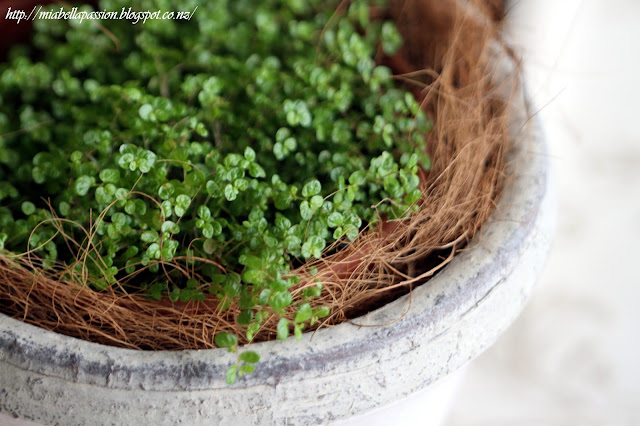
Baby Tears (aka Irish Moss or Soleirolia soleirlii)
Originating from Italy, it is one of my favourites.
Little tiny leaves cascade down the evergreen stems
which give this plant the name of baby tears.
Perfect as a ground-cover due to it's spreading nature,
Baby tears grow in semi shade or full shade garden beds.
It looks lush and green all year round if kept moist.
(It's not fond of dry or frost!)
And it's super SIMPLE to propagate.
Just take a clump and plant it where you want it to grow.
How easy is that?
And it is a superb weed suppressant.
Baby Tears is also fabulous to grow in pots indoors or out.
As well as in hanging baskets.
I like to plant mine in a plastic pot that I then place in an urn that's indoors.
Coconut fibre around the internal edge keeps the plastic pot hidden.
Coconut fibre around the internal edge keeps the plastic pot hidden.
Eventually it will cascade over the edge of the planter.
And when it is too big...
Root cuttings will be taken and a new plant started.❥
And if you are wondering about that hint of gold in the background of the first planter photograph,
yes - it's a new CUSHION...
The gold leaf image and cream cushion fit in with the decor PERFECTLY.
One can never have too many cushions, can they?
#babytears #planter #indoorplant #shadeplants
BUBBLE JOY!
Ok - so here is one of those random posts -
JUST BECAUSE!
I have been photographing bubbles....
or should I say trying to master the art of photographing bubbles...
And these images are so pretty.
And even though they're not perfect,
I thought I would share them with y'all.
#newzealandphotographer # photoart #bubbles
Re-purposed Light shade Flower Bowl...❥

Vintage milk glass light shades are BEAUTIFUL!
And ya all know how I LOVE flower bowls...
so it was a no-brainer as to what this ole light shade was about to become!
And ya all know how I LOVE flower bowls...
so it was a no-brainer as to what this ole light shade was about to become!
But that was nothing my trusty airdry clay could not fix!
(Seriously peeps - one should always have this stuff in the craft cupboard!)
(Seriously peeps - one should always have this stuff in the craft cupboard!)
And made a clay plait.
Then I checked sizing to create a plait base for the light shade.
Cut and joined it.
And left it to dry.
Once dry, the light shade bowl was placed on top.
The bowl filled with water and flowers.
Ahhh...upcycling satisfaction!
The flower of choice was a creamy white to pale yellow coloured camellia.
This is a favourite of mine.
It's called ' Jurys Yellow'.
It's vigorous, bushy and a shares profuse flowers from Autumn until Spring.
It has an upright habit of 2 metres by 1.5 metres.
Plant it in semi-shade for best flowers.
The bees LOVE this camellia too.
I love the way the light reflects on the glass!

I love everything about my 'new' vintage milk glass vase!
#camelia #flower #upcycled #flowerbowl
DIY Bird Wall Decor...❥
We used a free swallow template from the internet,
which you will find many bird templates in varied shapes and sizes.
I made a slight modification to this design as I wanted the tail to be a little thicker.
Airdry clay is available at most craft and art stores in New Zealand.
Press your paper cutout template onto the rolled clay.
Don't make it to thin.
Like any clay - the thinner it is the more fragile it will be when dry.
Don't make it to thin.
Like any clay - the thinner it is the more fragile it will be when dry.
Use a bread and butter knife (safer for the kids) to cut around the outline of the template.
My grandson aged 5 managed to do this pretty well alone.
My grandson aged 5 managed to do this pretty well alone.
To make patterns, use any object you already have that will imprint.
This is a metal heart which was perfect for the task.
This is a metal heart which was perfect for the task.
Then attach a hanger with more clay onto back side of bird - I used a metal bead label tag.
Carefully place onto a baking paper lined card.
Put aside to dry.
Carefully place onto a baking paper lined card.
Put aside to dry.
After about four days the bird was dry.
You can keep it in its natural clay colour or paint it.
If you were to place on a covered porch I would seal it with clear sealer.
But because it was decided to put this into the bathroom, which is blue and grey, we decided to paint it with grey chalk paint.
You can keep it in its natural clay colour or paint it.
If you were to place on a covered porch I would seal it with clear sealer.
But because it was decided to put this into the bathroom, which is blue and grey, we decided to paint it with grey chalk paint.
Once dry it was hung.
A wonderful 'Grandson and Nonna' craft memory.
And it looks wonderful with the other DIY art piece in this room too.
Faux solar leaf print#airdryclay #birdcraft #claycraft #homedecor #diy
Subscribe to:
Posts (Atom)


