A Snowy Luminary...❥


DIY a some gorgeous festive bling.
Or make one to gift and share the love of Christmas.

All you need to make these Snowy Luminaries are:
A Clear jar with an opening big enough to place a small tealight or candle.
(I used one that was 13cm tall , with a opening that is 7cm wide)

A small bag of Epsom salts.
(Epsom Salts makes fabulous fake snow.)

Matt Mod Podge glue.

Some decorations for the neck of the jar.
(rope, Christmas ribbon, faux berries & pine or anything Chjristmasy)


To make:
Coat the bottom 3/4 of the jar in a Mod Podge glue.


 Roll in the Epsom Salts

Press the salts onto the glue.
Set aside to dry.
Then paint a second layer of Mod Podge over the Epsom Salts to set it to the jar.
Set aside to dry.
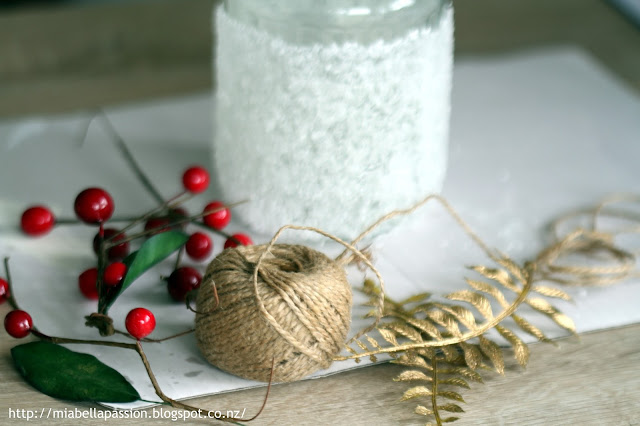
  
Bind the jar neck with the twine.


Add your embellishments. 


I used:
natural twine for the neck of the jar
some faux berries
and some gold plastic leaves.


I always save bits from old decorations for crafting new things.

 And a tea light candle.
I wish you could smell these ones...
OH MY they are so delicious you could almost eat them!
Handmade by Living Light - Golden Bay - New Zealand
https://www.livinglightcandles.co.nz/

Place the Snowy Luminary in your Christmas home decor and light at night.

And you have your own DIY Festive Bling.

Or gift to someone special this Christmas.


#christmas #christmascraft #candles #luminary


Mock Christmas Pressie Stack...❥

How cute are these little mock Christmas themed parcels.
And they are perfect for added fun to the Christmas decor.

To make you will need:
a selection of boxes in various sizes to stack
Various Christmas themed paper to wrap the boxes
Craft Glue
Sellotape
Embellishments: stickers or images from old Christmas Cards
 or coloured in stamp designs
coloured string


Wrap each box in chosen paper.


Embellish as desired.


Stack and place on a sideboard, bookshelf, or coffee table.
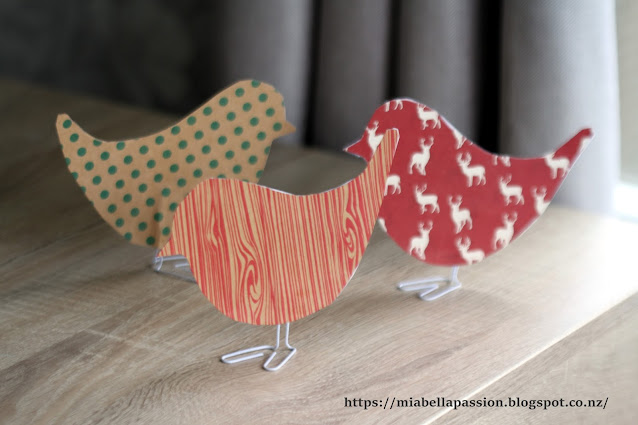
Add a 'Cute Christmas Bird' to the top.
The tutorial to make the birds is HERE.


#christmasdecorating #christmas #craft


Cute Christmas Birds...❥

Paper crafts
Well, y'all know I'm kinda fond of paper crafts, 
and these sweet wee paper birds are so very easy to craft.

Paper crafts
The kids will love to make them for decorating the mantel or bookshelf for sure!

Paper crafts
You'll need:
sturdy paper or card to make two bird shapes.
A bird template.
Two paper clips for each bird's feet.
A quick-drying craft glue.


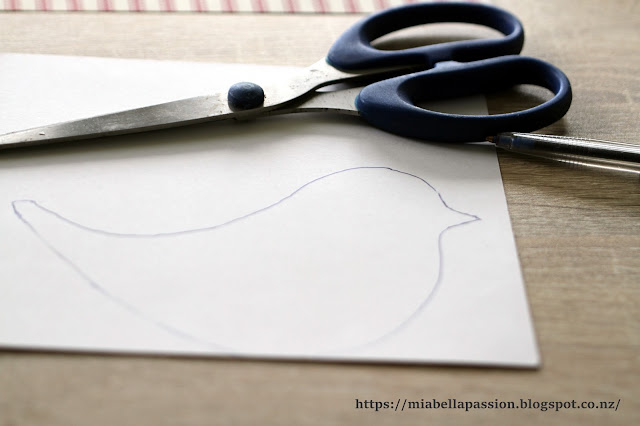
First, you will need to print a bird template and cut it out.

Paper crafts
I just used this free one that I found on Pinterest.
You can choose any bird shape you like.
I printed this in a 4x6 size.

Paper crafts
Use the template to draw an outline on paper of your choice.
Use a double layer with the pattern facing each other.
Draw around the template and then cut the double papers.
Because these are for the Christmas decor, 
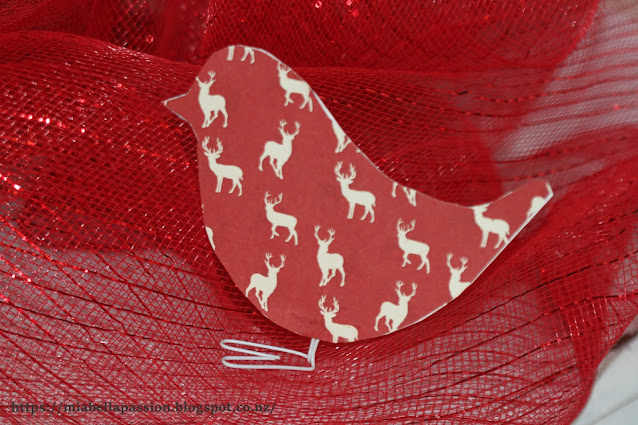
I have used Christmas themed paper.


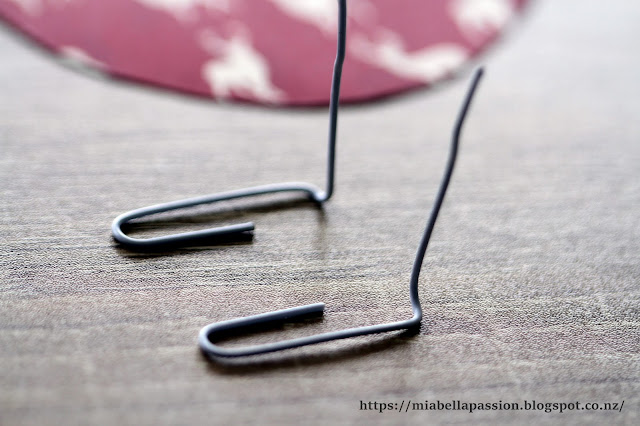
Bend two paper clips per bird for the feet as shown.

Paper crafts
 Glue the two sides together using a big dollop of glue at the bottom of the bird's tummy to hold the paper clips.


Paper crafts
 Insert the paper clips and hold the two layers together for a minute while the glue sets.
You will have to manipulate the feet a bit so the paper bird will stand on its own.


Paper crafts

Use for your Christmas decor... 

Note:
Save this paper craft idea for Spring and make pretty Spring paper birds.

Paper Crafts
For the latest posts CLICK  :)


#papercraft #birdcraft #paperbirds #nzbloggers 
#christmascrafts


Thrift Shop Wood Bowl Makeover... ❥

I love paint  in all of it's glorious forms.
But I particularly like spray paint.
Rust-oleum primer and paint in one can is just the best.
No clog nozzle.
Perfect coverage every time.

 Here I have a dollar find from the thrift store.
Looking a bit sad and much past its best.

 Two coats of spray paint later...
with a wait of 20 minutes between layers.
Turn and paint the inside of the bowl using same procedure.

And once the paint dries this colour - which is Robins Egg
is a wonderful matt finish.
I love it because it is just like a chalk paint patina.

Upcycled gifts are a favourite thing to create...

 And with Christmas coming it's time to think about DIY and homemade gifts...

And I believe whoever gets gifted this gorgeous upcycled bowl will adore it!
As it is so pretty and a perfect jewellery keeper.


#upcycling #spraypaint #homemadegifts


Chocolate Peanut Butter Nutters!

This one is all about peanut butter.
If you are a peanut butter nutter you are going to LOVE this sweet treat.

 All you need is:
A food processor to mix:
375 gram jar of quality salted peanut butter
40 grams of melted butter
and 2 cups of powdered sugar (Icing Sugar)
And that is it...
Mix and then roll into balls.

 Dip into melted dark chocolate using a fork or chocolate dipping prong.
Refrigerate till set, then serve.
I'm still to master the chocolate dipping,
but even a messy attempt ends up delicious!

 You can pop a peanut or a small chocolate into the middle of the peanut ball too...
or just leave them peanut butter nutter plain!
Deliciously yummy no matter what the occasion.
Actually who needs an occasion...
just make, eat and share!


#peanutbutter #sweets #treats #partyfood #eat  #homemade


KUMERA - The Easiest Pot Plant To Grow! ❥

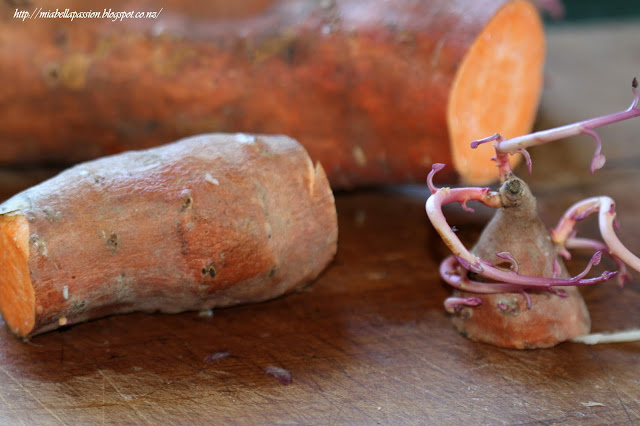
As I was chopping my kumara (sweet potato) up for dinner,
I was looking at the sprouting ends and thought,
how fun would it be to grow them, just like we did as kids!
Kumera must be the easiest pot plant to grow.
All you need is a sprouting end.

As you can see this one already has some tiny little leaves forming.

 I sat the ends in a little dish of water,
 and placed it on the sunny end of my kitchen bench.

The leaves started greening up,
roots began to grow.

After one week this is what you have.
Lots of leaves and a whole lot more green.
It's time to plant! 

I bought this hanging basket which is 35cm in size from Bunnings.
Fill the basket with potting mix.

 Place the kumara on top of the mix.


 Cover with more  potting mix.


For an extra pop of colour, I planted impatiens in the basket too.

After a week your plant is furling around...

Grow in the summer with or without complementary plants, 
 and you will have a fabulous green twirl of heart shaped leaves.
Eventually the vine type runners will hang down, but do bush up the growth a little by snipping the vine ends once the desired length.
 It will put on a show for the entire summer if watered regularly.


#nzbloggers #sweetpotato #potplant #hangingbaskets #deck #porchdecor


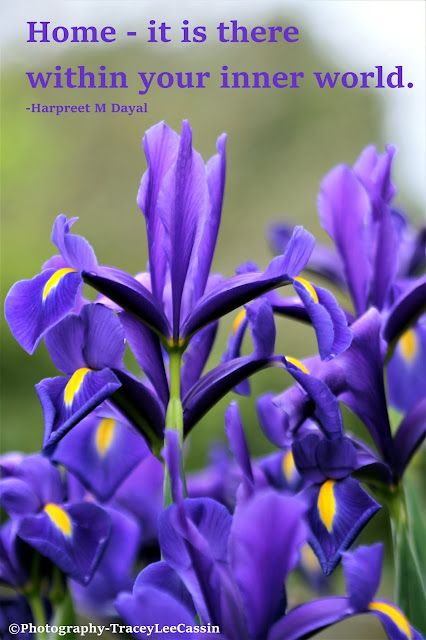
A New Photographic Quote: Home...


Popping purple with this gorgeous iris photograph...


This new quote for you to use as a screensaver, or print, frame and gift.


#quotes #iris #flowerphotography #spiritualquote


Gorgeous 'Ocean Beauty' Sheer Wrap...

Today I'm sharing this gorgeous wrap that I have designed.
It's modelled by my equally gorgeous daughter April. 
(sorry product is now sold out, but sharing my beautiful daughter pics anyway)

 This sheer wrap is perfect for all seasons.

Worn with a white cami singlet top in the warm seasons.
And with longer sleeves with extra under layers in the cooler seasons.

This design is taken from my original abstract oil painting called 'Ocean Beauty'.

The wrap fabric is soft and slightly sheer. 
And it flows beautifully.


The fact my daughter loves to wear my designs makes me one very proud happy artistic designer.

:)

#artisticapparel #designerclothing #Fashion #wearart #nzbloggers #newzealsandartist


Related Posts Plugin for WordPress, Blogger...