Be Sunshine Quote....

Isn't it nice to just brighten someones day...
with a little RANDOM KINDNESS.
We don't know what others are going through in their lives,
so that smile, compliment or a pay it forward moment might just be the gift they need. 

Sunshine Quote
Today's quote is a reminder for us to:
Try to be SUNSHINE in someone's cloud...

You'll find more Mia Bella Quotes HERE


#positivity #quote 


The PRETTY Easter Mantle...

Easter Decor Ideas
My Easter Sideboard display became an Easter Mantel this year...
Mainly because the sideboard is currently home 
to a little fish in it's aquarium which is on holiday with me.
So I had to change a few Easter ideas and came up with:

Painted Glassware
 Painted pastel glassware...
(Click here to find out how)

Free Printable
A FREE watercolour rabbit printable which I framed...
(Click here to get it)


DIY Paper Flowers
And some 'Pretty Paper Flowers'...These paper flowers are incredibly simply to make.
Use to decorate gifts.
Make a banner.
Or pop into a pretty bowl for a pop of pretty in the decor.

All you need is a scalloped flower template.
There's plenty to choose from on the internet...
but the one I used is the 8 petal flower 
Download and save to your computer.


Step One:  Select paper in your choice of colours


Step Two: Print directly onto your chosen papers
You need to print TWO templates per flower.
My paper size was 6 x 6.5 inch
My print size was 4 x 6 inch on Landscape setting.


Easter Paper Craft
Step three: Carefully cut out your scalloped flower templates.

Today I'm making three flowers.

Step Four: Hold two templates together and carefully use a the point of your craft scissors to put a hole in the centre.  Pop a brad into the hole.


Step Five:  Cut each of the petals to the brad. Pinch the top petals as shown.

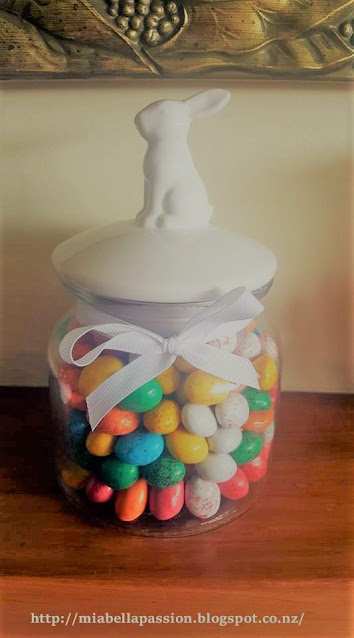
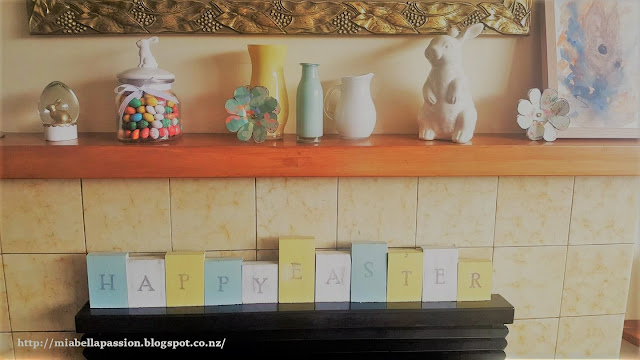
I combined all the Easter created elements on the mantel with a ceramic rabbit, a Easter themed jar of mini eggs, the pastel painted glassware and a little rabbit Easter glitter globe.

Then the last touch to the very pastel pretty but simple Easter Mantel display was
some random size cut wood blocks. 
Painted in the same pastels as the glassware.
I modpodged reverse (mirror) image letters on to them.
(Click Here to find out how to do reversed image transfers using modpodge)

And here is the end result of all the pretty and fun creativity...


Easter Decor Ideas

#Easter #paperflowers #decorideas #papercraft #reversemirrorwords


Upcycled Egg cups...


This upcycle began as a set of very retro egg cups found at the second hand shop...
They were from the 70s made from wood and ceramic.

I got all four for for 40 CENTS.
Gotta love a bargain!!
Now if I was a Retro fan they would just be left in all their original glory...
but y'all know me now I'm sure...
and white is for me.

So out came that trusty spray paint...
Rustoleum of course,
and in a matter of minutes - Retro became French Country.
A crime to some I'm sure.
But for me white is the obvious match for my white dinner set.

Though I did leave the insides of the egg cups the original gold ceramic for a nice contrast.

These sweet textured and now white egg cups will be used...


as quirky window flower vases,
for this Easter, the themed decor has extended to the kitchen.
And aren't these so sweet on the window sill.


And also to be used as an egg cup.

Because I love boiled eggs too!

What a win win!
cute and pretty...but also practical!


#upcycling  #diyvases


FREE Watercolour Rabbit Printable For Easter!

How about a little rabbit cuteness to add to your Easter home decor,
Or to gift?

Free Printable
This rabbit has been created in watercolour with ink and is available FREE. 


An Easter gift from me to you.


Free Printable
Copy and paste to your computer then print on A4 size white card or paper.

© Copyright Note:
This rabbit artwork was created by Tracey Lee Cassin.
It may not be reproduced for sale or profit.
The image may not be digitally or otherwise altered in any way.
The Rabbit Watercolour image is for your personal use only,
 to use framed in your own home decor or to print, frame and gift for Easter. 


#Easter #rabbit #artwork #freeprintable

The CUTEST Rabbit Cake Ever...

Well ain't this the CUTEST rabbit cake you ever did see?
There is a bit of fiddly prep,
but actually it is not too hard to create.
This cake was for a 3 year old girls birthday.
But would it not be the most fun cake to serve to family and friends this EASTER?

The first step in the week before making the cake,
you need to make the rabbit ears.

I just free hand drew the ear shape, 
but on the internet there are many free rabbit ear templates.
The ears were large at about 25 cm tall.

Then I cut out a smaller set of pink for the inner layer.
These were 15cm tall.

Then I decorated them.
The final step was to attach them to the iceblock stick with glue.

And this is the final result.

For the cake - I whipped up two packets of ready mix Strawberry cake.

These were baked in two large 23cm by 8cm deep cake pans.
Once cake is cold, remove it from pan and slice off tops so it's flat.
These cake slices can be frozen to use in trifle  type desserts.
Then ice the bottom cake layer (cut side up) with vanilla frosting, 
Top with other cake layer - with the cut side facing down to the frosting.

Place a thin layer of frosting over the entire cake.
Roll out white ready roll icing and cover the cake.

Then place the ears on top.

Make a pink strawberry frosting and create little swirls around the ears.
Decorate with edible paper flowers.
On the front pipe two eyes and a little pink nose.

To decorate the back of the cake place more pink icing swirls and more paper flowers.

It was a huge HOPPY hit at this Birthday Party...

And I think it would be as equally fabulous as a Easter cake.

The Rabbit cake was almost as big as the Birthday Girl!!

Pre Packet cake mix is a real timesaver...
and you know what?
It was pretty delicious too!


#rabbitcake #childrensbirthdaycakes #cakedecorating


Pastel Painted Glassware...

This is a 'Quick and Easy' painted glassware project.
Honestly it took an entire FIVE MINUTES!
You will need some glass items.
I have used a mini vase, jug, and wide neck bottle.
And you will also need some paint in pastel colours of your choice.
I use the Rust-oleum brand of spray paint as it has a fabulous coverage.
I chose Duck Egg, Gloss White, and Citron in matte.
Make sure you use a quality paint like Rust-oleum because it makes a huge difference to the project end result!

You need to be in a well ventilated area to spray the glassware.
What you do is shake can to mix paint well,
and place the nozzle in the glassware opening and spray, turn glassware, spray.
Until you have a good coverage of the inside.

DIY Painted Glassware
Clean up any painty finger prints and drips then set aside to dry.
I'm going to use this pretty pastel painted glassware on my Easter Sideboard in my dining room.
Once I have finished all my Easter inspired pieces I'll show you the finished vignette.
Meantime....I think I need to create some pastel paper flowers to go with this pastel bunch of glassware pretty!


#painted #glass #spraypaint #easypaintcraft


Easy Sew Lavender Pillows...❥

Easy Sew Lavender Pillows are something I sew every few years...
they are handy to have on hand for when you need that unexpected gift to give.
I use mine under my bed pillow because lavender not only has a wonderful aroma,
it is very calming and helps aid sleep.
Lavender Pillows
There are about 450 different varieties of lavender.
It is very easy to grow and take cuttings from in Spring to create new plants.
I have Lavender growing in various parts of the garden.
The plants like a sunny position that's well drained.

The lavender I grow is English Lavender (Lavandula augustifolia)
I like this one because it has a strong scent and drys well.  
The scent actually lasts well over a year once dried.

To make  the 'Easy Sew Lavender Pillows' you will need:

Fabric 
Cotton
sewing machine
Needle and thread
Buttons and ribbon bows if embellishing the pillows

Step one:
Cut on fold - the fabric into into a rectangle measuring 16 x 14 centimetres.

Step two:
Sew edges together leaving a good size gap for putting lavender in.
Turn right side out.

Step three:
Poke corners out with a skewer.

Step four:
Press with iron.

Step five:
Stuff with dry lavender. 
Then stitch an outside edge around whole pillow to seal opening and give detail edging to pillow.

Step six:
Lavender Pillows
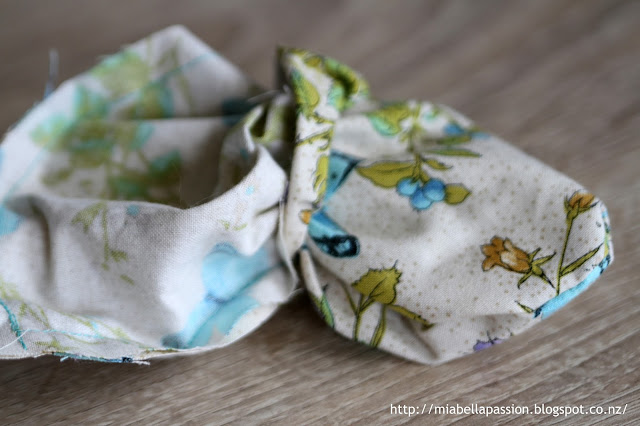
Stitch a button or bow of ribbon on front if desired.


#lavender #lavenderpillows #sewing #crafts #homemade


Related Posts Plugin for WordPress, Blogger...