FUN Christmas Ice Cream Cake...

What a fun Christmas foodie activity.

Chirstmascake
 Believe me, you will be laughing so much doing this!

Take one pre-prepared ice cream cake.

A tray full of edible decorations.


Take turns adding something to the cake.
You will be laughing and shouting things like...
Quick it's melting...
oh no my candy cane has fallen over... 
hurry up, hurry up...
noooo the creams lost its fluff...
it won't stand up...
quickly get the sprinkles!
When we created our cake we simply laughed ourselves silly!

Once it's all pretty and Christmasy devour it!

Now that is what you call perfect fun for the foodies!

To prepare cake:
Use a round tin preferably with removable click release side.
Slightly soften 1 Litre of ice cream.
(I used vanilla, but you can use any flavour you desire.)
Tip into a tin.
Use some more ice cream to fill in the side and level the top.
Freeze.
On the day of decorating.  Remove from freezer and plate.
Cover with plastic wrap and place back in the freezer until required to decorate.

Then decorate:
Drizzle with a layer of chocolate crack topping. 
Let it drip down the sides...


before embellishing with edibles...
ready to use canned cream, Christmas-themed biscuits, chocolates and sprinkles.


#christmasfood #christmasdessert #icecreamcake


Beach Inspired Christmas Tree With Driftwood...

Beach Inspired Christmas Tree
The colour theme was for Mia Bella Passions Christmas tree this year is green and white tones with wood.
I decided a beach theme would be fabulous as I live right by the sea.

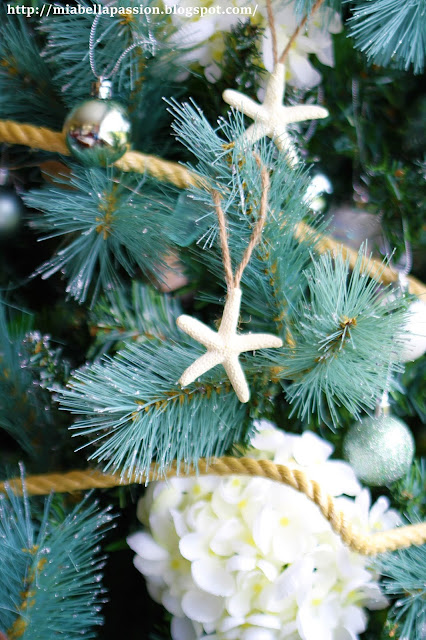
I made mini starfish ornaments by hot glueing a string hanger onto each one.

The tree decorating began with the lights, then the rope, which was wound around the tree.

Beach Inspired Christmas Tree
 I wanted to add some flowers to the tree too,  
so the perfect creamy white faux hydrangeas were poked into the tree.
The stems are long but blend into the foliage.
The white toned and sea green baubles were hung next.

Beach Inspired Christmas Tree
A laser cut wood Christmas star placed on the tree top.
And at the bottom, some raw sacking was placed to cover the tree stand.

Beach Inspired Christmas Tree
The driftwood was collected off my local beach.

Beach Inspired Christmas Tree
Washed and dried before adding the final beachy touch to the tree base.

Christmas Wreath
For the coffee table, I placed a premade wreath and added some battery powered mini greet Christmas tree lights.
(oh look - a pop of red has snuck into the colour scheme!)

Christmas Wreath
This looks fabulous at nighttime!
In the centre of the wreath, I popped a glass contained Ecoya Pine scented candle.
These candles are amazing, and the scent is true pine!
Perfect hint of the real thing if you opt for the artificial tree.

Beach Inspired Christmas Tree
Where I got things:

Tree
Fir tree from Kmart.
Baubles from Kmart.
Starfish from Amazon.
Hydrangea flowers from Spotlight (on sale).
Rope from Bunnings.
Woodstar - a free gift from Better Homes & Gardens Magazine

Table Wreath:
Wreath from Bed Bath & Beyond (50% sale)
Mini Green Tree Lights from Farmers
Ecoya pine scented candle from Farmers


#christmastree #christmasdecor #beachthemedchristmas


DIY Pet Reindeer...

Remember when pet rocks were the rage?

Reindeer Crafts
These pet reindeer are a little larger in size than previous pet rocks,
 but the kids will love to make them.
It's a super fun and easy Christmas paint craft project.

All you do is:
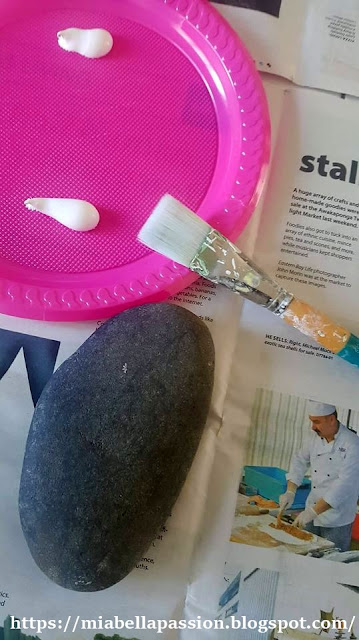
Select an oval or round flat type rock.

Paint one side or both with white paint.
(I used an artist type acrylic paint)
Leave to dry.
Or dry quicker using a hairdryer.
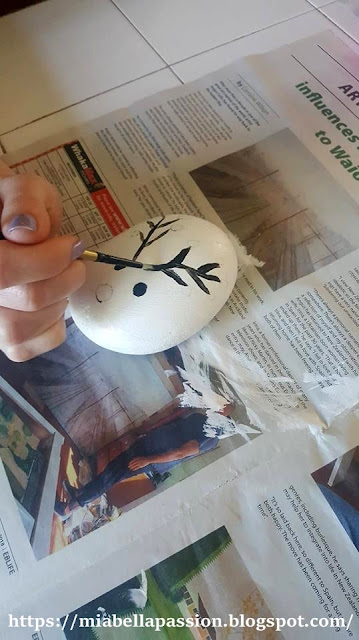
Using a thin brush, paint on eyes in black.
A red nose.
Antlers,
And baubles in coloured paint hung on the antlers.

Painted Rocks
I did this project with two five-year-olds.
So once the white paint was dry, I used a soft lead pencil to draw the eyes, nose, antlers and baubles on to the rock.
They then simply painted it.

Reindeer Crafts
Pet reindeer...
to place on the coffee table Christmas display, 
use as a paperweight, to give to someone special as a handmade gift,
or be part of your Christmas decor.


#christmas #christmascraft #reindeercraft #reindeer


Petunia Love...


 A new release Petunia.


 Petunia Night Sky has the darkest blue-purple flowers that are speckled with white spots that resemble a stellar night sky!

As soon as I walked through Mitre 10's Garden Centre doors - it grabbed me...
For the flowers are spectacular!


I am planting mine in a large white plastic pot.

($15 each from KMart!)
I'm going to plant two pots the same.


I'm also adding cascade lobelias in a mix of blues, pinks and whites as companion plants.

The lobelias will drape down the sides of the pot.


Petunia Night Sky has a mounding, trailing habit which means it is also good for garden beds and hanging planters.

The height it grows to is 25 to 40cm high.
It requires full sun, regular watering and fertilizing for the best flowering results.


Petunia Night Sky

Newly planted, and I can't wait for the fabulous show of flowers to come.


#gardenplants #petunia #flowers #plantsforpots


Three Popular DIY Christmas Crafts To Make now... ❥

Here are three EASY Christmas craft ideas to start the Christmas preparation...

 Berry Button Gift Cards...
see the tutorial HERE.
❤

 Make a beautiful Snowy Luminary...
or a row of them for your mantel, hearth or porch steps. 
Find out how HERE.
❤

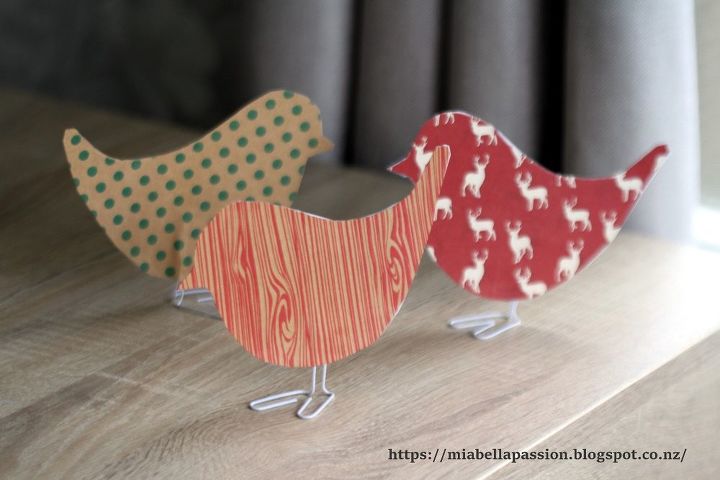
cute christmas birds
Or make a flock of Little Christmas Birds...
Tutorial HERE.

❤


#christmascrafts #christmas #luminary #birds #gifttags #christmasideas


DIY Crayon Dripped Candle Holder...


When we were children we made all the gifts we gave for birthdays and Christmas...
This drippy crayon candle was a popular one to make and gift.
So I thought it was a whole lot of fun,
 and a great memory instigator to craft one for my middle deck makeover.

DIY Bottle Candle Holder
It looks fabulous on the old mosaic table.

To make:
You will need an old bottle with a neck to fit a candle.
(I used a wine bottle)
Some crayons in your chosen colours.
Matches or a lighter.
Newspaper to protect your work surface.
And two large stick candles.

Place one stick candle in the neck of the bottle.

Peel the paper off the crayons.

Light the second candle.
And place the crayon in the flame.  

Drip down the neck of the candle in the bottle and on to the bottle.
Drip your crayons until you have your desired effect.

DIY Candle Holder
Place on your outdoor table.
Enjoy the ambient candlelight when alfresco dining.


#diy #crafts #candles 


DIY & Sewing Home Improvements....❥

So the past few weeks have been a little chaotic...
New double glazing and carpet have been put in Mia Bella Passions mansion.
This house is my mansion.
Did you know I have lived here for 30 years?
The double glazing in the living area of the house was a costly but necessary upgrade to make the home warmer for when the next winter comes.
Worth every penny already to be rid of all those old drafty doors and windows.
Gone also is the old forest green carpet and the peach carpet.
It was a half and half carpeted house.

The new carpet is dark black brown.
I love it.
It is so soft and squishy.
So when new things happen...it's nice to upgrade the decor too.

This first thing I did was to paint the bookshelf.

I left the sides wood and also the shelf bases.
It looks so farmhouse.
I'm in love with this too.

Then I sewed a new runner for the coffee table.
This easy sew runner is a breeze to make.
You can find the instructions HERE.

I had a piece of fabric left so I made a new pillow cover.

The forest of trees fabric design just freshens the whole tv room up.

The white guest bedroom headboard was looking a little dirty, so I recovered the headboard with a textured neutral coloured linen.


It was a great improvement,
 as the headboard now matches the linen type fabric on the lamp.

Then I made a new headboard from scratch for the purple bedroom.
(Just get your hardware store to cut a piece of mdf or any other board to size).
I padded the board by stapling an old but still usable puffy mattress topper on to it.
Then I repurposed grey curtain fabric from an old curtain set to cover over the padding.
All using a staple gun.

It was a much-needed addition to this bedroom.
I also have another curtain in the grey spare so that will be used for a future DIY project of recovering the Roman blind in this room.

Love, love, love all my DIY interior decor upgrades.
The total cost to do all this was just $25 for the table runner fabric.
(I purchased this from Spotlight NZ Online)

Because everything else in the decor upgrade was created using saved or stashed materials, and paint I already had.


#diy #upcycling #repurposing #homedecor #sewing 


Related Posts Plugin for WordPress, Blogger...