White Forest Christmas Tree...❥

Christmas Tree
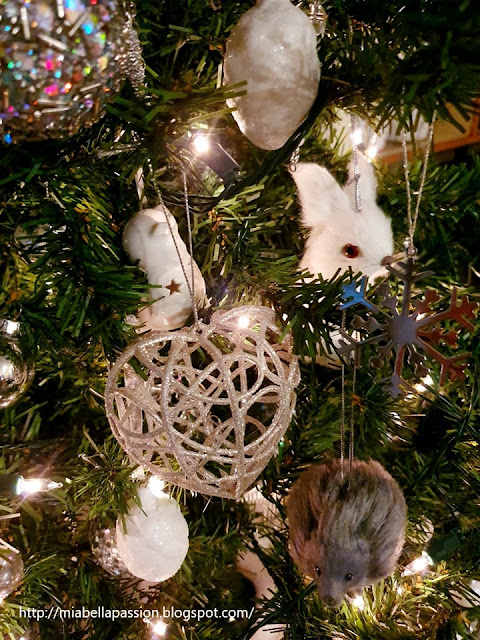
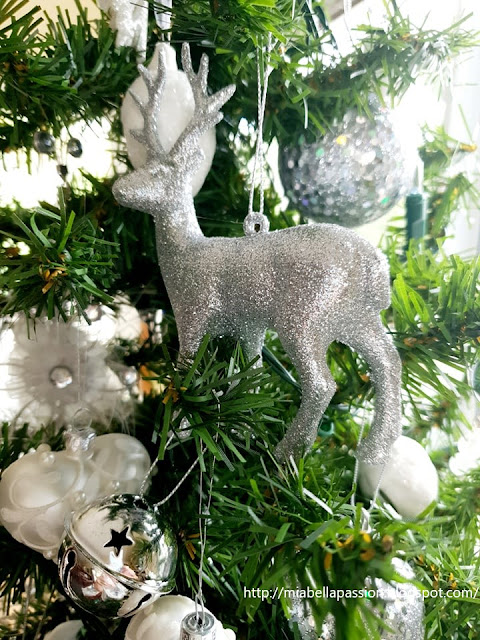
This years Christmas Tree is all about critters!
Christmas Tree
Forest critters to be precise!

Christmas Tree
I found these super cute animal ornaments at a Christmas Store.

Christmas Tree
They are seriously TOO CUTE!

Christmas Tree
I could not resist them, and they became the theme of the tree.

Beach Inspired Christmas Tree
Last year the tree was beach-inspired...
(find out about it HERE)
It was big and was my favourite tree yet.
Until now...

Christmas Tree

Christmas Tree

Christmas Tree

Christmas Tree
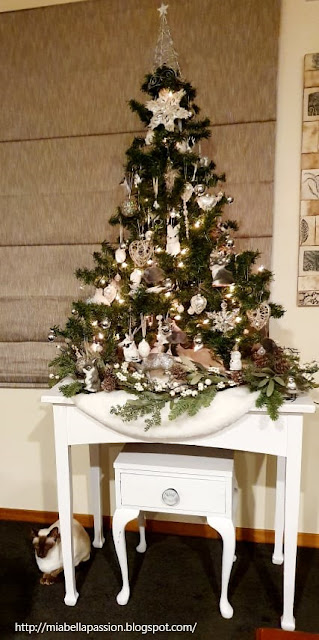
Until The White Forest Christmas Tree was created.

Christmas Tree
With all, it's cute 'Lil critters.

Christmas Tree
And my white and silver decorations

Christmas Tree
and a little bit of Christmas bling.

Christmas Tree
And now I think this is my favourite tree design.

Christmas Tree
I'm just hoping Arabella 

Christmas Tree
...doesn't want to eat my new friends!


#Christmasdecor 


The Thankful Heart Tree...

Bookpage Heart Decorations
Christmas is coming with leaps and bounds...
But before Christmas is Thanksgiving.
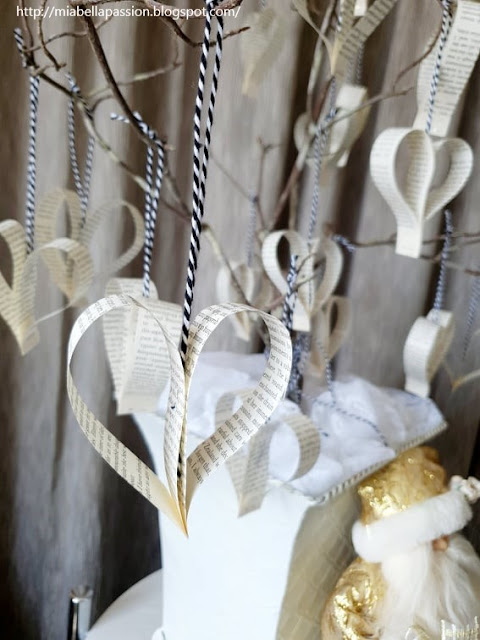
This DIY Thankful Heart Tree is an easy-to-create decoration for the Thanksgiving holiday and can remain on display throughout the Christmas season too.
Bookpage Heart Decorations
The hearts are created using book page strips, that are stapled to shape.
The hanger is stapled on too.
A super fun activity for the kids to make.
And while you are folding and stapling your hearts, it's a good time to talk about gratefulness and what you are thankful for.

My tree is displayed on an upcycled trolley table.
You can find out how I did this HERE.
When the time you choose to decorate your home decor for Christmas add your favourite Christmas things to compliment the Thankful Heart Tree.
 I've added a Santa figurine to the vignette.
And a Christmas votive candle too.
The Christmas theme cushion on the chair is pretty cool too...
One side of the cushion on the tree is gold, and the other is silver. I'm enjoying the gold side today!

To make the Thankful Heart Tree:
You will need a vase and container to place it in or a tin bucket vessel.
Florist foam.
A branch.
An old book.
Stapler.
Twine.
Fabric or lace to cover the foam.

Cut the book pages into strips.  You need two strips per heart.
Hold as shown.
Staple.
Cut a length of twine. 
Bookpage Heart Decorations
Knot and place in the heart.
Staple.
Or you could use a dob of hot glue if you prefer.
Place the florist foam in your vessel.
Place the branches into it.
Tie a twine bow on it.
Place the fabric or lace on top of the foam to disguise it.
Bookpage Heart Decorations
Hang your hearts on the tree.
Place in your Thanksgiving vignette.
Then change it up to keep for the Christmas decor.


#bookpagehearts #diyChristmas


Snow Fudge with Cranberries...

 Christmas Fudge 
SNOW FUDGE WITH CRANBERRIES
Now that is what I call the taste of Christmas!

Christmas Fudge
And talking about NOW - it is the perfect time of year to make fudge.
(Actually when is not a good time of year to make fudge?)

This fudge has a completely KISS status!
(KISS = keep it simple stupid)
It is SO EASY to whip up.
Sets QUICKLY.
And a go-to recipe for Christmas 'Bring A Plate' functions and parties.
In fact a go-to recipe for any party in any season!


All you do is:
Prepare a slice tray by lining it with baking paper
Place 3 x 290-gram packets of white chocolate 
(I used Nestle White Chocolate Melts)
into a microwave-proof bowl
(I used glass)
Add 1 x 395 gram tin of condensed milk.
Mix.
Microwave for one minute.
Remove from microwave and stir smooth.
Microwave another 20 seconds if a little more melt time is required.
Add 2 teaspoons of vanilla bean extract with seeds.
And 150 grams of dried cranberries.


Mix quickly and put into slice tray.
Refrigerate till set.
Cut into pieces when set.
Store in an airtight container.

Christmas Fudge
This Fudge is superb for gifting as it is not sticky.
Therefore you can put in little cello bags or decorated boxes to give.
Homemade always hits the heart with those feel good vibes more than a storebought gift!

Christmas Fudge
You will make more than one batch - I guarantee you!


Note: An ingredient conversion chart can be found HERE


GRAB A COFFEE AND POP OVER TO MY GIFT STORES AT

FINE ART AMERICA

REDBUBBLE

SAATCHI ART


#christmas #christmasgiftstobake



Fairy Bumble Print...

Tracey Lee Cassin
'Fairy Bumble is new to my collection of images available at Fine Art America...
Christmas Gift Ideas
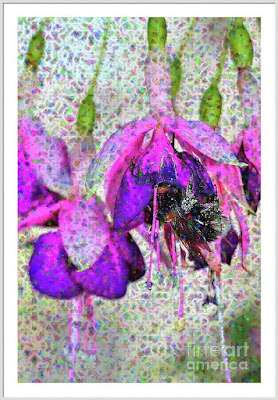
Pretty, dotty fuschia flowers with a pollen-laden Bumblebee.
Pop over for a look at


 This image is on canvas, print, framed, and in more fabulous gift ideas...

#onlineshopping


Fish Chair Upcycle...❥

How old is this chair?

It is about 100 years old.
And it's been in the family for a good part of 80 of those years!
It is loved.
It is used.
But the upholstery needed a bit of a facelift!  
And the wood with it's aged patina needed some oil.

So I decided to funk it up with some groovy fish fabric I had in the cupboard.

As I am happily covering the chair I realise...
THE FISH ARE UPSIDE DOWN!
How did I get that wrong?
I even got the fish photograph image upside down for this post.
This fabric really plays with the brain!

Spencer Puppy decided to supervise.
Luckily I had more fabric and on the second attempt got it the right way up!

Chair Upcycled
I'm really happy with how it turned out.

Arabella is quite fond of it too.


#chairmakeover #upcycled


Mary Poppins Quote....

Mary Poppins Quote

Wisdom from Mary Poppins...


#lifequotes #photographicquotes #raindrop #naturequote


Topiary Love...❥


Diy Topiary
Topiaries are fun.
They are stylish and artistic.
Topiary adds a whole lot of flair and even formality if you desire!
I'm a huge topiary fan.


So when I saw this 'Totally Topiary' shaped like a cone,
I had to have it!
They are an excellent choice for a container.
Also for creating symmetry at an entrance by planting in pairs.


The growth period for this plant is September to February in the Southern Hemisphere.
And that is also when you feed it with slow release fertiliser.
During this time the plant requires regular clipping to maintain the shape.
They will need repotting every two years if planted in a container.
You can also let it increase in size by trimming off the new growth following the line of the original shape.
That's what I will be doing as I'd like this darling to be twice as big as it currently is!


Diy Topiary
And I know you are all wanting to know what this little plant actually is...
well - it is 'Lonicera nitida'.
Perfect for Topiary because it has a super easy going nature.
It has quick growth and loves a trim.
The flowers are insignificant but hey, it's all about the foliage!
'Lonicera nitida' can be grown in sun or part shade.
I'm leaving it to settle in the new pot for a week or so, 
then I'll be snip, snip, snipping!


Note: plant sourced from Bunnings Garden Centre.


#topiary #foliageplants #pottedplants


Beautiful Moments...

Sharing a beautiful quote...
reminding us to collect and remember the beautiful moments in life.

Life Quotes

Feel free to share, print for personal use, or use as a screensaver.

#lifequotes #joy #love


The Beautiful CAMELLIA SASANQUA....❥

Camellia Sasanqua is a hardy shrub/small tree that offers a beautiful autumn colour in the home garden.
The blooms range in colour from red, pure white, white with a pink tinge and many many shades of pink.
The flowers can be single with yellow stamens or multi-petaled doubles.
There are also sweet delicate miniatures.
Some are even scented!
Evergreen leaves are glossy green which is very attractive even when the tree is not in flower.

Camellias like a well-drained humus acid rich soil.
They will grow in full sun or part shade.
All they require for best blooms are regular watering, Spring fertilising and a light trim after flowering.
Once established Camellia Sasanqua is hardy, tolerating light frost in the winter and short droughts in the summer.
This amazing plant can be grown in pots, espaliered, and clipped to form a hedge.
 Or left to be a feature in small tree state in the garden.


#camlelia #smallshrubs #smalltrees 


Steampunk Wind Chime...❥

Old spoon love...
that's a bit of a thing for me.
I find these timeworn treasures at the Thrift Store.
And even though they are tarnished and worn there is a certain beauty about them.
But what to do with them?
You can use them in decor vignettes.
Lay spoons in rows or crossed atop a stack of old books with interesting coloured covers.
Or pop them in a vessel.
Perhaps a silver-tone cup, a vintage teacup, or a beautiful crystal glass.
Or why not create a cute wind chime that has a definite steampunk style?
This design is rustic, raw and 'bohemian steampunk'.
Is there even such a word?
The design is carefree, relaxed, and just a little bit unusual.
You can follow my guide or add your own personal touch.
I'm thinking about making another and adding some beautiful hanging crystals.


For this simple project you will need:

6 old silver teaspoons
a wide metal filagree bangle 
(the one I used was 25 centimetre diameter).
thin wire
wirecutters
tape measure
a pencil

1/.  Cut 6 lengths of wire at about 46 centimetres long.  

2/.  Twist the wire tightly around each spoon handle.


3/.  Attach each wired spoon to bangle at approximately every 3.5 to 4 centimetres.
Use a chair to help hold the bangle while you attach the spoons.


4/.  Cut another wire to make a handle.
Use a pencil to add spiral details as shown.
Attach by twisting wire to opposite sides of the bangle.


5/.  Hang and enjoy the beautiful sounds it creates.

Can you imagine what some beautiful crystals will do to this?
Rainbows of light dancing to the spoon chime music!
How beautiful.

You may like to also visit my other creative blog at 


#diy #diywindchimes #spoonwindchimes


Related Posts Plugin for WordPress, Blogger...