Lemon and Garlic Olive Oil

 Flavoured Olive Oil
There is nothing easier to do than make your own flavoured olive oil!

If you purchase flavoured oil ready-made from the store, it is quite expensive when you work out the ml size to $ value.

And if you are like me and use it all the time the dollars add up!

But make it yourself and save!

Especially if you recycle used glass bottles 

and buy the olive oil when it is on super saver specials.


Flavoured Olive Oil

Flavoured Olive Oil

So let's whip up some 'Lemon and Garlic Flavoured Olive Oil'...

and honestly, it takes about 10 minutes to put together.

So here we go...

(Printable recipe HERE).

.

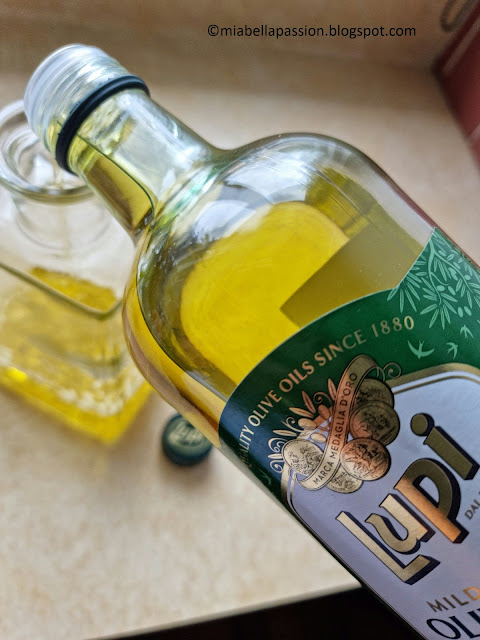
For the oil, I used Lupi Brand in a mild flavour.

Flavoured Olive Oil

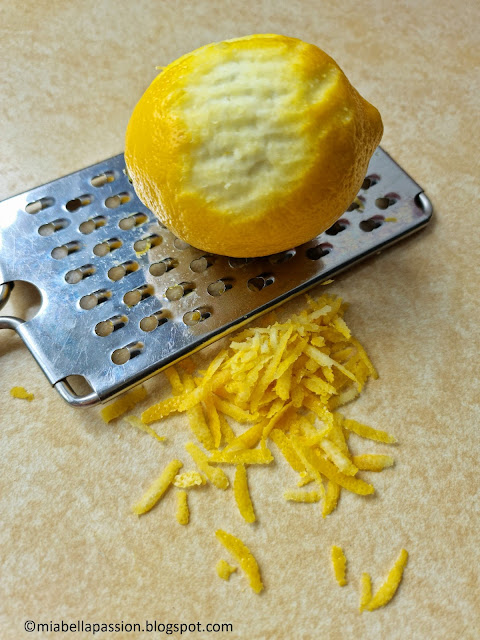
I have grated the rind off I small lemon.

Flavoured Olive Oil

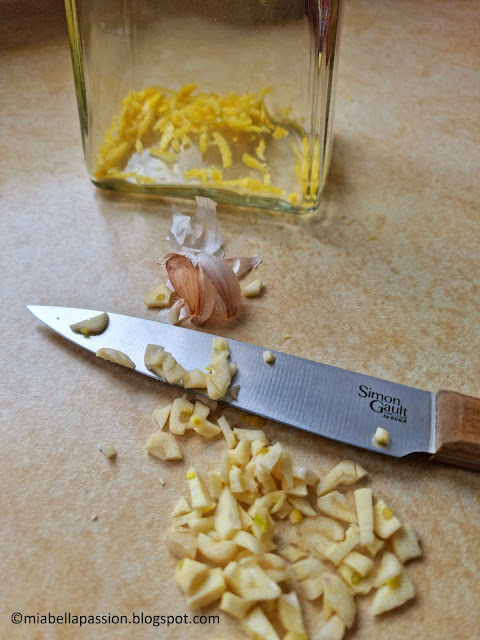
Then peeled and roughly chopped 4 garlic cloves.

Put the rind and the garlic in a heat sterilised bottle, new or recycled that has a screw cap or cork stopper.

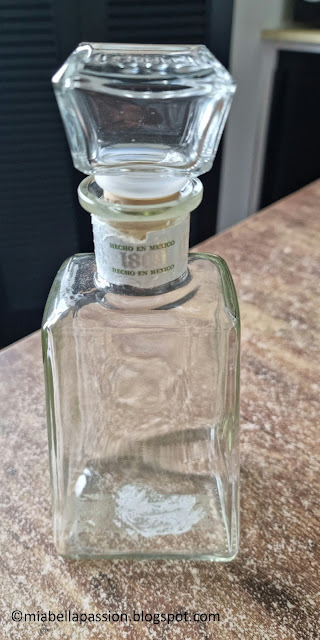
Recycled Bottles

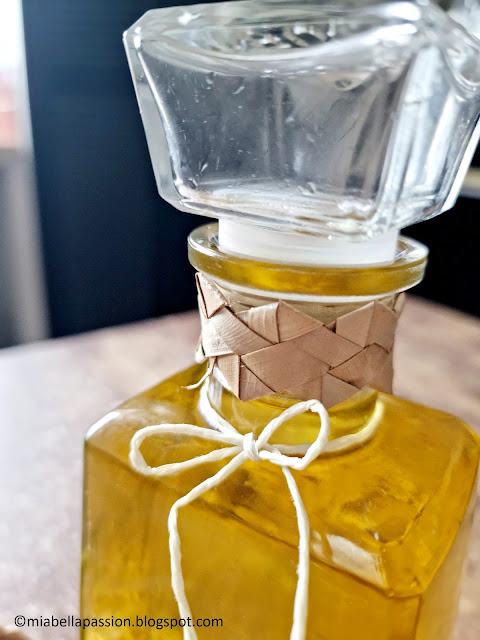
(I have used a recycled tequila bottle because I just LOVE the shape of this bottle and the very groovy glass stopper.)

Flavoured Olive Oil

Flavoured Olive Oil

Next, carefully fill up the bottle with olive oil.

Cork or cap.

.

That is it!

Mia Bella Passions Blog

I prettied up my bottle with a flax weave and string collar.

Flavoured Olive Oil

If you gift it, add a wee name tag of the flavour of the oil.

And instructions to leave for three weeks, but turn the bottle upside down every week, before using.

Store out of direct sunlight.

This gives the lemon and garlic time to infuse their delicious flavours into the oil.


Gift it, or keep it for your own kitchen pantry,

this flavoured oil is delicious on green salads, to cook fish, prawns or shellfish in, 

(or drizzle a little over your cooked seafood)


Grab a cuppa, and visit

 my Fine Art America gift store

:)


#Flavouredoil #homemade #diygifts


Chain Of Hearts Pot Plant

Chain of Hearts

Pot plant mania sure has struck many homes around the world.

Obsession with collecting different varieties of plants is the main thought on many minds.

It is so reminiscent of when I was a child.

When I grew up I remember relishing the 'chore' given to me of polishing the leaves of the monsteria deliciousa and the rubber plant in the foyer of our home.

I remember pretending the Queen was coming to visit and I just had to have those leaves so shiny for the occasion!

My mother often grew things from cuttings.

As did my father.

And then as a young homemaker, I collected pot plant and garden plant cuttings and roots from friends neighbours and family.

And developed my own collections and garden displays.

Then that fad, phase or era ended.

Trends changed, home decor changed.

So now some 30 years later I am filled with joy that plant mania is back.

The healing nurturing power of those botanical beings is a force in this trying world we are currently living in.

And as we are having a chat about plants, I wanted to share this little beauty.

Chain Of Hearts

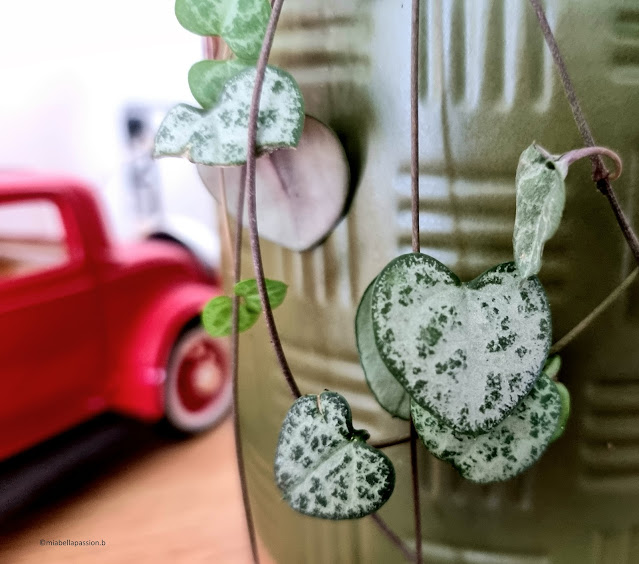
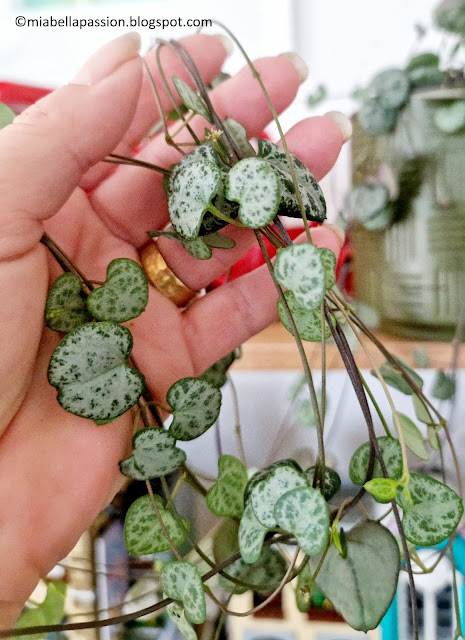
'Chain Of Hearts' or as it's sometimes known 'String Of Hearts'.

This beautiful little plant has a lovely variegated heart-shaped leaf, that has a chain or string-like structure.

The lengths of these chains or strings can reach up to 4 metres long.

It is an easy-care plant that loves good drainage and bright indirect light.

Let the soil dry out between watering.

Fertilise with a general-purpose fertiliser once a month during the growing season.

It is best displayed in a hanging pot or on a high shelf.

And for the animal parents, it is good to know it is pet-friendly non-toxic!

The most common problem with Chain of Hearts is overwatering which causes the plant to rot.

Chain Of Hearts

I love this little plant, and it will gift you tiny tube-like white flowers with black edging to say thank you for letting me live in your home.


#potplants #houseplants


Beach Inspired Air Plant Holder

Air Plant

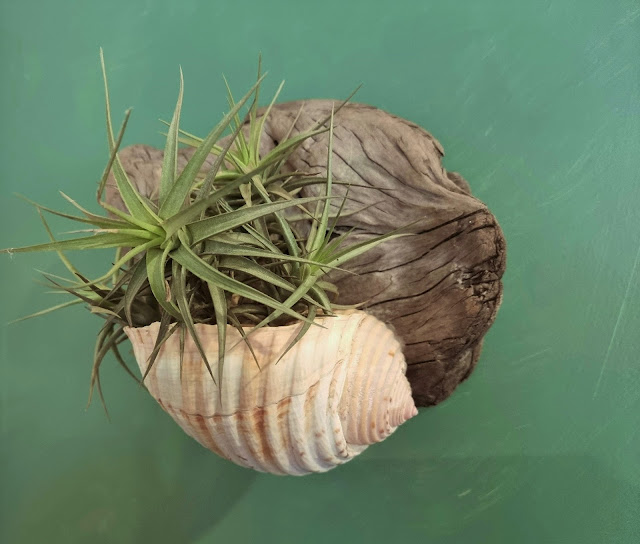
Here is a very easy beach-inspired air plant holder,

using found beach items.

A piece of driftwood.

And a large shell.

Now, this shell already had a drainage hole in the base created by nature.

But if your shell has no hole in it, use an electric drill with a small fine bit or a thin sharp nail and a hammer to create a drainage hole. 

Because you are dealing with odd shapes it's best to decide how you will hang the driftwood.

Attach a wire loop hanger to the back using a small staple nail.

 Use hot-glue to attach the shell to the driftwood.

Push a piece of air plant into the shell.

Hang in a desirable position.

If inside you can remove the air plant from the shell and water.

If outside and drip damage is not an issue, you can spray water directly on to it.

I put mine inside on the wall of our office room.

DIY Beach Decor

My partner and I both paint seascapes,

and camp by the sea often in the New Zealand summer,

so it's a lovely memory inspired wall hanging.

If you are a beach lover I'm sure this easy-care planter will tempt you too.


Note: 

If you cannot source an air plant, you could alternately use a small-leaved hanging succulent or a plant not requiring a lot of watering.

Put stones over drainage hole and plant in potting mix.

.

Visit my 'Saatchi Art & Photography' store HERE

Original art store HERE

#diyplanter #airplants #driftwood #shellplanter


Flax Sails Print

The new year is well and truly here.

I've spent quite a bit of time enjoying the beach in New Zealand's summer.

I find the inspiration for photography, painting, sculpture and crafts is endless here.

This print is a manipulated combination of photography and my ocean oil painting. 

It's new to my Saatchi Art shop,

Flax Sails.

Beach Print

Available as a print in various sizes on fine art paper, canvas, or photographic paper.

You'll find it here - 

 https://www.saatchiart.com/print/New-Media-Flax-Sails/956220/8907803/view?sku=P230-U956220-A8907803-T2


#prints #onlineprints #beach #beachprints


Winter Sea Designer Tee

                       Online Shopping

Lover of the ocean.
That's me.  
Seascape artist.
.
Wearing:
BOATNECK BOYFRIEND TEE
(which is the comfiest casual Tee!)
Artwork: Winter Sea
BY TRACEY LEE CASSIN DESIGN
 
(SOLD OUT)

Visit my 'Saatchi Art & Photography' store HERE

Original art store HERE


This weeks Six Most POPULAR Mia Bella Passions Searches...

 Christmas is coming!

And the most searched posts this week on 'Mia Bella Passions' confirm this!!

Because there is a wonderful Christmas feel to what people are looking at.

Christmas biscuit Wreath

NO1:  The Tim Tam Christmas Wreath for the decadence of chocolate.


Truffles

NO2: Peachy Chocolate Balls for a slightly healthier Christmas treat.

DIY Throw

NO3: A DIY Fringed Throw to gift. 


DIY Terrarium

NO4:  Beach Lovers Terrarium  (another great gift idea)


Christmas Cookie

NO5: Sweet Christmas Cookie to share with family on Christmas Eve.


DIY Christmas Decorations

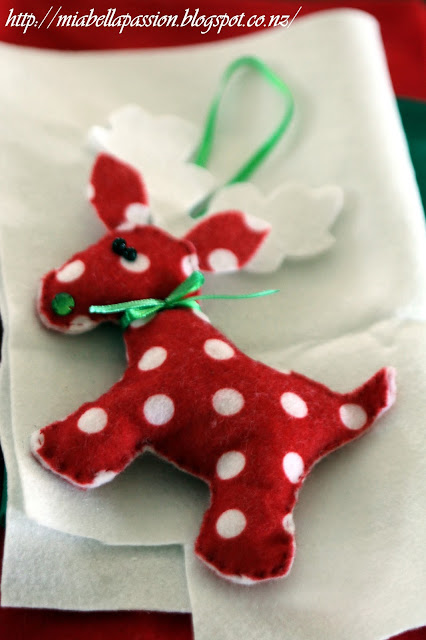
NO6: And of course our CUTEST Do it yourself Reindeer Decorations.


#christmascraft #christmasbaking


Handmade Reindeer Christmas Decorations

 Way back in 2016 I shared on Mia Bella Passions a tutorial on how to create these cute little reindeer.

Miabellapassions Blog

Over the years I have made them in various colourways made from felt.

Miabellapassions Blog

Originally handstitched, but in this version they are created using a sewing machine.

The deer have been enjoyed by all on my trees at Christmas for years,

so I thought I would share the link to the original tutorial with pattern and step by step instructions again.

Miabellapassions Blog
Visit the link here for the full tutorial.

https://miabellapassion.blogspot.com/2016/12/felt-reindeer-christmas-decorations.html


#handmade

 #christmas

 #christmascraft


Fudge it with Caramel Rough Fudge

Homemade Fudge
 Totally bad for you!

 But oh so good.

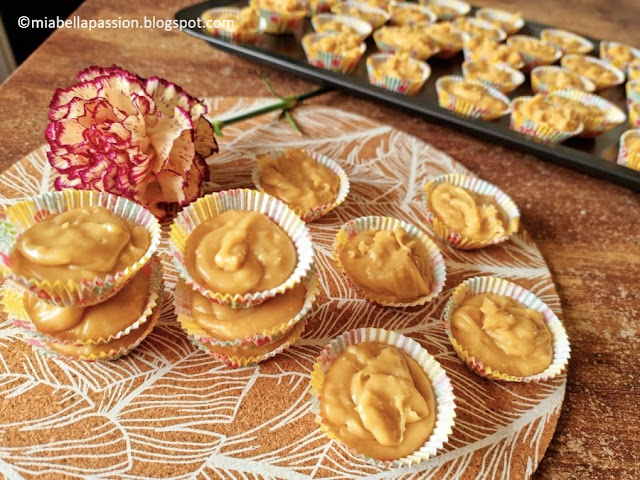
Sometimes we need to have naughty little treats and this 'Caramel Rough Fudge' ticks all those boxes.

Homemade Fudge
I have adapted this recipe to have less sugar and butter than usual, so that kind of makes me feel a bit better when chomping on a piece! 

Homemade Fudge

It is also a fabulous homemade gift.

Instead of pouring the mixture to set in a tray, 

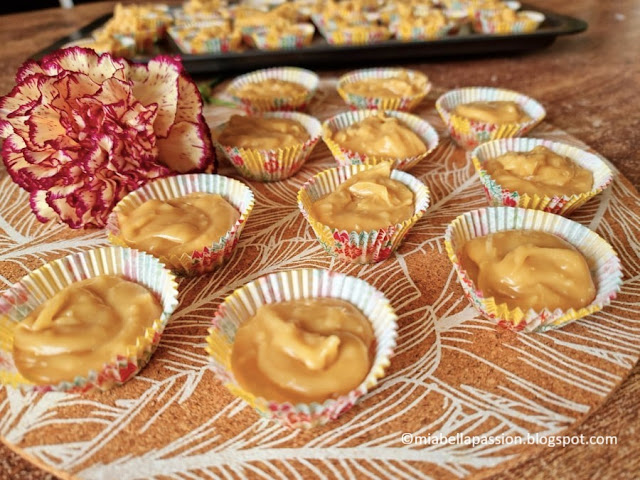
just pop spoon fulls into mini cupcake cases.

Box, or place in cellophane to gift.

Homemade Fudge

The recipe calls for white chocolate melts.

Caramel Syrup.

Brown Sugar.

Sweetened Condensed Milk.

Coconut.

White Chocolate Melts.

And butter.

Homemade Fudge

The extra bonus about this recipe is it is super simple to make in a microwave.

The microwave I used was 800 watts.

If yours is more powerful you will need to drop the cooking time by 2 mins at the end.

Method:

Melt 100 grams of salted butter.

Add 400 grams of brown sugar,

A 395 gram can of Sweetened condensed milk.

Microwave in 4 increments of 2 minutes.

Stir between each increment.

Add 1/2 cup dry coconut.

And 20 ml of caramel syrup.

Microwave for 4 minutes.

Stir through 290 grams of white chocolate melts.

When melted and smooth spoon into mini cupcake cases.

.

You'll find the printable recipe HERE

You will find a pounds and ounces to grams and oven temperature conversions HERE

For the latest posts JOIN :)

.

#homemadefudge #sweets #homemadegifts


DIY Fringed Throw

DIY Throw

Isn't is funny what you remember from your childhood.

 Things like pretending builders' sawhorses were our ponies, complete with reins and saddles.

And helping Mum fray the edges to create a fringe on the homemade fabric doilies and coffee table runners she was making. 

Oh, how I particularly loved to do this.

And that 'fray' memory is what this blog post is all about.

DIY Throw

I purchased 2 x 2.4 metres of cotton fabric from Spotlight online.

DIY Throw

It has a loose weave.

Perfect for fraying.

And that really is the secret.

DIY Throw

The fabric has to have a weave that is not tight.

DIY Throw

As you need to be able to pick with a needle the individual weave strands to pull.

DIY Throw

Mum always stitched by machine about 1 inch from the edge around the entire fabric piece if she frayed all four edges. 

DIY Throw

If she only frayed the top and bottom,

she would roll, iron and stitch a small side seam after fraying was complete.

DIY Throw
So this is my frayed edge DIY fringed throw.

It was fun to make.

And in doing so returned to mind some lovely memories.

With its boho look, this throw is super pretty in the decor too.

.

Visit my 'Saatchi Art & Photography' store HERE

Original art HERE


.

#diyprojects #homemade #diydecor


Butterfly Love!


Butterfly Products

.

New designs are coming to my store.

Here is the latest.

A butterfly.

A Yellow Admiral Butterfly.

So very pretty.

Butterfly Bag
.

Now available on a range of products.

Butterfly Mug


Visit  https://www.redbubble.com/shop/ap/77954701

.

#onlinegifts  #onlineshopping #butterfly #butterflyproducts


Bird Bath Upcycle.

 Succulents

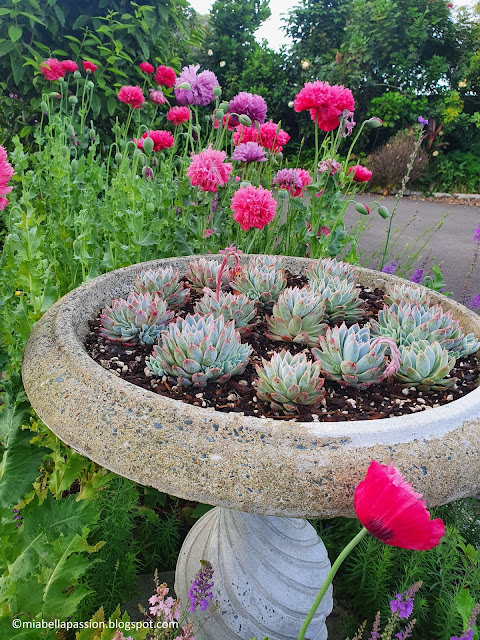
An old Birdbath has been in Mia Bella Passions gardens for many many moons.

It's made of concrete, and I have always enjoyed it.

It once contained water for the birdlife in the garden to quench their thirst or bathe in.

But as time wore on the heavy concrete bowl developed some cracks, it would not contain the water anymore.

I thought about endeavouring to create a colourful mosaic repair on the inside of the bowl, but saw this planting idea in a home and garden magazine and thought 'AHA' I can do that.

succulents

So I did!

The succulents were baby plants from another area of the garden.

Potted Succulents

All I needed to do (as it already had some cracks for drainage was fill the birdbath bowl with potting mix, and plant the succulents straight into it.

Potted Succulents

It was not long before the succulents multiplied.

It looks fabulous!

Visitors to the garden comment on its intriguing style.

So if you have an old birdbath tucked into the back of a garden bed, or one you'd like to simply upcycle, a fun succulent top might be what it needs! 

Potted Succulents

The succulent variety I have used is called echeveria elegans.

Potted Succulents

  I also have succulents planted around the base of a magnolia tree.

They really are such easy-care plants as long as you protect them from very cold temperatures (frost and snow).

Succulents

They are also very easy to propagate from a leaf or baby plant runner.

All you do is pinch a leaf or the mini baby plant and place it into the potting mix.

The baby plant is the quickest method to grow more plants quickly.

Succulent print

This print image is available at Fine Art America - you'll find it HERE on the art print page.

(There are 9 versions to choose from).


#succulents #pottedsucculents #succulentprint


Related Posts Plugin for WordPress, Blogger...