Showing posts with label DIY & Crafts. Show all posts

Kokedama Christmas Tree...


For something completely untraditional,
a kokedama tree is a  perfect choice for Christmas.
Kokedama in English literally means moss-covered ball.
And this is the technique used to create Kokedama.
The idea originated in Japan.
It's a combination of nearai (meaning no pot) and the kusamono planting style.
(The tree used here is Robina pseudoacacia 'Lace Lady')

To create your own Kokedama 
You will need:
 A sludge mix of potting mix and water.

Soaked sphagnum moss.

A Plant That has been removed from it's pot.
Then:
Loosen and trim the root ball.
Covered it in the wet mix, and then in a thick layer of sphagnum moss.
Wind natural rope fibre around the ball until the moss is mostly covered.
tie a knot.

Wind rope around and around...

Until the moss is mostly covered and it is firm.
Soak root ball in a container of water until the air bubbles stop.
(this is also how you water Kokedama plants once established.
Drain off excess water.
Place on a waterproof tray.
DIY Kokedama
Pot plants are great fun to kokedama.
Here is one we made using 'Rhipsalis Cereuscula'.
DIY kokedama
A kokedama plant will last 2 to 3 years.
It's a great diy to create.
Fun, and a unique gift too.

Kokedama is a great way to create a modern Christmas tree statement as we have done.
The tree we made this year will move outdoors onto the deck once the Christmas season is over, so we can still enjoy it.


#kokedama #diyplanters


GRAB A COFFEE AND POP OVER TO MY GIFT STORES AT

FINE ART AMERICA

REDBUBBLE

SAATCHI ART


The Thankful Heart Tree...

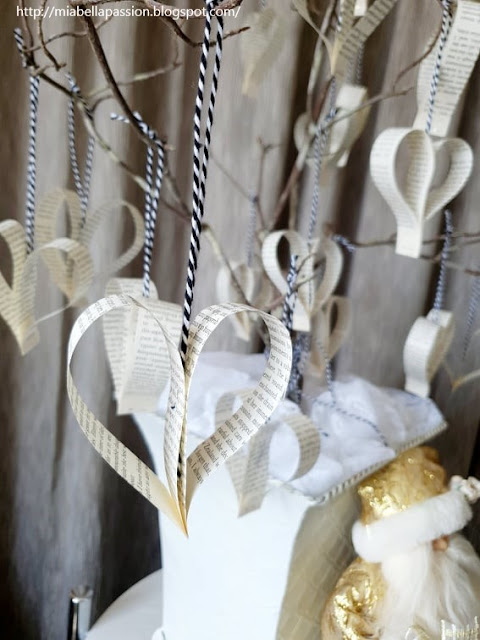
Bookpage Heart Decorations
Christmas is coming with leaps and bounds...
But before Christmas is Thanksgiving.
This DIY Thankful Heart Tree is an easy-to-create decoration for the Thanksgiving holiday and can remain on display throughout the Christmas season too.
Bookpage Heart Decorations
The hearts are created using book page strips, that are stapled to shape.
The hanger is stapled on too.
A super fun activity for the kids to make.
And while you are folding and stapling your hearts, it's a good time to talk about gratefulness and what you are thankful for.

My tree is displayed on an upcycled trolley table.
You can find out how I did this HERE.
When the time you choose to decorate your home decor for Christmas add your favourite Christmas things to compliment the Thankful Heart Tree.
 I've added a Santa figurine to the vignette.
And a Christmas votive candle too.
The Christmas theme cushion on the chair is pretty cool too...
One side of the cushion on the tree is gold, and the other is silver. I'm enjoying the gold side today!

To make the Thankful Heart Tree:
You will need a vase and container to place it in or a tin bucket vessel.
Florist foam.
A branch.
An old book.
Stapler.
Twine.
Fabric or lace to cover the foam.

Cut the book pages into strips.  You need two strips per heart.
Hold as shown.
Staple.
Cut a length of twine. 
Bookpage Heart Decorations
Knot and place in the heart.
Staple.
Or you could use a dob of hot glue if you prefer.
Place the florist foam in your vessel.
Place the branches into it.
Tie a twine bow on it.
Place the fabric or lace on top of the foam to disguise it.
Bookpage Heart Decorations
Hang your hearts on the tree.
Place in your Thanksgiving vignette.
Then change it up to keep for the Christmas decor.


#bookpagehearts #diyChristmas


Fish Chair Upcycle...❥

How old is this chair?

It is about 100 years old.
And it's been in the family for a good part of 80 of those years!
It is loved.
It is used.
But the upholstery needed a bit of a facelift!  
And the wood with it's aged patina needed some oil.

So I decided to funk it up with some groovy fish fabric I had in the cupboard.

As I am happily covering the chair I realise...
THE FISH ARE UPSIDE DOWN!
How did I get that wrong?
I even got the fish photograph image upside down for this post.
This fabric really plays with the brain!

Spencer Puppy decided to supervise.
Luckily I had more fabric and on the second attempt got it the right way up!

Chair Upcycled
I'm really happy with how it turned out.

Arabella is quite fond of it too.


#chairmakeover #upcycled


Steampunk Wind Chime...❥

Old spoon love...
that's a bit of a thing for me.
I find these timeworn treasures at the Thrift Store.
And even though they are tarnished and worn there is a certain beauty about them.
But what to do with them?
You can use them in decor vignettes.
Lay spoons in rows or crossed atop a stack of old books with interesting coloured covers.
Or pop them in a vessel.
Perhaps a silver-tone cup, a vintage teacup, or a beautiful crystal glass.
Or why not create a cute wind chime that has a definite steampunk style?
This design is rustic, raw and 'bohemian steampunk'.
Is there even such a word?
The design is carefree, relaxed, and just a little bit unusual.
You can follow my guide or add your own personal touch.
I'm thinking about making another and adding some beautiful hanging crystals.


For this simple project you will need:

6 old silver teaspoons
a wide metal filagree bangle 
(the one I used was 25 centimetre diameter).
thin wire
wirecutters
tape measure
a pencil

1/.  Cut 6 lengths of wire at about 46 centimetres long.  

2/.  Twist the wire tightly around each spoon handle.


3/.  Attach each wired spoon to bangle at approximately every 3.5 to 4 centimetres.
Use a chair to help hold the bangle while you attach the spoons.


4/.  Cut another wire to make a handle.
Use a pencil to add spiral details as shown.
Attach by twisting wire to opposite sides of the bangle.


5/.  Hang and enjoy the beautiful sounds it creates.

Can you imagine what some beautiful crystals will do to this?
Rainbows of light dancing to the spoon chime music!
How beautiful.

You may like to also visit my other creative blog at 


#diy #diywindchimes #spoonwindchimes


Mini Tropical Mountainscape Garden...


Miniature gardening has become quite the thing!
It all started with the classic and much-loved fairy and pixie gardens,
and has evolved from there.
Now you can create gardens themed by dragons, dinosaurs, beach, alpine, tropical jungle or bonsai.
Just select the plants and theme that will suit the position you are placing the container in.
Once you have decided on the theme, and the soil requirements and plants to suit, you just add as much (or as little) accessories as you desire.
A coastal beach scene might have a white sand area with a mini Adirondack deckchair made from iceblock sticks.
A beach sign (also made from iceblock sticks).
Plants could be mini grasses, small-leaved succulents, small natural stones and tiny driftwood pieces.
The main focal tree could be a mini size fig or palm.
You only need to let your imagination have free reign to create any type of themed miniature garden. 

The one I've chosen to create today is a 'Mountainscape'.
To do this I used tropical type plants:
Rocks in various shapes and sizes.
Mini size 'Baby Houseplant' ferns x 2.
Coleus Baby Houseplant.
Tradescantia spathacea Baby Houseplant.
Black Mondo Grass (ophiopogon Black Dragon).
A Flamingo Flower plant (anthurium Andreanum).
Moss.
A round squat type planter.

I filled the container with potting mix.

 
Placed my rocks into position.

Worked out the best placement...

of plants and planted them.
Final touches - a rocky path and moss to cover the soil.

This Mini Mountainscape Garden is now gracing my afternoon sunny covered deck.
I'm thinking in summer I'll be making a beach themed Miniature Garden for this spot and move the Mountainscape inside while it's hot.
And if you are stuck for a school holiday idea for the kids, this is a fab fun activity for them to enjoy. 


#minaturegardens #mountainscape #minigardens


Hyacinth In A Teapot!

It's now the depths of winter here in the Bay Of Plenty in New Zealand.
Today has been the coldest day so far...
a mere 4 degrees at 10am this morning.
I am not a fan of the cold. 
 I am so grateful the beautiful Bay offers a Spring, Summer and Autumn with warm, hot, warm temperatures.
It really is a grin and bear it scenario in winter.  
When the weather is just awful and you are stuck indoors, what do you do?
Well, you fast forward Spring, and jazz up your home decor a bit, that's what you do!

Hyacinth
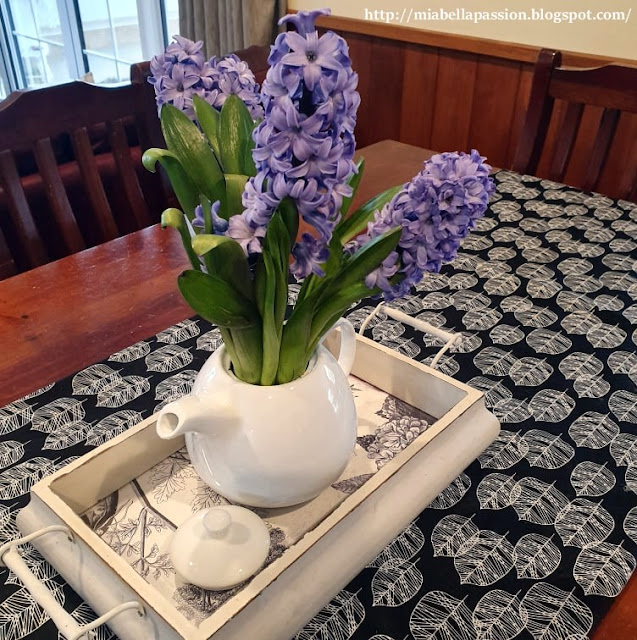
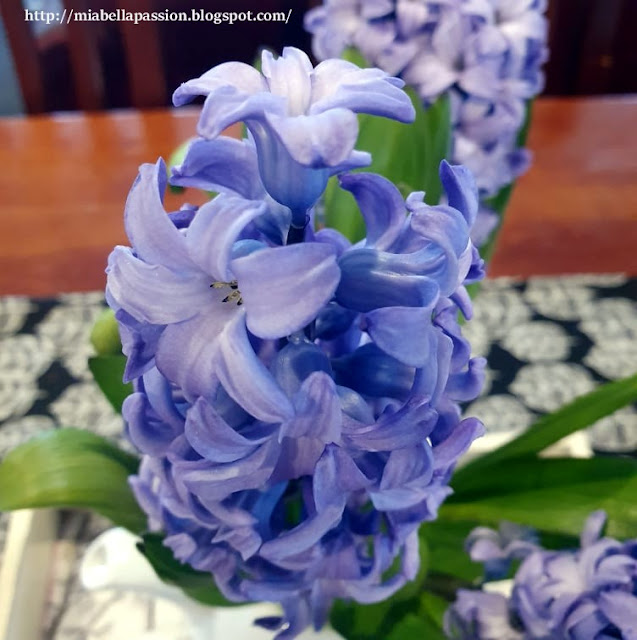
So today I potted up a gorgeous blue-purple hyacinth into a funky teapot.

The white teapot was $8 from KMart.

 
The Hyacinth sourced from Bunnings.

Hyacinth
A hyacinth in a teapot you ask?
Well, I say - why not!

Indoor Bulbs
It's a bit quirky, and once placed onto a French style tray, makes a super winter table centrepiece.
I also made a new table runner.  
You can find out how to make a 'DIY TABLE RUNNER' HERE.


Hyacinth
It looks pretty. It smells divine.
And it's a reminder that Spring is coming!

Hyacinth
Once the Hyacinth blooms have finished flowering which will be in 2 or 3 weeks time,
 I will plant them out into the garden border where they will rebloom next winter.
Hyacinths have a delightful scent and a stunning form.
If you grow them potted indoors they require a warm position with good light conditions.
Only keep the soil lightly moist as too much water makes them grow too tall!
It is best to place a wood orchid stake in the centre of the pot and make a thin wire loop to thread through the flower stems 3/4 of the way up, to pull stems together so as to avoid the weight of the flowers drooping over.
They do tend to grow towards the strongest light source, so turn the pot regularly to keep the plant in shape.
You just cannot beat the beauty and perfume of the Hyacinth.


#hyacinth #springflowers #bulbsindoors


Related Posts Plugin for WordPress, Blogger...