French Map & Cacti Pots...❥


Ok - I admit I really do have 'a thing' for cacti.
Let's blame my Grandad.
He had a vast collection in pots, and as a child I would watch him tend them with so much love!

For this project I painted some small terracotta pots with with chalk paint.
Then left them a day to dry.

Next steps require Mod Podge.
(In new Zealand this is available at most craft outlets.)


And some decoupage paper.
Though you could use fancy serviettes if preferred.
If you use serviettes take of the back layer of paper.

I'm loving this cool map design...


Measure the paper to size, brush wrong side with Mod Podge and manipulate it on to the pot.
You'll need to pleat it to fit the curves.

 Leave to dry.
Once dry seal with a layer of clear sealer that will tolerate outdoor conditions.

 Once sealed - leave to dry for a week.

 Then plant with desired plants using a suitable potting medium.
Which in my case is cacti.
But you could plant an annual flower like a pansy.

I'm planting baby cacti.
But you could plant an annual flower like a pansy.

And don't these sweet French Map pots look fab on this railing top on my covered deck?


#decoupage #maps #cactus #cacti #paintedpots #diy


Ghost Cake & Icecream Cone Toppers...

Spooky cute seems to be the thing for my Halloween preparations this year.
With more little ghosts.

These ones are the edible kind.
Made from meringue, 
these guys are perfect as a cake topper or ice cream cone topper.
They really are not difficult to make.
You will need meringue.
For the printable meringue recipe click HERE.

Note cooking time differs from what's stated in the recipe.
The Ghosts need to be baked at 100 degrees Celsius for 40 minutes.

Once the meringue is whipped up, 
 onto a baking paper lined tray, 
pipe spirals - large to small with a peak.
You decide the size.
Ice cream topper = smaller
Cake topper = bigger

No icing tip is needed. 
Just a plastic bag filled with meringue that has had the corner cut off.
Once baked and cold.
Pipe dots for eyes using black icing.
Store in an airtight container until needed.

Top your favourite cake, or your cone of ice cream with a spooky cute meringue ghost.

Or pop them on a cake stand and eat as is.

MORE HALLOWEEN IDEAS & PRINTABLES HERE

#halloween #baking #caketopper #meringue #ghosts


Driftwood Ghost Halloween Banner....

The Halloween sideboard display is coming together nicely...
But I needed a banner for the background wall.
Just something small but a little spooky.
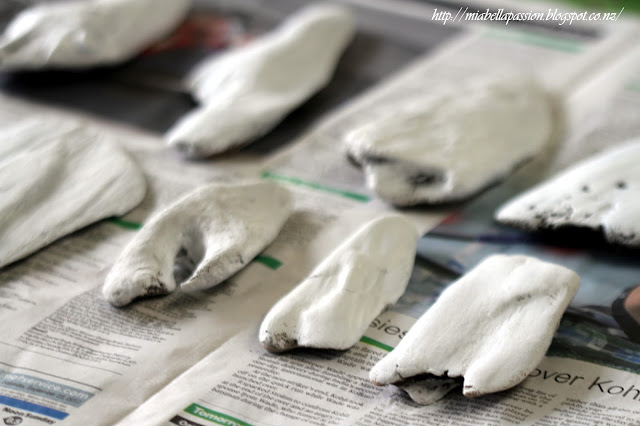
So I went to the beach and collected some flat ghost shaped pieces of driftwood.


Then got out my trusty chalk paint ...

 and gave the fronts a coat of white.

Next some ghostly eyes and mouth using a permanent marker pen.
I'm not sure these are very spooky as they are kinda cute!

To make the banner I hot glued the backside of the driftwood pieces along the string.

And hung it up.

How easy to create.
And a fun activity to do with the kids pre-Halloween.


#halloween #craft #driftwood #ghosts


Halloween 'Goodie' Jars - upcycled of course! ❥

I'm sure you must have some jars or glass containers hiding away in the back of the cupboard.


Just like the ones that were upcycled into these fab 'Goodie' jars for halloween.

These jars were part of my endless AQUA collection,
and they were destined for the goodwill store.
But then I came up with this cool idea to 'Halloween' them to use on my 'Halloween' sideboard vignette.

All I did was spray the glass jars with bright orange paint.
I let the paint drip down in places for effect.

And then I let them dry for a week...
Don't they look pretty?

 The next step was to make a label.
I used dollar store gift tag labels.

 Then painted them black on both sides.

 I'm not the best calligrapher so wanted an easy option for writing.
That was stick on letters in gold.

 I chose the words 'Boo' and 'Treat'...

Here are the jars all finished and ready to fill with treats.
Call back soon for the next creation I'll be making for the "Halloween' display.


#spraypaint #upcycling #orange #jars #makeover #diy #Halloween

The Chalk Paint and Chair Binge...

This posts title says it all really...
I have been bingeing on chalk paint.
Nothing is safe.
I see many items of furniture in my abode that could have a makeover...
So this week has been all about chalk paint and chairs.
These old oak chairs (there are three!) have had their time on the covered porch.
Now it is time to upcycle them..
and rejuvenate them...
Ready for new purposes.

So Chair number one was painted in Annie sloane chalk paint - Paris Grey.

It was left two days to dry.

 Then waxed with soft wax.

The seat was re-padded and give a new cover of blue grey and white toned stripes.

 I ran the fabric stripe horizontally to give more impact against the chair back risers that go vertically.

 I'm thinking this looks pretty darn cute!

 Gracie does too!

Chair number one = my new office desk chair.

 Chair number two and three were first painted in Annie Sloane - Pure White chalk paint.
Then a second coat applied of Paris Grey.
The white undercoat pops through the grey in various places.

The seat was recovered in a grey and black butterfly light upholstery fabric.

These two chairs will be for a breakfast table.
I can't show you the table yet...
as I am still hunting for the right one to upcycle.
There is so much joy in making old fab again!


#chalkpaint #upcycling #chair #makeover #diy 


Related Posts Plugin for WordPress, Blogger...