Ghost Cake & Icecream Cone Toppers...

Spooky cute seems to be the thing for my Halloween preparations this year.
With more little ghosts.

These ones are the edible kind.
Made from meringue, 
these guys are perfect as a cake topper or ice cream cone topper.
They really are not difficult to make.
You will need meringue.
For the printable meringue recipe click HERE.

Note cooking time differs from what's stated in the recipe.
The Ghosts need to be baked at 100 degrees Celsius for 40 minutes.

Once the meringue is whipped up, 
 onto a baking paper lined tray, 
pipe spirals - large to small with a peak.
You decide the size.
Ice cream topper = smaller
Cake topper = bigger

No icing tip is needed. 
Just a plastic bag filled with meringue that has had the corner cut off.
Once baked and cold.
Pipe dots for eyes using black icing.
Store in an airtight container until needed.

Top your favourite cake, or your cone of ice cream with a spooky cute meringue ghost.

Or pop them on a cake stand and eat as is.

MORE HALLOWEEN IDEAS & PRINTABLES HERE

#halloween #baking #caketopper #meringue #ghosts


Driftwood Ghost Halloween Banner....

The Halloween sideboard display is coming together nicely...
But I needed a banner for the background wall.
Just something small but a little spooky.
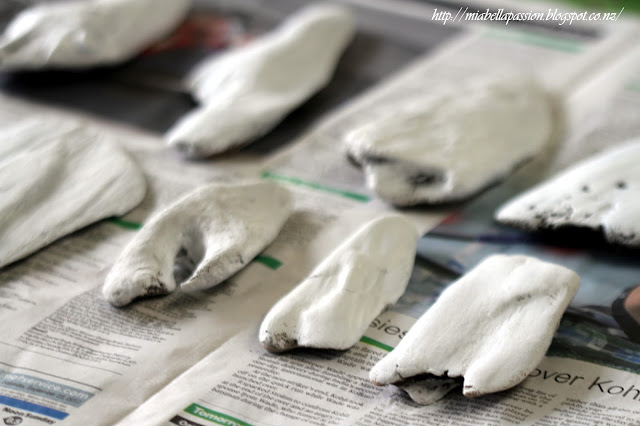
So I went to the beach and collected some flat ghost shaped pieces of driftwood.


Then got out my trusty chalk paint ...

 and gave the fronts a coat of white.

Next some ghostly eyes and mouth using a permanent marker pen.
I'm not sure these are very spooky as they are kinda cute!

To make the banner I hot glued the backside of the driftwood pieces along the string.

And hung it up.

How easy to create.
And a fun activity to do with the kids pre-Halloween.


#halloween #craft #driftwood #ghosts


Halloween 'Goodie' Jars - upcycled of course! ❥

I'm sure you must have some jars or glass containers hiding away in the back of the cupboard.


Just like the ones that were upcycled into these fab 'Goodie' jars for halloween.

These jars were part of my endless AQUA collection,
and they were destined for the goodwill store.
But then I came up with this cool idea to 'Halloween' them to use on my 'Halloween' sideboard vignette.

All I did was spray the glass jars with bright orange paint.
I let the paint drip down in places for effect.

And then I let them dry for a week...
Don't they look pretty?

 The next step was to make a label.
I used dollar store gift tag labels.

 Then painted them black on both sides.

 I'm not the best calligrapher so wanted an easy option for writing.
That was stick on letters in gold.

 I chose the words 'Boo' and 'Treat'...

Here are the jars all finished and ready to fill with treats.
Call back soon for the next creation I'll be making for the "Halloween' display.


#spraypaint #upcycling #orange #jars #makeover #diy #Halloween

The Chalk Paint and Chair Binge...

This posts title says it all really...
I have been bingeing on chalk paint.
Nothing is safe.
I see many items of furniture in my abode that could have a makeover...
So this week has been all about chalk paint and chairs.
These old oak chairs (there are three!) have had their time on the covered porch.
Now it is time to upcycle them..
and rejuvenate them...
Ready for new purposes.

So Chair number one was painted in Annie sloane chalk paint - Paris Grey.

It was left two days to dry.

 Then waxed with soft wax.

The seat was re-padded and give a new cover of blue grey and white toned stripes.

 I ran the fabric stripe horizontally to give more impact against the chair back risers that go vertically.

 I'm thinking this looks pretty darn cute!

 Gracie does too!

Chair number one = my new office desk chair.

 Chair number two and three were first painted in Annie Sloane - Pure White chalk paint.
Then a second coat applied of Paris Grey.
The white undercoat pops through the grey in various places.

The seat was recovered in a grey and black butterfly light upholstery fabric.

These two chairs will be for a breakfast table.
I can't show you the table yet...
as I am still hunting for the right one to upcycle.
There is so much joy in making old fab again!


#chalkpaint #upcycling #chair #makeover #diy 


The Earth Laughs... ❥


Sharing a new quote with y'all today...
 ❥
The flower in this photograph is a Geranium.
It is called 'Hot Pink Cranesbill'.
I love this flower as each year it seeds and renews...
all by it's little sweet self!
So it is a wonderful burst of colour in the Spring and Summer garden beds.

Copy and save to your computer to use as a screensaver if you like.  :)


#nzbloggers #flower #garden #pink  #raindrops #quotes


Let's BE Fabulous! ❥


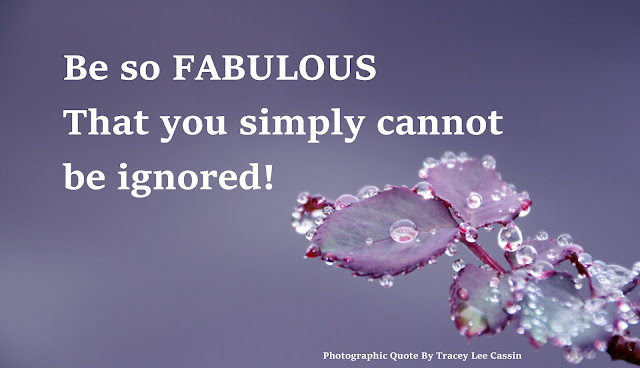
A little reminder to be FABULOUS!!!


#nzbloggers #roseleaf #raindrops #quotes


'Baby Tears' Planter...❥


Baby Tears (aka Irish Moss or Soleirolia soleirlii)
is the sweetest little plant.
Baby Tears Plant
Originating from Italy, it is one of my favourites.
Little tiny leaves cascade down the evergreen stems
which give this plant the name of baby tears.

Perfect as a ground-cover due to it's spreading nature,
Baby tears grow in semi shade or full shade garden beds.
It looks lush and green all year round if kept moist.
(It's not fond of dry or frost!)
And it's super SIMPLE to propagate.
Just take a clump and plant it where you want it to grow.
How easy is that?
And it is a superb weed suppressant.

Baby Tears is also fabulous to grow in pots indoors or out.
As well as in hanging baskets.
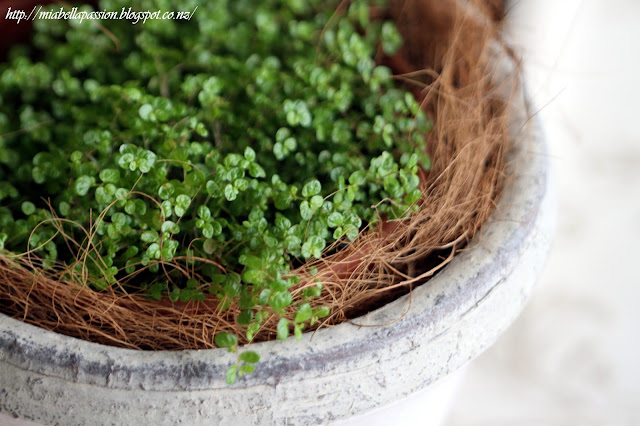
I like to plant mine in a plastic pot that I then place in an urn that's indoors.
Coconut fibre around the internal edge keeps the plastic pot hidden.
Even in the early stages of growth, it is pretty.

Baby Tears Plant
Eventually it will cascade over the edge of the planter.
And when it is too big...
Root cuttings will be taken and a new plant started.


And if you are wondering about that hint of gold in the background of the first planter photograph,
yes - it's a new CUSHION...
The gold leaf image and cream cushion fit in with the decor PERFECTLY.
One can never have too many cushions, can they?


#babytears #planter #indoorplant #shadeplants


BUBBLE JOY!

Ok - so here is one of those random posts -
JUST BECAUSE!

I have been photographing bubbles....
or should I say trying to master the art of photographing bubbles...

Bubble photographs
 And these images are so pretty.

And even though they're not perfect,
I thought I would share them with y'all.


#newzealandphotographer # photoart #bubbles 


Re-purposed Light shade Flower Bowl...❥

Vintage milk glass light shades are BEAUTIFUL!
And ya all know how I LOVE flower bowls...
so it was a no-brainer as to what this ole light shade was about to become!

One problem was the GORGEOUS shape...
It did not sit flat on the table.

But that was nothing my trusty airdry clay could not fix!
(Seriously peeps - one should always have this stuff in the craft cupboard!)

I cut three pieces...

Rolled each into long sausage shapes...


Squeezed the three ends together...

And made a clay plait.

Then I checked sizing to create a plait base for the light shade.
Cut and joined it.
And left it to dry.

Once dry, the light shade bowl was placed on top.
The bowl filled with water and flowers.
Ahhh...upcycling satisfaction!

The flower of choice was a creamy white to pale yellow coloured camellia.
This is a favourite of mine.
It's called ' Jurys Yellow'.
It's vigorous, bushy and a shares profuse flowers from Autumn until Spring.
It has an upright habit of 2 metres by 1.5 metres.
Plant it in semi-shade for best flowers.
The bees LOVE this camellia too.

I love the way the light reflects on the glass!


I love everything about my 'new' vintage milk glass vase!


#camelia #flower #upcycled #flowerbowl


Related Posts Plugin for WordPress, Blogger...